Boro vs Sashiko: Complete Difference Guide for Beginners
Japanese textile repair traditions have become globally recognized for their beauty, durability, and sustainability. Two of the most discussed techniques are Japanese Boro stitching and Sashiko stitching. Many beginners assume they are the same thing because both involve hand stitching, old fabric, and visible repair. But in reality, they serve different purposes.
The easiest way to understand them is simple:
Boro is the repair philosophy.
Sashiko is the stitching technique.
Boro focuses on rebuilding and preserving worn textiles through layering and patching. Sashiko focuses on strengthening fabric using structured running stitches.
Historically, both came from necessity in rural Japan, where fabric was expensive and families repaired clothing repeatedly instead of replacing it.
Today, these traditions influence:
- sustainable fashion
- visible mending
- denim repair
- textile art
- slow fashion movement
Understanding the difference helps you decide:
- when to patch
- when to stitch
- when to combine both
This guide from japanese boro stitching.online explains the complete difference between Boro and Sashiko so you can choose the right method for your projects.
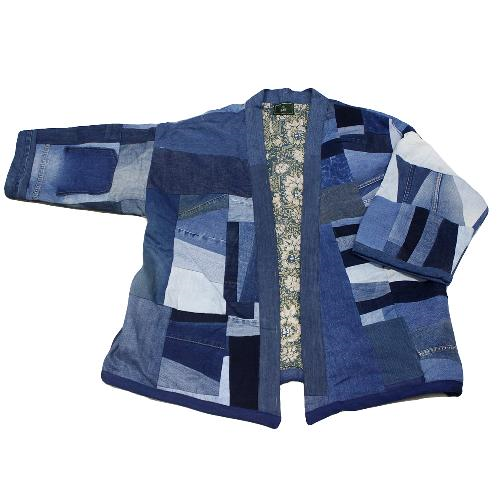
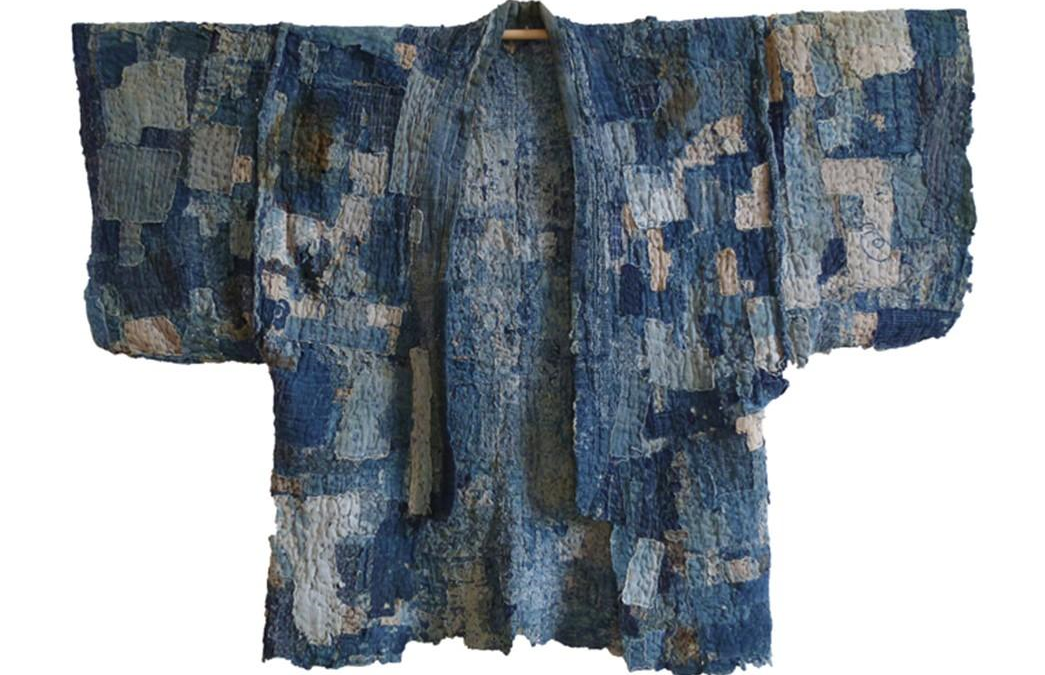
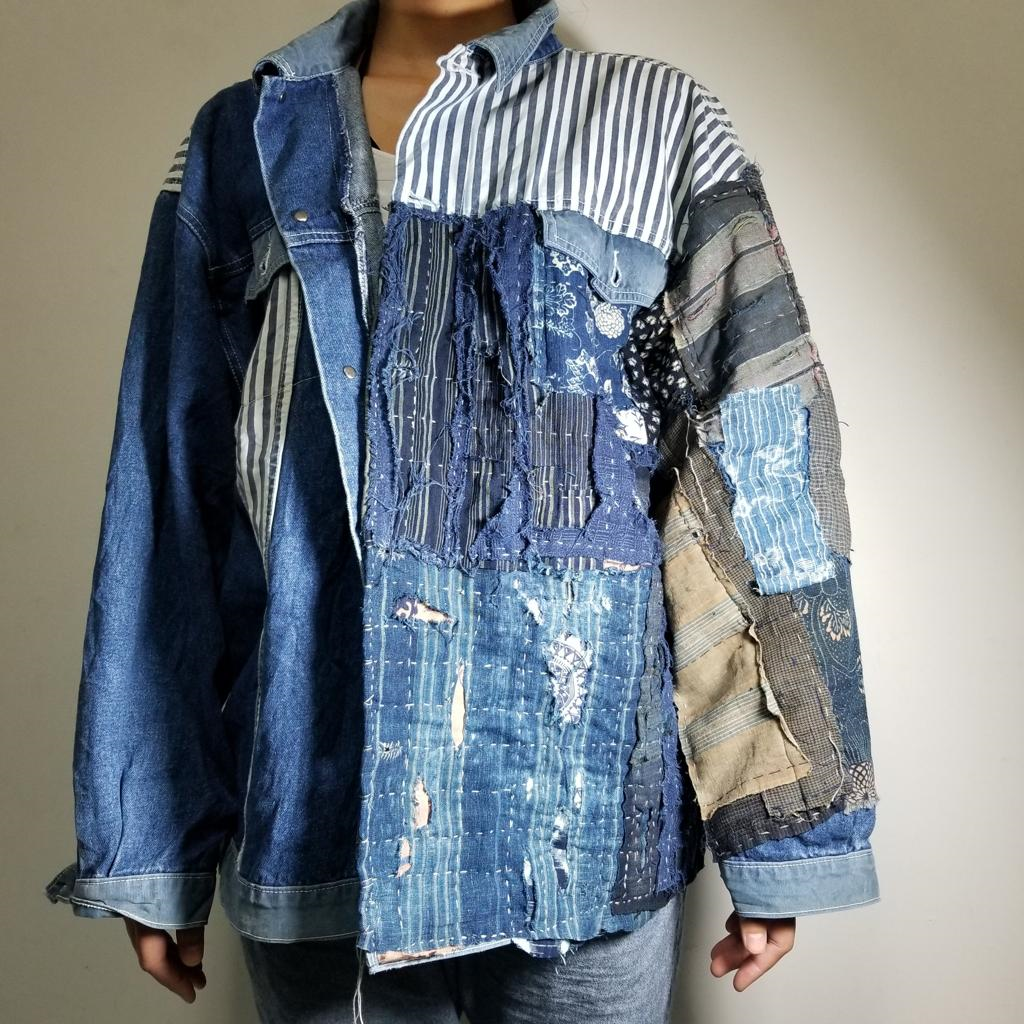
Boro is a Japanese textile repair tradition built around layering patches over damaged fabric to extend its life. The term “Boro” means worn-out or tattered cloth, which perfectly describes its origin.
Boro developed during times when cloth was scarce, especially among farming families. Instead of discarding damaged garments, people added patches over weak areas and stitched them into place. Over time, one garment could hold decades of repairs.
The focus of Boro is preservation.
It is about saving fabric.
It is about maximizing textile life.
Boro is not defined by stitches.
It is defined by repair structure.
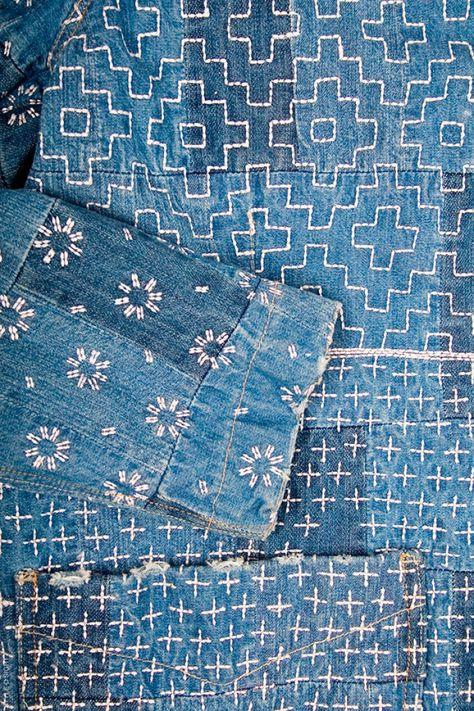
Key characteristics of Boro include:
- layered fabric patches
- visible wear marks
- multiple repair generations
- mixed fabric textures
- irregular patch placement
Traditional Boro fabrics often included:
- indigo cotton
- hemp cloth
- linen
- recycled kimono fabric
- workwear textiles
Modern Boro has evolved into art and fashion, but the core idea remains the same: use what you have and make it stronger.
Boro is not about perfection.
Its beauty comes from imperfection.
That makes every Boro piece unique.
If your goal is rebuilding damaged fabric through patching and preserving its story, Boro is the ideal technique.
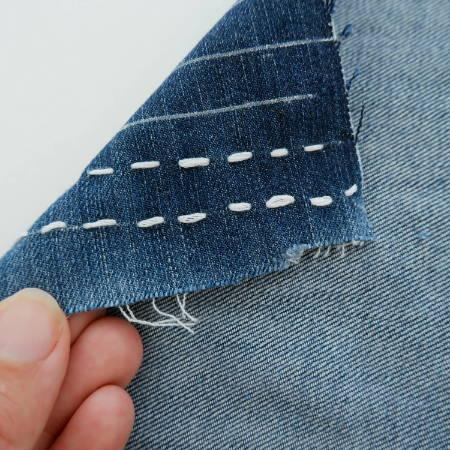
What Is Sashiko and How Does It Work?
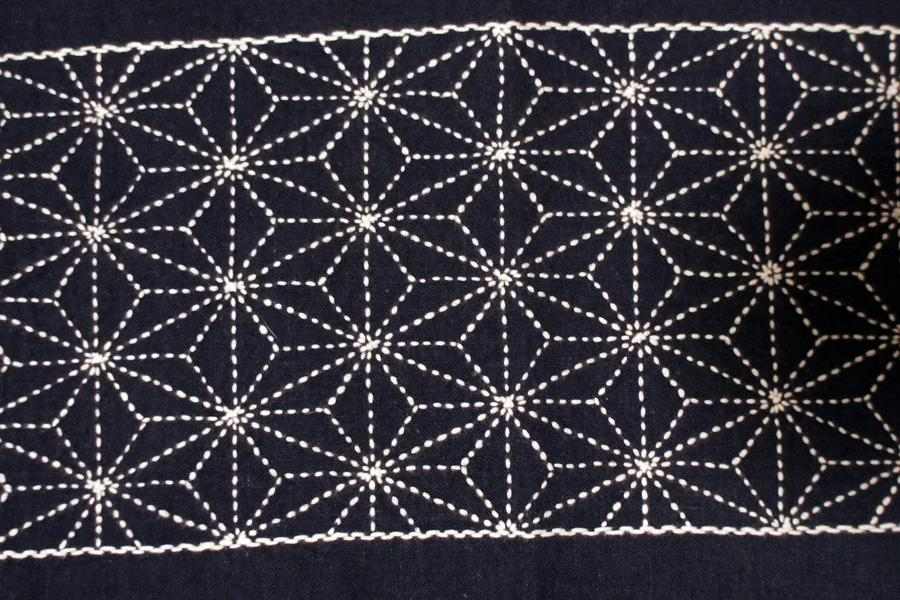
Sashiko is a Japanese hand-stitching technique based on repetitive running stitches. The word means “little stabs,” referring to the needle movement used to create even lines of thread across fabric.
Unlike Boro, Sashiko is a stitching system.
Its focus is structure.
Its purpose is reinforcement.
Historically, Sashiko helped strengthen clothing, increase insulation, and improve durability. Workers used it to reinforce worn clothing without necessarily patching it.
Sashiko is recognized by:
- consistent stitch spacing
- visible thread lines
- geometric patterns
- organized layouts
- repeated stitch rhythm
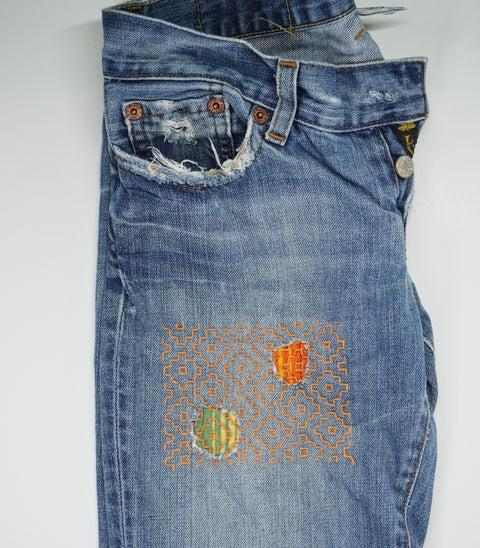
Common Sashiko patterns include:
- waves
- mountains
- hemp leaf patterns
- grids
- circles
Sashiko can be purely decorative or highly functional.
Modern Sashiko is used for:
- denim decoration
- embroidery art
- clothing reinforcement
- bags
- home textiles
Unlike Boro, Sashiko can exist without damaged fabric.
You can stitch Sashiko onto brand-new fabric.
That makes it more flexible.
The skill in Sashiko comes from consistency.
Even spacing creates strength.
Better tension creates cleaner results.
For beginners wanting to learn Japanese stitching basics, Sashiko is usually the easier entry point.
Do Sashiko Patterns Affect Repair Strength?
Pattern choice changes repair strength.
Dense patterns distribute stress better.
Loose patterns focus stress in smaller areas.
Strong Sashiko patterns:
- grid patterns
- hemp leaf
- cross patterns
- layered lines
Lower-strength decorative patterns:
- wide curves
- loose spacing
- minimal overlap
Why?
More stitch intersections create better tension distribution.
Best use:
High-stress zones:
- knees
- elbows
- pockets
Use denser patterns there.
Lower-stress zones can use decorative layouts.
Pattern is not only visual.
Pattern is structural.
That makes design choice important
Boro vs Sashiko: The Core Difference Explained
The biggest mistake beginners make is treating Boro and Sashiko as interchangeable terms.
They are connected.
But they are not identical.
Boro is about patching fabric.
Sashiko is about stitching fabric.
That difference changes everything.
Think of Boro as the complete repair system and Sashiko as one tool inside that system.
Core comparison:
Boro focuses on:
- layering
- patching
- rebuilding
- extending lifespan
- preserving history
Sashiko focuses on:
- stitching
- reinforcement
- design structure
- tension
- durability
A Boro piece may use:
- Sashiko stitching
- machine stitching
- hidden stitches
- rough stitches
A Sashiko project may have:
- no patches
- no damage
- no repair purpose
This creates a clear distinction.
Boro exists in fabric structure.
Sashiko exists in stitch movement.
If you remove stitching from Boro, the patches still exist.
If you remove stitching from Sashiko, the technique disappears.
That is the clearest definition.
Understanding this difference improves your project planning because you know whether you need repair architecture or stitch reinforcement.
That saves time and produces stronger work.
Which Should You Use for Different Projects?
Not every repair project needs the same method. Choosing between Boro stitching and Sashiko stitching depends on fabric damage, visual goals, and garment type.
Boro works better when the structure is already damaged.
Sashiko works better when the fabric is still stable.
Use Boro for:
- torn knees in denim
- ripped jackets
- worn elbows
- layered patch repairs
- rebuilding vintage garments
Use Sashiko for:
- seam reinforcement
- decorative denim
- strengthening cuffs
- adding stitch detail
- repairing light wear
Best combination projects:
- jeans with holes
- workwear restoration
- patched tote bags
- utility jackets
A simple decision rule:
If the fabric needs rebuilding, start with Boro.
If the fabric only needs strengthening, start with Sashiko.
If both damage and weakness exist, combine both.
This project-first decision system helps avoid over-repairing or under-repairing fabric.
Historical Origins: How Boro and Sashiko Developed
Both Boro and Sashiko were born from necessity in rural Japan, especially during periods when textile resources were limited.
Cotton was expensive.
Clothing was valuable.
Nothing was wasted.
Families passed garments through generations, repairing weak areas repeatedly.
Boro developed from scarcity.
People layered scraps over holes to keep clothing functional. These repairs accumulated over years.
Sashiko developed from efficiency.
Simple running stitches allowed people to strengthen cloth quickly and effectively.
Historical uses included:
- farming jackets
- work pants
- sleeping quilts
- protective clothing
- family garments
Why indigo?
Because indigo-dyed cotton was durable, practical, and widely available.
The relationship between Boro and Sashiko became strong because:
- Boro needed stitching
- Sashiko provided strong reinforcement
Over time:
Boro became recognized as textile heritage.
Sashiko became recognized as stitch artistry.
Modern collectors now value antique Boro textiles for their history, texture, and craftsmanship.
Sashiko patterns became design systems studied globally.
Their origins matter because they explain their purpose.
They were not created for decoration.
They were created for survival.
That practical origin still shapes how they are used today.
Real Repair Examples: When Boro Wins vs When Sashiko Wins
Theory helps.
Examples make decisions easier.
Boro wins when:
- jeans have holes
- jacket elbows are torn
- fabric sections are missing
- vintage cloth is fragile
Sashiko wins when:
- seams weaken
- cuffs wear thin
- knees need strengthening
- decorative repair is enough
Real example:
A denim knee hole needs patching.
Boro creates the support patch.
Sashiko secures it.
Another example:
A shirt cuff is thinning.
No patch needed.
Sashiko reinforcement is enough.
Decision logic:
Missing fabric = Boro
Weak fabric = Sashiko
Damaged + weak = Both
This practical framework helps beginners choose correctly.
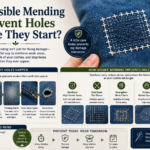
Which Is Better for Visible Mending?
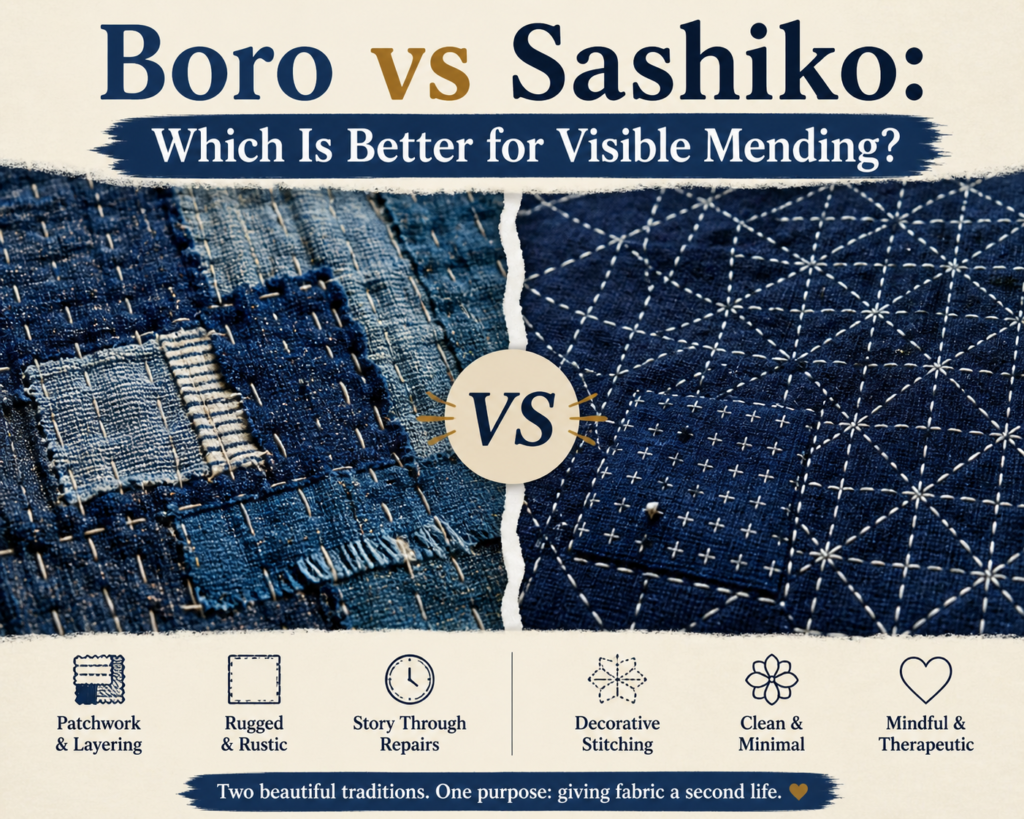
Visible mending is where Boro and Sashiko overlap most.
This is why many people confuse them.
Visible mending means repairing fabric while allowing the repair to remain visible instead of hiding it.
Boro is stronger for structural repair.
Sashiko is stronger for stitch reinforcement.
Choose Boro if your fabric has:
- holes
- tears
- thinning areas
- multiple weak zones
Choose Sashiko if your fabric needs:
- reinforcement
- strengthening
- decorative repair
- edge stabilization
Best visible mending combination:
- patch with Boro
- stitch with Sashiko
This creates:
- stronger structure
- better durability
- attractive repair lines
- improved fabric lifespan
For denim repair, this combination is extremely effective.
Boro provides support under damaged areas.
Sashiko locks everything into place.
If you only use Sashiko on badly damaged fabric, the fabric may remain unstable.
If you only patch without strong stitching, the patch may fail.
That is why combining both methods often creates the best result.
For visible mending, they are strongest together.
Common Beginner Mistakes in Boro and Sashiko

Most repair failures come from beginner mistakes, not bad materials.
Understanding mistakes early saves time.
Common Boro mistakes:
- using weak patch fabric
- patching too small
- poor stitch anchoring
- uneven layering
- ignoring grain direction
Common Sashiko mistakes:
- uneven stitch spacing
- pulling thread too tight
- weak thread choice
- poor tension control
- inconsistent direction
Shared mistakes:
- rushing repairs
- weak knots
- poor planning
- low-quality tools
How to avoid them:
- test fabric first
- practice stitch rhythm
- match fabric weight
- use stronger thread
The biggest mistake?
Choosing aesthetics over structure.
Repair strength must come first.
Visual beauty comes after stability.
That principle creates better long-term results.
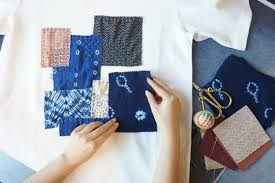
Fabric Differences: What Materials Work Best?
Fabric choice changes the outcome of both Boro and Sashiko.
Boro works best with flexible mixed fabrics because its structure depends on layering.
Sashiko works best with stable woven fabric because stitch consistency depends on tension.
Best Boro fabrics:
- vintage denim
- cotton scraps
- linen
- hemp
- canvas
Best Sashiko fabrics:
- sashiko cloth
- medium cotton
- denim
- canvas
- quilting cotton
Boro fabric rules:
- texture variety is acceptable
- thickness variation is acceptable
- irregular edges are acceptable
Sashiko fabric rules:
- stable weave matters
- even tension matters
- smooth stitching path matters
Beginners often make mistakes by using weak fabric for Sashiko.
This causes:
- thread pulling
- uneven stitches
- weak reinforcement
Boro is more forgiving.
Sashiko is more precise.
If you want texture and repair history, choose mixed fabrics.
If you want cleaner stitch lines, choose stable fabric.
Fabric selection affects durability more than beginners realize.
Choosing correctly improves both beauty and strength.
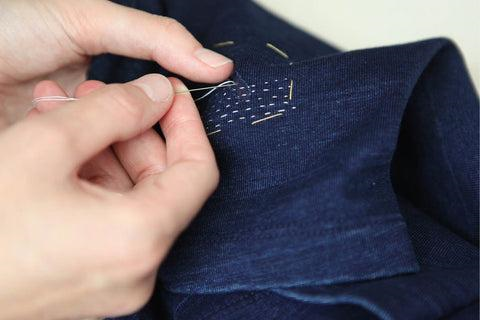
Thread Differences Between Boro and Sashiko
Thread choice changes both appearance and strength.
Many beginners focus only on fabric, but thread controls durability.
Traditional Sashiko stitching uses specialized sashiko thread because it is thicker, stronger, and creates visible stitch definition.
Traditional Boro is more flexible.
It often uses whatever thread is available.
Best threads for Sashiko:
- sashiko cotton thread
- perle cotton
- thick embroidery thread
Best threads for Boro:
- embroidery floss
- cotton thread
- quilting thread
- repair thread
Sashiko thread advantages:
- stronger stitch visibility
- cleaner lines
- better pattern definition
Boro thread advantages:
- flexible texture
- easier patch blending
- adaptable thickness
Avoid:
- weak polyester thread
- very thin sewing thread
- low-quality thread
Good thread prevents repair failure.
If the thread breaks first, the repair fails first.
Thread strength is part of repair strength.
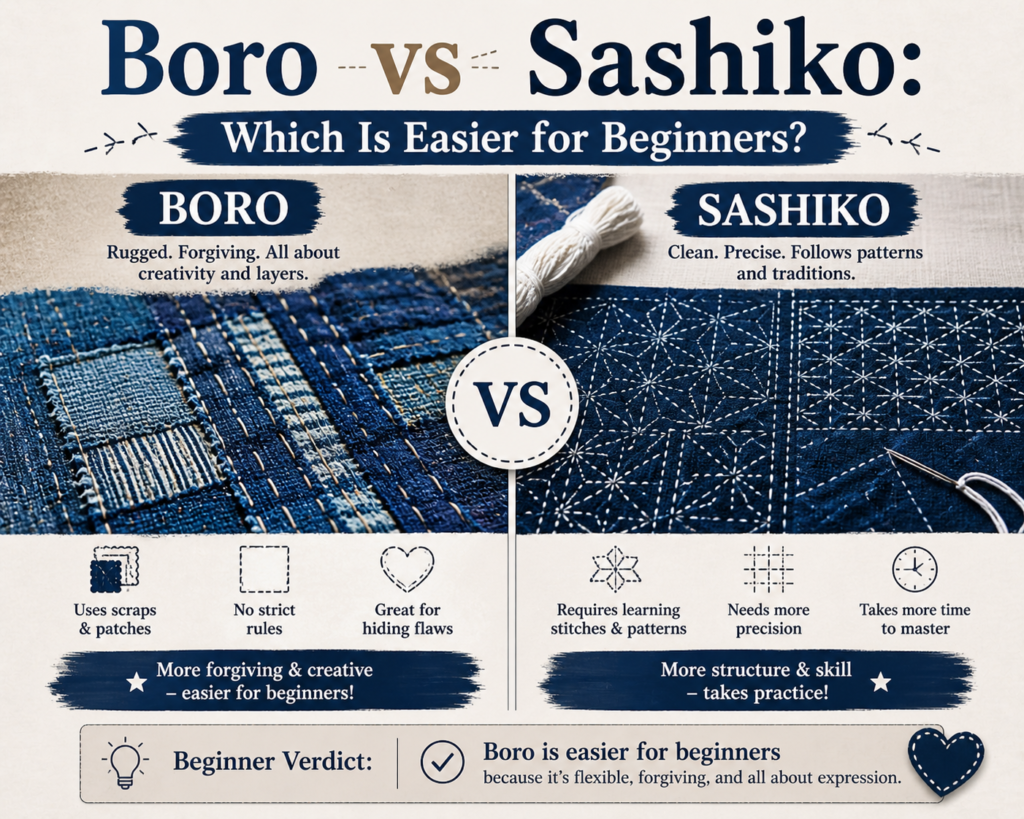
Which Is Easier for Beginners?
For beginners, Sashiko is usually easier.
Why?
Because it follows rules.
Boro requires decisions.
Sashiko teaches controlled stitching:
- stitch length
- spacing
- thread tension
- direction consistency
This creates a clear learning path.
Boro requires:
- patch selection
- placement planning
- fabric layering
- structural thinking
That makes it more advanced.
Beginner-friendly Sashiko advantages:
- easier repetition
- simple tools
- predictable outcomes
- skill improvement through practice
Beginner challenges in Boro:
- choosing patch size
- balancing fabric thickness
- managing layers
- planning repair strength
Best learning order:
- Learn Sashiko stitching
- Practice tension control
- Reinforce fabric
- Move into Boro patching
- Combine both techniques
This order builds skill naturally.
Learning Boro first without stitching control often creates weak repairs.
Learning Sashiko first builds foundation.
That foundation improves all future Boro projects.
For total beginners, start simple.
Master the needle.
Then master the patch.
That sequence produces better results.
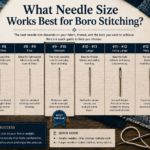
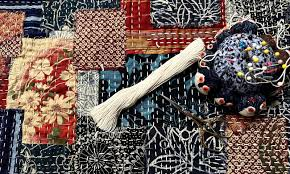
Tools Needed for Boro vs Sashiko
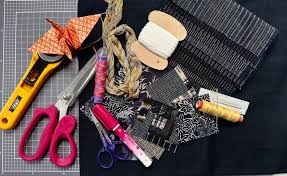
The right tools improve repair quality and reduce frustration.
Both methods use hand-sewing basics, but their priorities differ.
Basic Sashiko tools:
- sashiko needle
- sashiko thread
- thimble
- fabric marker
- embroidery scissors
Basic Boro tools:
- repair fabric
- sewing needle
- thread
- scissors
- pins or clips
Useful for both:
- denim needles
- patch templates
- measuring ruler
- iron
- fabric chalk
Sashiko tools focus on stitch consistency.
Boro tools focus on patch placement.
Beginners often overspend.
Start simple.
You do not need expensive tools.
Priority order:
- Good needle
- Strong thread
- Sharp scissors
- Stable fabric
Better tools improve speed, accuracy, and durability.
Skill matters most, but tools make learning easier.
Boro vs Sashiko in Modern Fashion and Sustainability
Modern fashion has transformed both Boro and Sashiko into global design movements.
What started as survival repair is now part of sustainable fashion.
Boro is popular for:
- patched denim
- jackets
- workwear
- reconstructed clothing
- vintage-inspired design
Sashiko is popular for:
- decorative denim
- embroidered accessories
- shirts
- bags
- fashion detailing
Why are they trending?
Because sustainability matters.
Consumers now value:
- repair over replacement
- slow fashion
- handmade detail
- durability
- textile preservation
Boro aligns with sustainability because it extends garment life.
Sashiko aligns because it reinforces wear points before failure.
Together they reduce waste.
Fashion designers now use both for aesthetics, but traditional values remain:
repair first.
beauty second.
This is important because modern commercial versions sometimes focus only on appearance.
True Boro and Sashiko maintain functional logic.
That function is what creates authenticity.
For sustainable makers, learning both techniques is one of the strongest long-term textile skills available today.
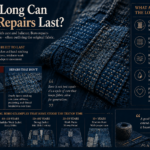
Which Method Lasts Longer?
Durability matters.
A repair that fails quickly wastes time.
Boro stitching often lasts longer in damaged areas because it adds structural layers.
Sashiko stitching lasts longer in reinforcement zones because it strengthens existing cloth.
Boro durability strengths:
- layered support
- stronger rebuild
- better for holes
- better for tears
Sashiko durability strengths:
- seam reinforcement
- tension support
- wear prevention
- edge stabilization
Longest-lasting solution:
Boro + Sashiko combined.
Why?
Because Boro rebuilds.
Sashiko locks the rebuild.
That creates stronger repair systems.
If the damage is major:
Boro wins.
If the fabric is stable but weak:
Sashiko wins.
For maximum lifespan:
Use both.
That is the strongest repair strategy.
Is Boro or Sashiko More Affordable?
Budget matters for beginners.
Both methods are affordable, but costs differ.
Basic Sashiko costs:
- thread
- needle
- thimble
- fabric marker
Basic Boro costs:
- patch fabric
- thread
- needle
- clips or pins
Sashiko usually costs less because:
- fewer materials
- no patch fabric
- less setup
Boro can cost more if buying fabric.
But if using recycled fabric:
Boro becomes very cheap.
Cost-saving options:
- old jeans
- old shirts
- fabric scraps
- recycled cotton
Best budget choice:
For learning stitching → Sashiko
For recycling fabric → Boro
Both are low-cost compared to replacing clothing.
That makes both sustainable and economical.
How to Wash Boro and Sashiko Repaired Clothing
Washing affects repair lifespan.
Bad washing weakens stitches and patches.
Best washing practices:
- cold water
- gentle cycle
- mild detergent
- low spin
- air dry
Avoid:
- bleach
- high heat
- aggressive wringing
- rough drying
Boro repairs need gentle handling because patch edges can shift over time.
Sashiko repairs need protection because tension can loosen.
Best care habits:
- wash inside out
- avoid overloading machine
- inspect repairs after washing
Good washing extends repair life.
Poor washing destroys good repair work.
Maintenance is part of repair skill.

Final Verdict: Should You Learn Boro or Sashiko First?
If your goal is repair, learn both.
If your goal is stitching, start with Sashiko.
If your goal is reconstruction, move into Boro.
The ideal learning path is:
Start with Sashiko.
Then add Boro.
Why?
Sashiko builds:
- needle control
- rhythm
- spacing
- tension
Boro builds:
- structural repair thinking
- layering skills
- patch placement strategy
- fabric understanding
The strongest projects combine both.
Best use cases:
Choose Boro for:
- holes
- torn clothing
- damaged denim
- layered aesthetics
Choose Sashiko for:
- strengthening seams
- decorative stitching
- structured reinforcement
- pattern work
Choose both for:
- visible mending
- denim restoration
- sustainability projects
- heirloom repair
The final truth is simple:
Boro repairs the cloth.
Sashiko strengthens the repair.
That partnership is why they have survived for centuries.
Learning them together gives you both technical skill and textile understanding.
That is the traditional Japanese repair mindset—and it remains powerful today.
Which Has a Faster Learning Curve?
Learning speed matters.
Most beginners learn Sashiko stitching faster because it follows repetition.
Boro requires judgment.
Sashiko learning focuses on:
- spacing
- rhythm
- tension
- consistency
Boro learning focuses on:
- patch logic
- structural thinking
- layering strategy
- placement decisions
Average beginner timeline:
Sashiko basics:
- 1–2 weeks
Basic Boro patching:
- 2–4 weeks
Strong combined repairs:
- 1–3 months
Fastest learning path:
- Learn Sashiko
- Practice reinforcement
- Learn Boro patching
- Combine both
This progression creates better skill development.
Sashiko builds control.
Boro builds repair strategy.
Together they create complete textile repair skill.
Final Verdict: Boro vs Sashiko
Boro and Sashiko are connected but different.
Remember this:
Boro repairs fabric.
Sashiko stitches fabric.
Boro is material-centered.
Sashiko is stitch-centered.
Use Boro when your priority is rebuilding.
Use Sashiko when your priority is reinforcement or decoration.
Use both when you want the strongest visible mending system.
That is the traditional Japanese way.
FAQs
Is Boro the same as Sashiko?
No. Boro is patchwork repair; Sashiko is stitching technique.
Does Boro always use Sashiko?
No. Boro can use other stitching methods.
Is Sashiko embroidery or repair?
Both. It can be decorative or structural.
Which is older, Boro or Sashiko?
They developed alongside rural textile survival traditions in Japan.
Can beginners start with Boro?
Yes, but Sashiko is usually easier first.
Can I use modern fabric for Boro?
Yes. Denim and cotton work very well.
Is Sashiko only Japanese?
It is Japanese in origin, but practiced globally now.