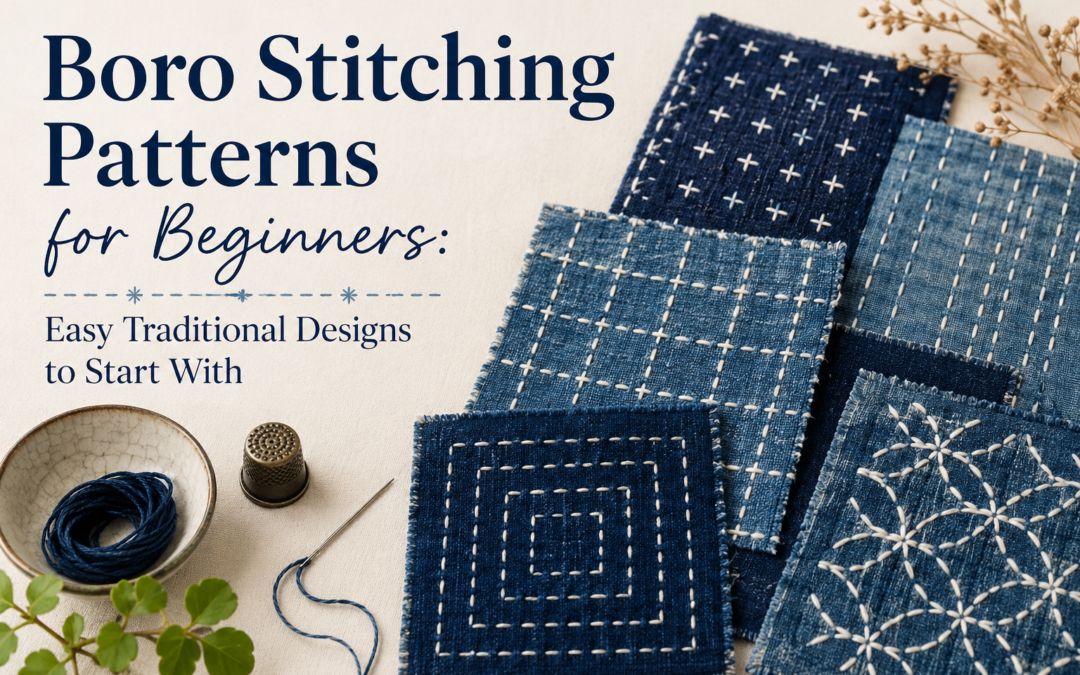
Boro stitching patterns is one of the easiest ways to begin learning traditional Japanese textile repair because it is built on repetition, visible handwork, and practical function rather than perfection. Originating in rural Japan, boro was developed as a necessity. Families reused old fabric, layered scraps, and repaired worn clothing using repeated hand stitches to extend the life of garments. What started as survival sewing has now become a respected textile art practiced worldwide.
For beginners, boro offers an ideal starting point because it removes the pressure of perfection. Uneven stitches, layered fabrics, and visible repairs are part of the beauty. Unlike advanced embroidery that demands exact symmetry, boro embraces human touch and irregularity. That makes it one of the most forgiving and enjoyable hand-stitching methods.
In this guide, you will learn the best beginner-friendly boro stitching patterns, how they work, where to use them, and how to build confidence through repetition. Each section includes practical insight, decision clarity, and visual examples to help you start your first boro project properly.
Want to know more about the history of Japanese Boro Stitching and its cultural significance, refer to out expert historian guide.
What Makes a Good Boro Stitching Pattern for Beginners?
A good beginner boro stitching pattern is simple, repetitive, and forgiving. The purpose of a beginner pattern is not to create a masterpiece but to build hand memory. Traditional boro stitching was never about decoration first. It was about preserving fabric and strengthening weak areas through visible stitches. This practical foundation is what makes it ideal for beginners today.
The best beginner patterns are based on repetition because repeated movements train your hands faster. Straight lines, grids, and basic crossing patterns create rhythm. Once rhythm is established, consistency becomes easier. That consistency builds confidence. The goal is not making every stitch identical. The goal is learning how stitches move through fabric naturally.
A beginner-friendly pattern should have:
- Easy repeatability
- Visible stitch structure
- Functional reinforcement
- Flexible spacing
- Easy correction if mistakes happen
- Strong visual guidance
Patterns that are too complex create frustration. Start simple and build upward. Traditional boro itself evolved through necessity, which means simplicity is authentic. The strongest beginner decision is choosing easy patterns and repeating them until they feel natural.
How to Choose the Right Boro Pattern for Your Project
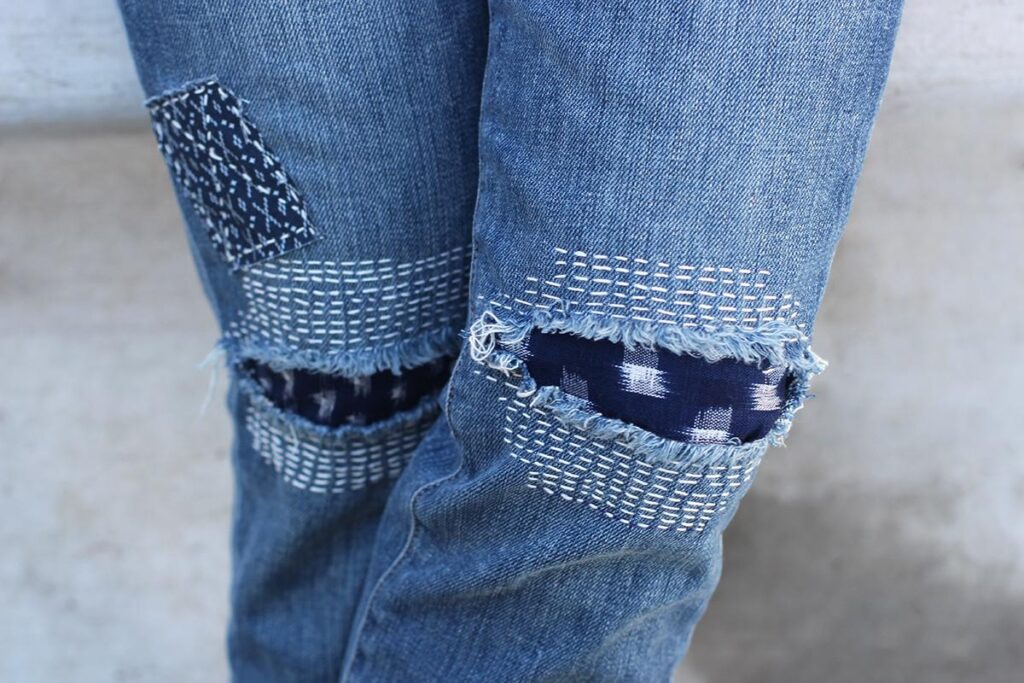
Choosing the right boro pattern depends on the type of repair, the fabric thickness, and the amount of stress the area receives. Beginners often make the mistake of choosing patterns based only on appearance. In traditional boro, the pattern served the repair first and the visual outcome second. A heavily worn knee patch needs stronger locking stitches than a decorative pocket repair. This is why understanding pattern purpose matters before stitching begins.
The easiest way to decide is to match pattern behavior with fabric movement. Stable areas can use decorative freedom, while flexible or high-stress zones need stronger structural stitching. This simple decision framework reduces mistakes and improves durability. Over time, choosing the right pattern becomes instinctive.
Use this quick pattern guide:
- Running stitch → general beginner practice
- Parallel lines → large stable patches
- Grid pattern → stronger reinforcement
- Cross grid → heavy stress areas
- Organic stitch → decorative freedom
- Border stitch → edge stabilization
Always choose function before decoration
The Running Stitch Pattern (Best First Pattern)
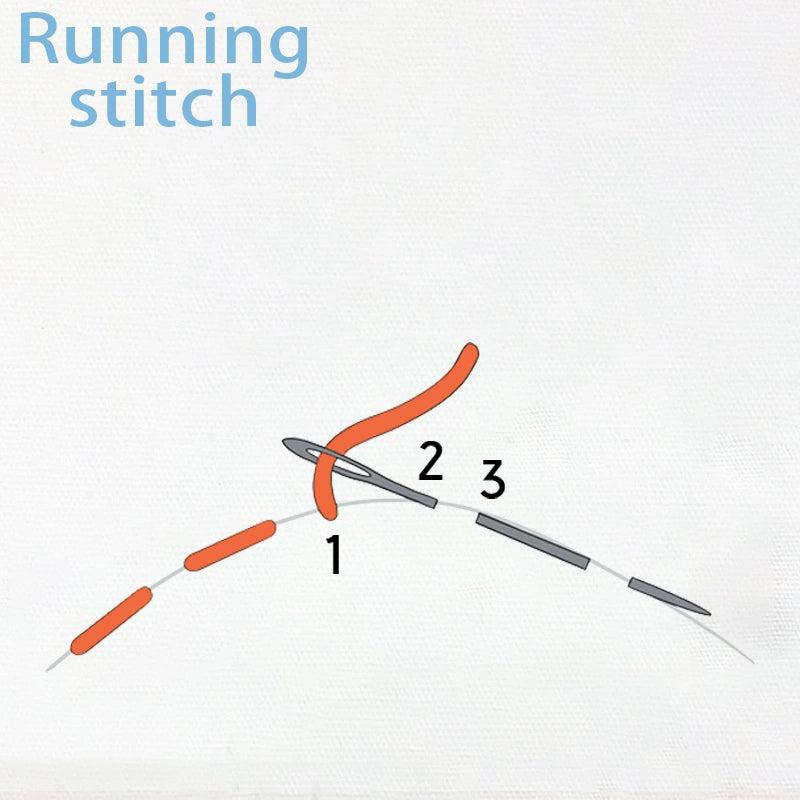
The running stitch is the foundation of boro stitching. Every beginner should start here because nearly every advanced pattern is built on this basic stitch. It is simply a continuous in-and-out movement of the needle through the fabric, creating visible dashed lines. That sounds simple, but mastering rhythm and spacing here changes everything.
The running stitch teaches control. It teaches how to pull thread without puckering fabric and how to maintain a comfortable flow. In traditional boro, running stitches were used to secure patches, strengthen weak fabric, and add layers of reinforcement. Even today, this remains the strongest first step.
Why beginners should start with running stitches:
- Easy to learn
- Builds hand rhythm
- Teaches spacing
- Strengthens fabric
- Forms the base of all future patterns
A practical beginner exercise is stitching parallel running lines across scrap denim. Use white thread on blue denim for clear contrast. Focus on equal stitch length rather than speed.
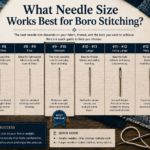
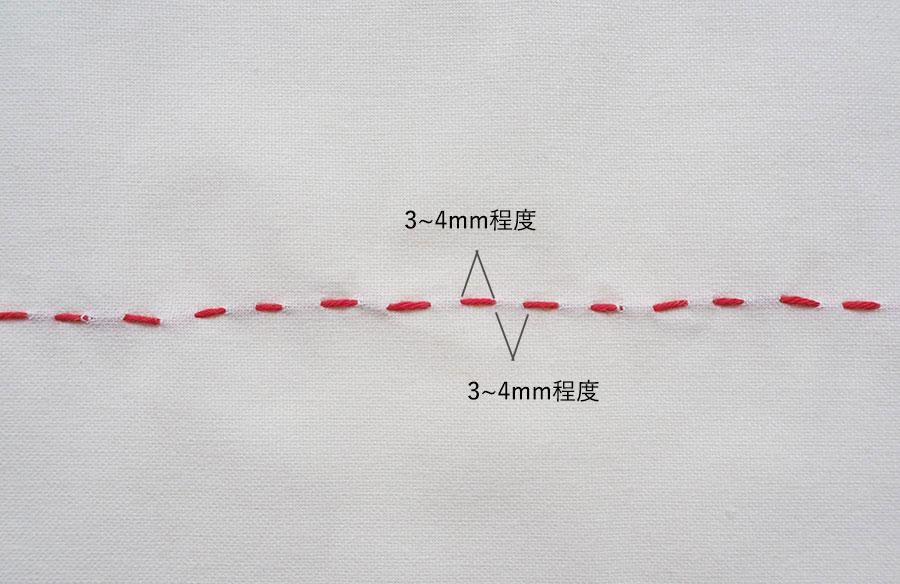
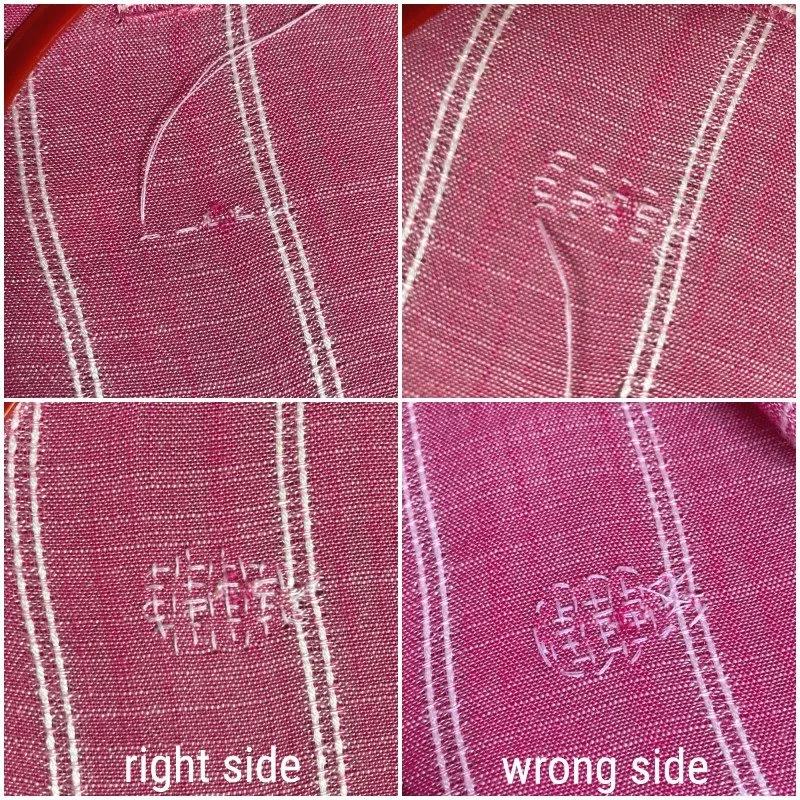
One of the biggest beginner questions in boro stitching is how long each stitch should be. The answer depends on fabric weight, but a simple beginner rule works well: keep stitches between 3–5 millimeters with equal gaps between them. Traditional boro often used longer visible stitches on thicker workwear fabrics because durability mattered more than precision.
Beginners should focus less on perfect measurement and more on rhythm consistency. If your stitches are too short, the work becomes slow and stiff. If they are too long, the patch may not hold securely. Finding the balance creates both strength and visual flow. The relationship between stitch and space is what creates harmony.
Beginner stitch rules:
- 3–5 mm stitch length
- Keep gaps similar to stitch length
- Pull thread gently
- Avoid puckering fabric
- Keep rhythm consistent
Good stitching feels smooth, not forcedyou repeat this stitch, the easier every future boro pattern becomes.
Beginner Pattern Difficulty Comparison
Not all beginner boro patterns feel equally easy. Some patterns focus on repetition, while others require directional control and layered planning. Understanding difficulty levels helps beginners build skill progressively rather than jumping into complex work too early. A gradual learning path creates better confidence and cleaner results.
The best progression starts with running stitches, then moves into parallel lines and grids before exploring organic or layered patch structures. This progression mirrors traditional skill development. It allows hand memory to develop naturally while expanding visual control.
Quick difficulty guide:
- Running stitch → easiest
- Parallel lines → easy
- Grid pattern → moderate
- Organic stitching → moderate
- Cross grid → moderate to advanced
- Layered patchwork → advanced beginner
Skill progression matters more than speed.
Parallel Line Pattern
Parallel line stitching is one of the easiest boro patterns to understand because it organizes running stitches into structure. Instead of random stitching, the lines run side by side, creating a balanced visual texture. This is one of the most practical patterns for reinforcing larger patches.
This pattern works exceptionally well for beginners because it removes decision fatigue. You only need to focus on maintaining spacing between lines. The repetition builds muscle memory quickly. Traditional boro garments often used parallel stitching because it stabilized patched areas without overcomplicating the repair.
Best uses for parallel line stitching:
- Large fabric patches
- Jacket elbow repairs
- Tote bag reinforcement
- Decorative visible mending
- Layered denim repair
Parallel lines also help you understand stitch direction. This becomes important later when learning grid and cross patterns. For beginners, this pattern creates discipline while still keeping the process enjoyable and forgiving.
Grid Pattern (Classic Beginner Structure)
Grid stitching combines horizontal and vertical running stitches to create boxes across the fabric. It is one of the strongest and most balanced boro patterns for beginners. The structure naturally distributes tension across the patch, making repairs stronger.
The beauty of grid stitching is how it teaches spacing awareness. Beginners quickly learn how stitch placement affects the visual outcome. If the rows are too close, the fabric becomes stiff. If they are too wide, the patch may not stay secure. Finding balance is part of the learning process.
Why grid patterns are ideal:
- Strong reinforcement
- Structured learning
- Balanced appearance
- Better patch security
- Easy measurement
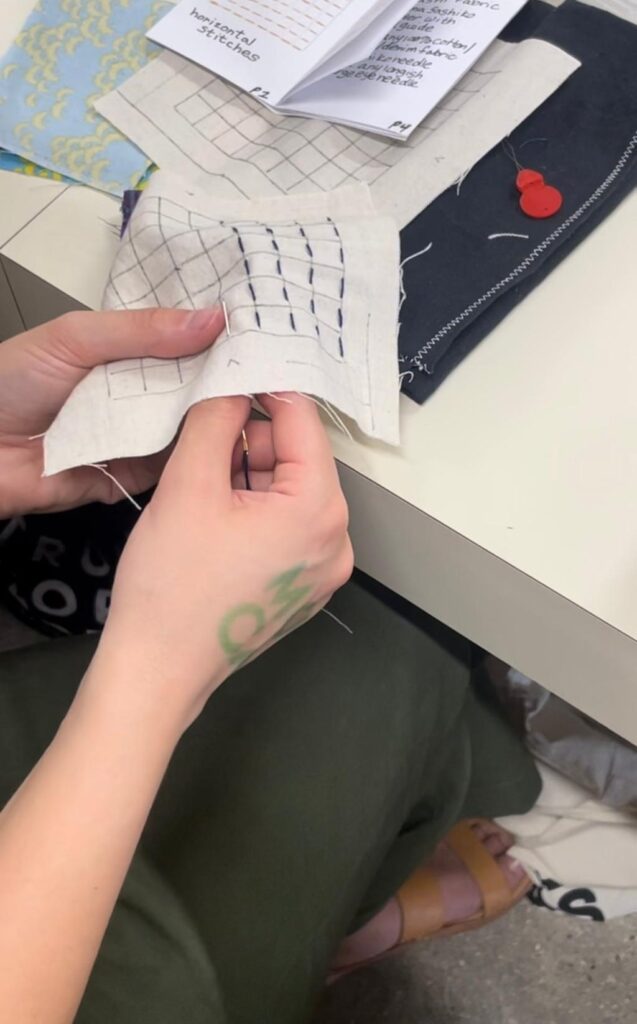
A simple beginner project is making a patch sample with a 1-inch grid. This helps train your eye and hand at the same time. Once you master grids, many traditional Japanese stitch structures become easier.
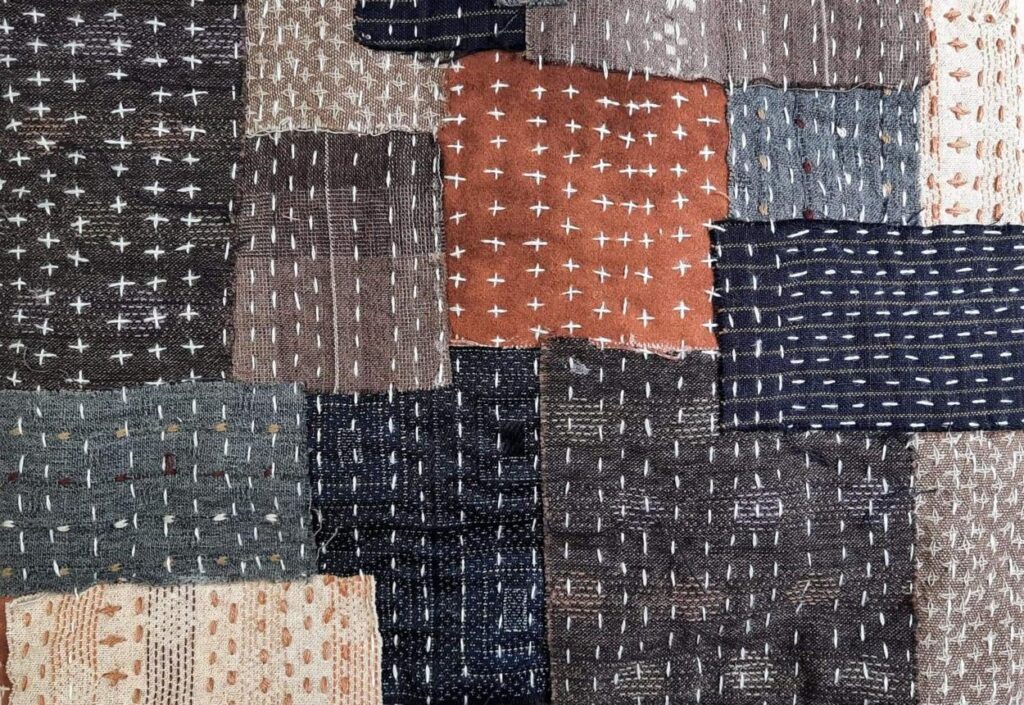
Cross Stitch Grid Pattern
Cross stitch grids add diagonal reinforcement over a grid base. This creates stronger fabric locking and more visual texture. In boro repair, this pattern is useful in high-stress areas like knees, elbows, and bag corners where extra strength matters.
For beginners, this pattern introduces directional change. Instead of only moving horizontally or vertically, diagonal stitching teaches new movement patterns. This improves hand flexibility and pattern awareness.
Best beginner uses:
- Knee repairs
- Workwear patches
- Tote bag corners
- Heavy denim reinforcement
This pattern may look more complex, but it is simply built from smaller parts you already know. Learn grids first, then add diagonals. This progression makes learning smoother.
Which Boro Patterns Are the Strongest for Repairs?
Not all boro patterns provide the same level of strength. Some patterns are purely stabilizing, while others lock fabric from multiple directions. Understanding repair strength helps beginners choose better for practical use. High-stress areas like knees or elbows need stronger pattern structures.
Grid-based stitching usually provides the strongest hold because it distributes pressure across multiple directions. Cross-grid patterns add diagonal resistance, which increases durability. Border stitching alone works best for low-stress areas but is weaker for structural repair.
Strength ranking:
- Grid pattern → strongest balance
- Cross grid → strongest locking
- Layered patch → strongest durability
- Parallel lines → moderate support
- Border stitch → light support
Strength should guide your pattern choice
Random Organic Stitch Pattern
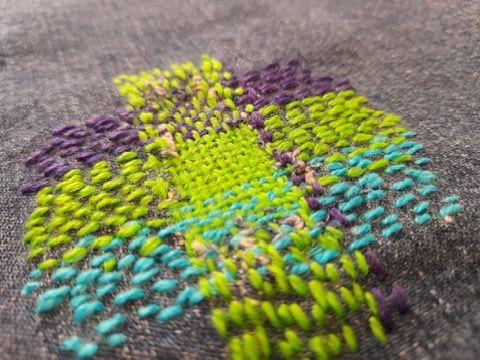
Not every boro pattern follows strict geometry. Traditional boro often evolved organically based on available fabric scraps and wear patterns. Random organic stitching follows the shape of the patch rather than forcing structure.
This is perfect for creative beginners who dislike measuring. Instead of following lines, you follow fabric edges, patch curves, and natural stress points. This creates a more authentic handmade appearance.
Why beginners love organic stitching:
- Less pressure
- More freedom
- Traditional authenticity
- Faster creativity
- Natural visual movement
Organic stitching teaches intuition. Instead of measuring everything, you start understanding where stitches should go naturally. That instinct becomes valuable in larger future projects.
Wave Pattern (Simple Curved Flow)
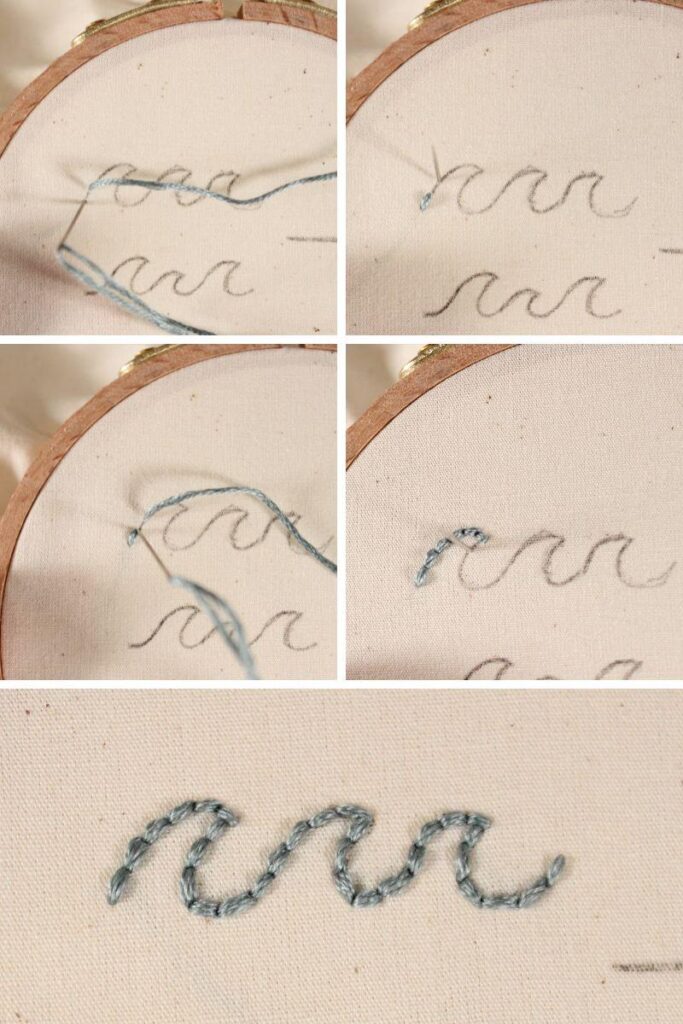
Wave patterns introduce movement into boro stitching. Instead of straight lines, the stitches flow in curved paths. This creates softness and visual energy. Traditional Japanese textile aesthetics often use wave-like forms because they reflect nature.
For beginners, wave stitching improves hand flexibility. Straight lines teach discipline, but curves teach control. Learning to maintain even stitch length on a curve builds stronger needle control.
Best uses:
- Decorative mending
- Textile art panels
- Soft fabric reinforcement
- Patch transitions
Wave patterns feel more artistic and less rigid. Beginners often enjoy them after mastering straight-line basics.
Patch Border Stitch Pattern
Patch border stitching focuses only on the edges of a patch. Instead of filling the center, you secure the perimeter. This keeps the patch stable while allowing flexibility in the middle.
This is useful for lighter fabrics or garments needing movement. Traditional boro often used edge stitching to attach layers quickly before adding internal reinforcement later.
Benefits of border stitching:
- Fast repair
- Flexible patch movement
- Cleaner structure
- Good for thin fabric
Beginners should practice this because edge control is important. Good patch edges improve the strength of all future boro work.
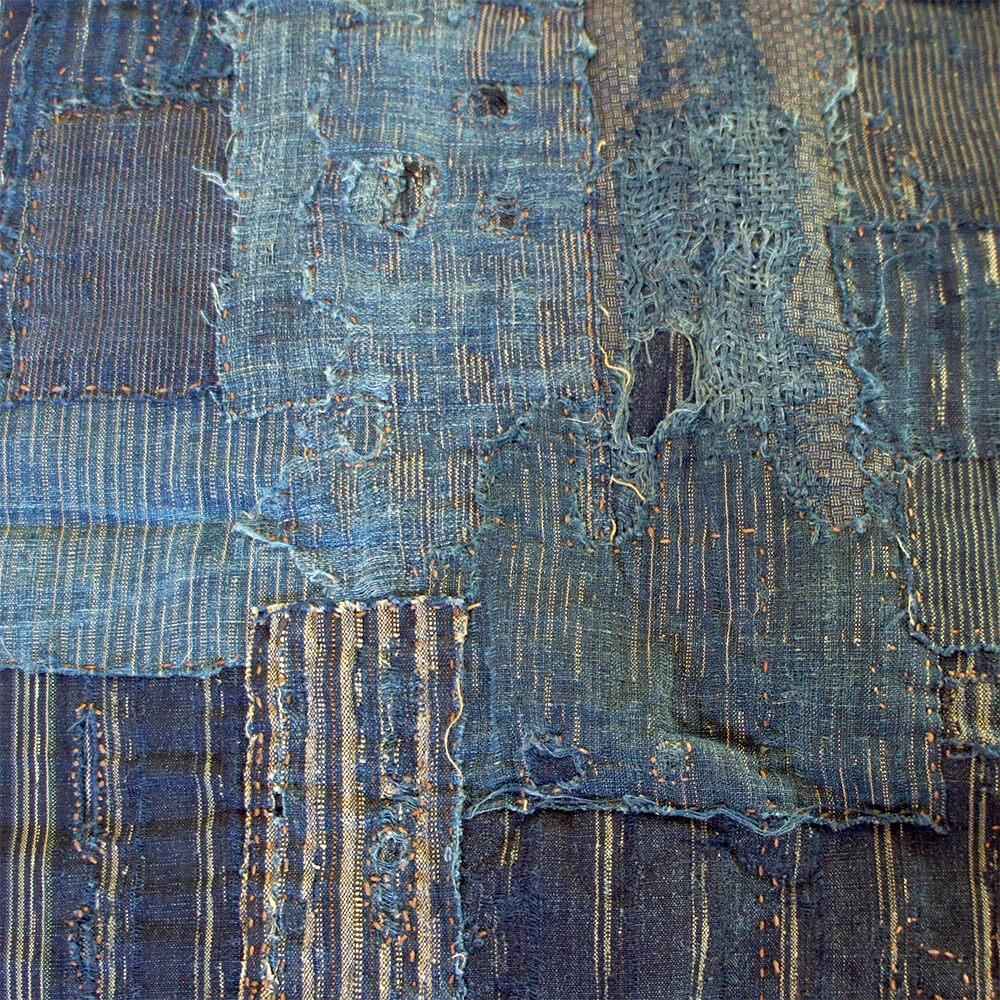
The Traditional Meaning Behind Boro Stitch Patterns
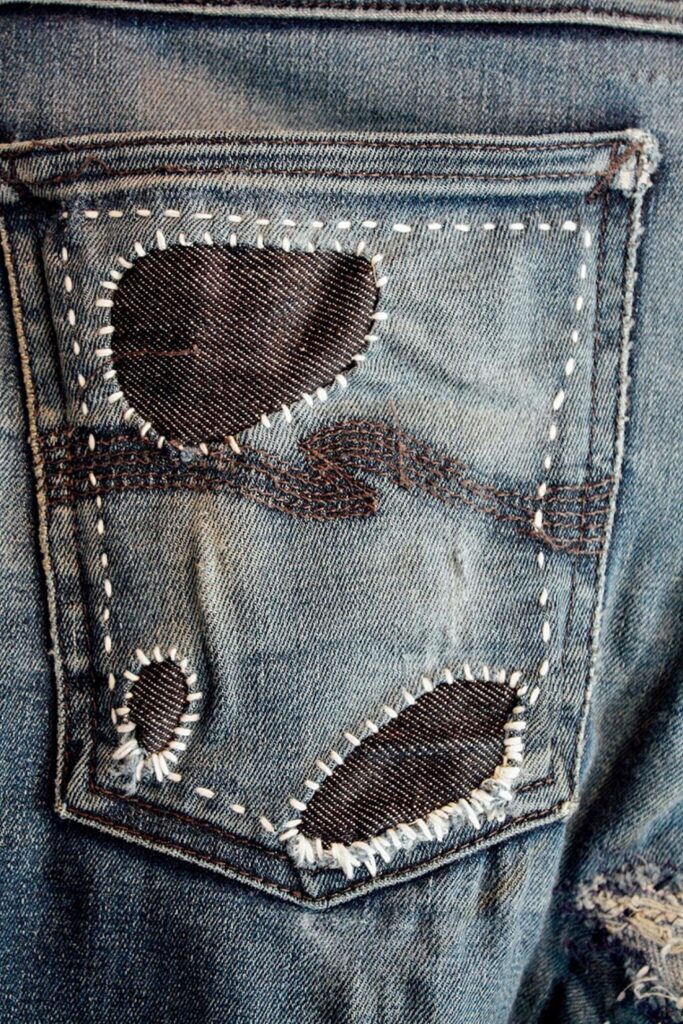
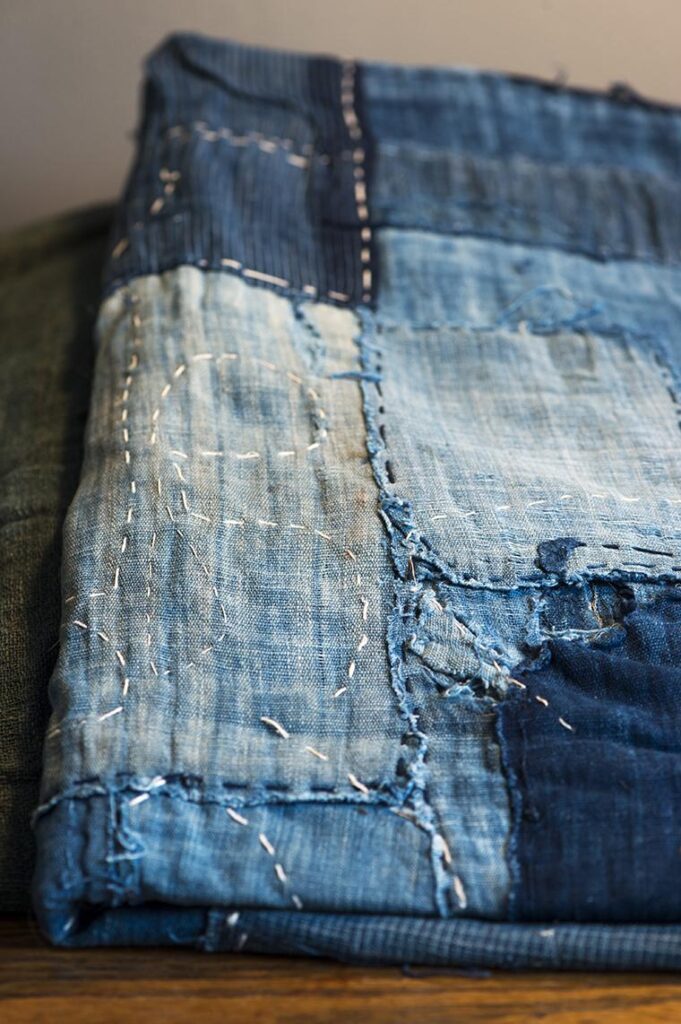
Boro is deeply connected to Japanese textile history. In rural Japan, fabric was valuable and often difficult to replace. Families repaired garments repeatedly, layering scraps and reinforcing weak areas through visible stitching. Each stitch represented preservation, care, and necessity.
The visual language of boro reflects a philosophy of continuation rather than replacement. Unlike modern fast fashion, boro values the life of fabric. Every patch tells part of the garment’s story. For beginners, understanding this philosophy changes the mindset from crafting decoration to preserving material.
Traditional boro values:
- preservation
- repair
- reuse
- durability
- textile memory
Boro is not just stitching. It is textile history.
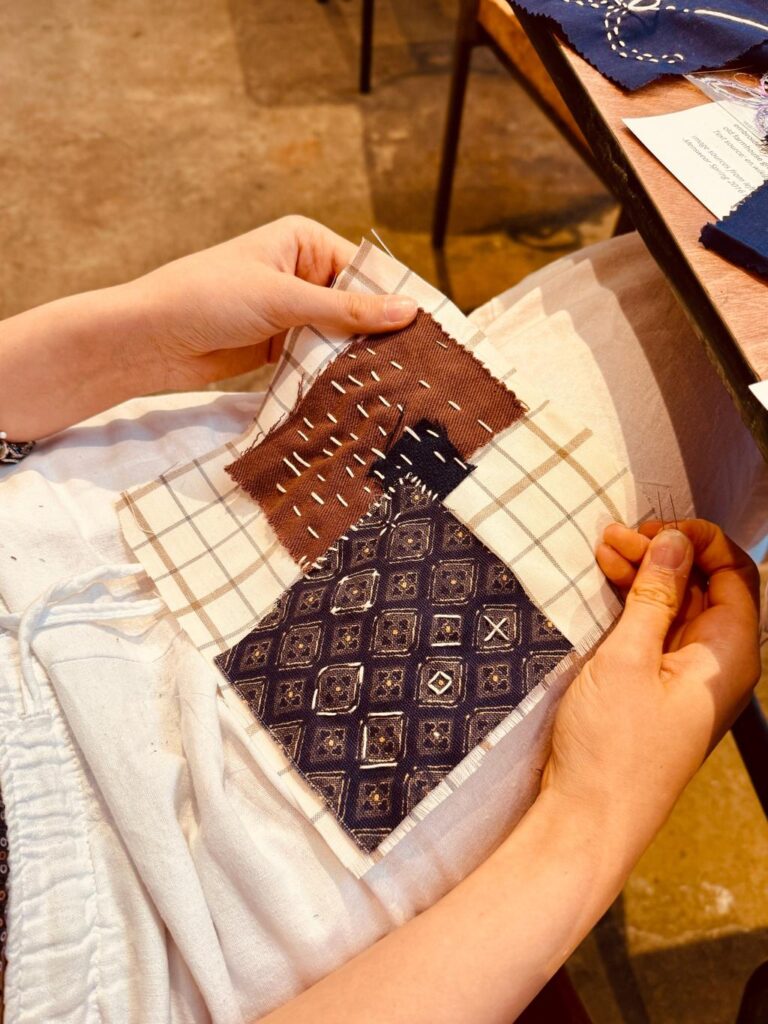
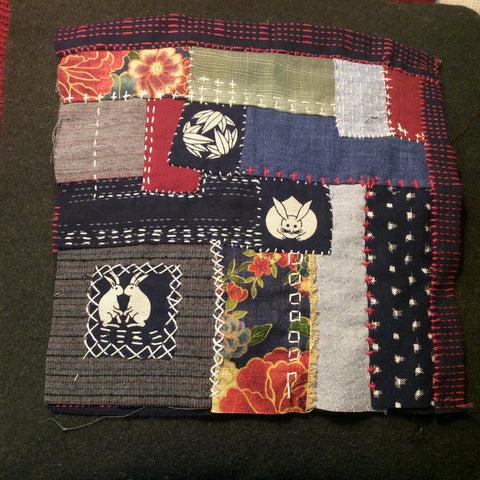
Layered Patch Pattern
Layering is central to boro. Instead of using one patch, traditional boro often stacked multiple patches over time. This created thickness, durability, and a visual history of repairs.
For beginners, layering teaches fabric behavior. Different fabric weights react differently under stitches. Learning this early helps build better repair decisions.
Layering advantages:
- Stronger repairs
- Better durability
- Rich texture
- More authentic look
A beginner project could involve layering two denim scraps and stitching through both. This teaches pressure, needle strength, and stitch planning.
Best Fabric and Thread for Beginner Boro Patterns
Choosing the right materials makes learning easier. Beginners should avoid difficult fabrics and start with strong, stable materials. Fabric controls how easy stitching feels.
The best fabrics for beginners are medium to heavy-weight because they hold shape and allow easier needle control.
Best beginner fabrics:
- Denim
- Cotton
- Linen
- Canvas
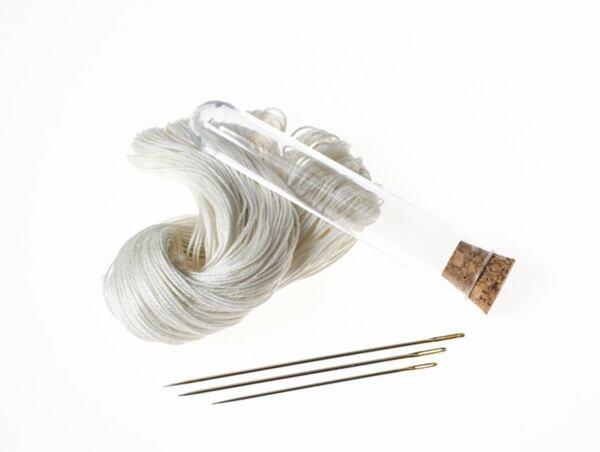
Best beginner threads:
- Sashiko thread
- Embroidery thread
- Thick cotton thread
Avoid stretchy or slippery fabrics in your first projects. Material choice directly affects learning speed. Good materials remove unnecessary frustration.
Best Boro Patterns for Different Fabric Types

Different fabrics respond better to different boro patterns. Thick denim handles dense grids well, while softer linen works better with lighter parallel stitches. Matching pattern structure to fabric weight improves both strength and appearance.
Beginners should think of fabric and pattern as a partnership. Heavy fabric can support more aggressive reinforcement, while lighter fabric benefits from flexible movement. This improves repair longevity and prevents distortion.
Best matches:
- Denim → grid or cross grid
- Cotton → parallel lines
- Linen → organic stitching
- Canvas → border stitching
- Layered scraps → running stitch
Better fabric matching creates cleaner beginner results .
Having difficulty in trying out Boro Stitching Patterns on your first experience, refer to Step by Step guide on How to do Boro Stitching.
Boro Patterns vs Sashiko moving into structured sashiko work.
Key differences:
- Boro = repair focused
- Sashiko = decorative focused
- Boro = flexible
- Sashiko = structured
- Boro = layered
- Sashiko = patterned
Start with boro for easier entry.
If you want a comprehensive and detailed point of view on Boro vs Sashiko Difference, refer to our expert analysis on this case.
Where Should You Place Boro Patterns on Clothing?
Pattern placement matters because different clothing areas experience different stress levels. A knee patch bends constantly, while a pocket patch experiences friction. Beginners often place stitches based on appearance instead of wear behavior.
Understanding stress points helps you repair smarter. Reinforcement should follow movement. Flexible areas need adaptable stitching, while stable areas can support stronger structured patterns.
Best placement examples:
- Knees → grid or cross grid
- Elbows → parallel lines
- Pockets → border stitching
- Cuffs → running stitches
- Bag handles → layered patchwork
Placement affects durability.
Best First Projects for Beginner Boro Patterns
Starting with small practical projects builds confidence faster. Large projects create fatigue and increase mistakes. Small projects help you finish quickly and learn more effectively.
A good beginner project should involve simple stitching, visible results, and useful repair.
Best first projects:
- Denim pocket repair
- Jacket elbow patch
- Tote bag patch
- Fabric coaster
- Knee patch repair
Finishing your first project matters. Completion builds motivation. Small practical repairs often teach more than large artistic pieces.
Common Beginner Pattern Planning Mistakes
Many beginner mistakes happen before stitching even begins. Poor patch planning leads to weak repairs and messy visual flow. Traditional boro may look spontaneous, but effective repair still requires practical thinking.
Planning mistakes often include choosing patches that are too small, not overlapping enough damaged fabric, or placing stitches too close together. These problems weaken the repair and reduce durability.
Avoid these mistakes:
- Patch too small
- Weak overlap
- Stitches too dense
- Wrong thread thickness
- Poor fabric match
Good planning creates stronger stitching.
How to Practice Boro Patterns Daily
Boro improves through repetition. Daily short practice sessions are more effective than occasional long sessions. Even 15 minutes builds muscle memory.
Practice on scrap fabric. Focus on one pattern at a time. Repeat until it feels natural. Then move to the next pattern.
Daily practice ideas:
- Running stitch rows
- Parallel line sampler
- Grid sampler
- Patch border practice
- Layered patch test
Boro is not about speed. It is about rhythm. The more often you stitch, the more natural it feels.
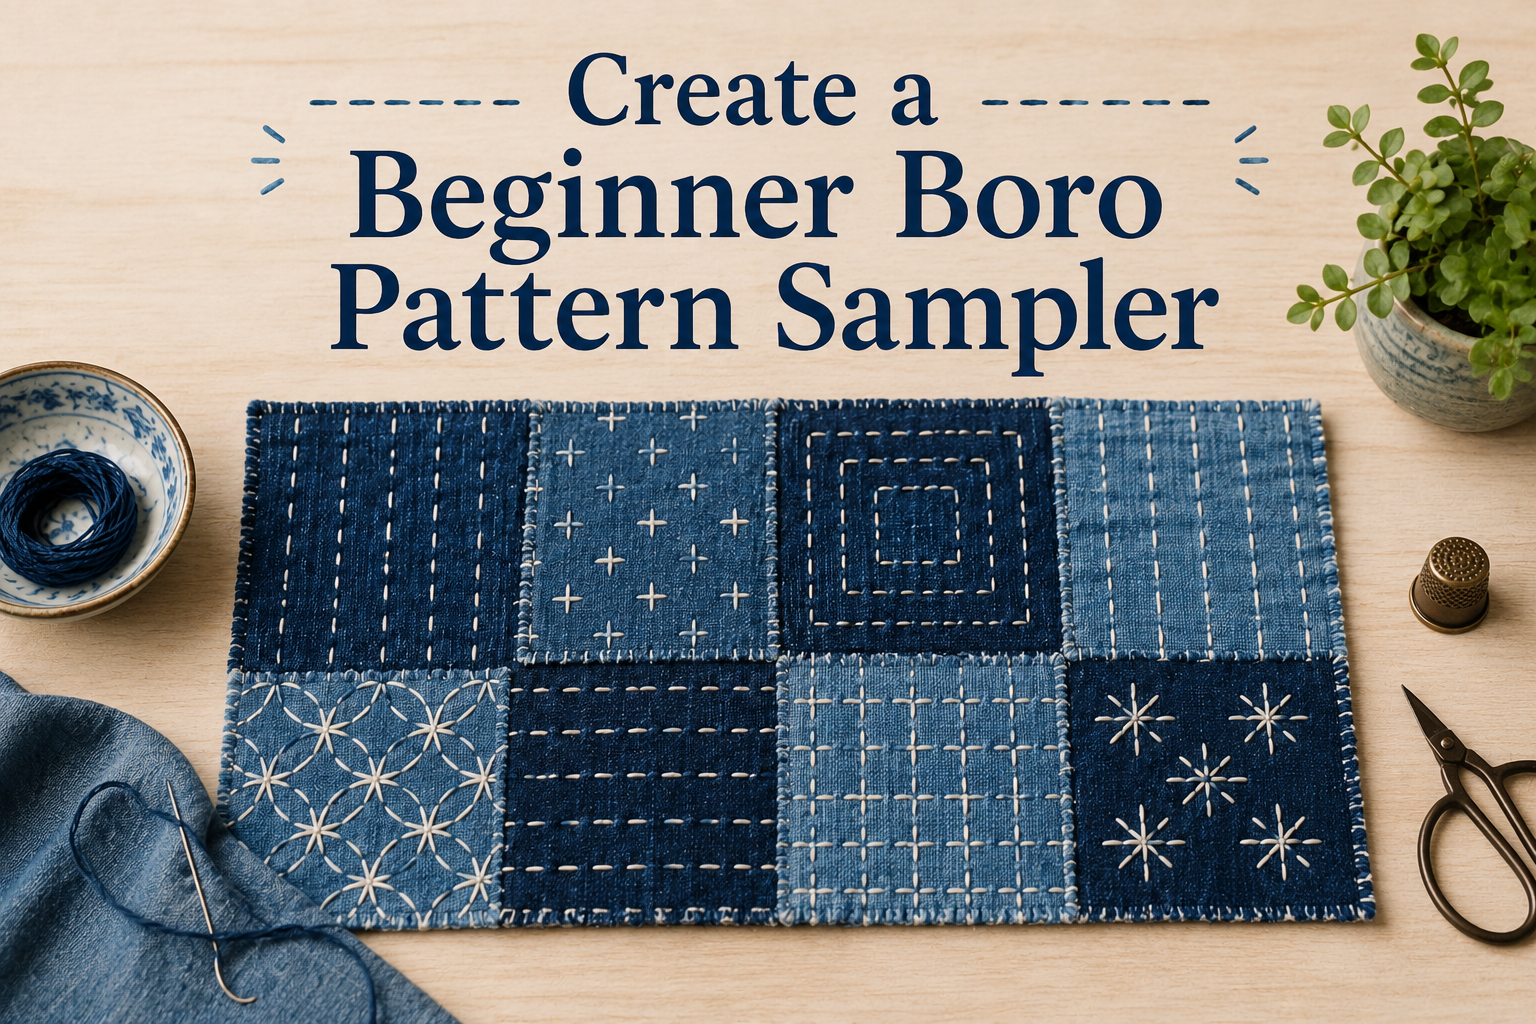
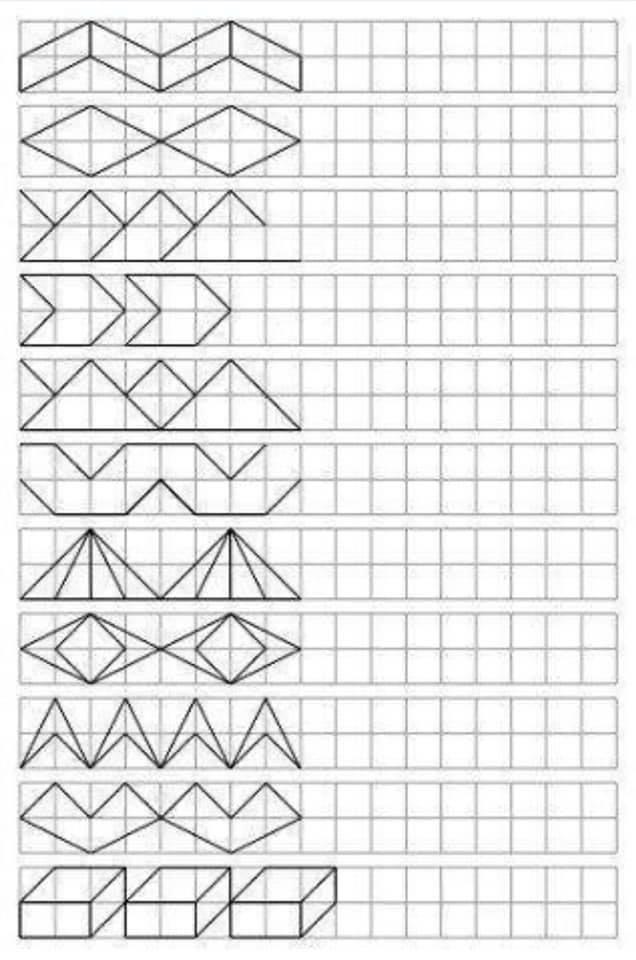
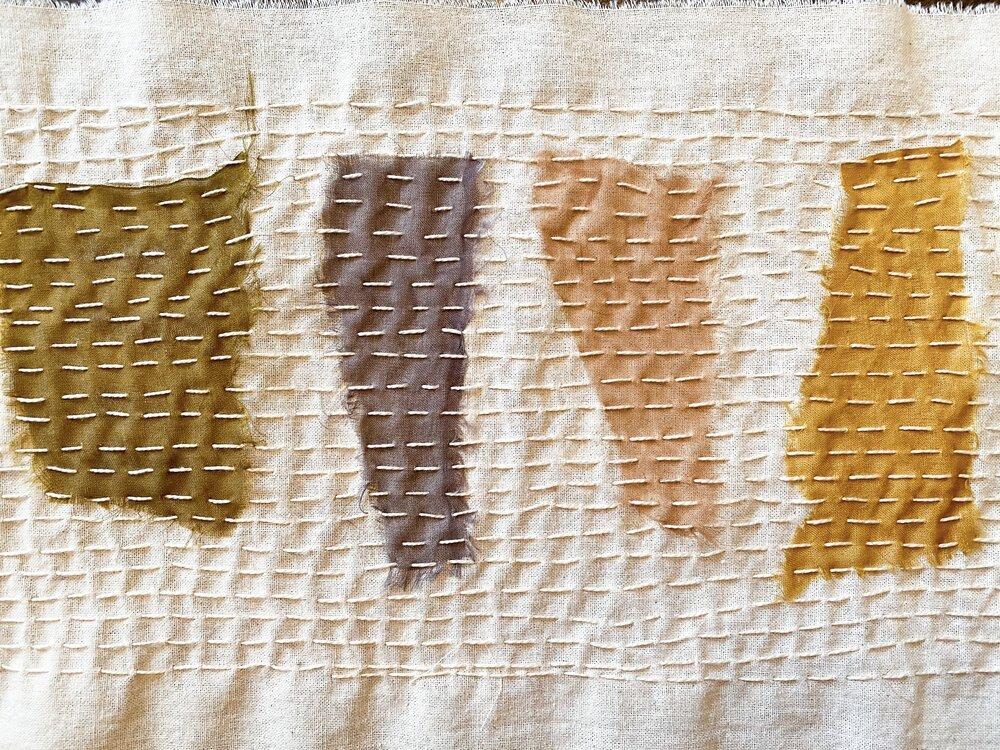
Create a Beginner Boro Pattern Sampler
A boro pattern sampler is one of the fastest ways to improve. Instead of practicing on random scraps, create one fabric panel divided into sections. Each section can hold one pattern type. This builds comparison experience and helps identify your strongest and weakest stitch styles.
A sampler becomes your visual reference for future projects. It also teaches how different patterns behave on the same fabric. This is one of the smartest beginner exercises because it combines practice with progress tracking.
Include these sampler sections:
- Running stitch
- Parallel lines
- Grid pattern
- Cross grid
- Organic pattern
- Border stitch
A sampler builds skill faster than isolated practice.
FAQ Section
What is the easiest boro pattern for beginners?
Running stitch is the easiest because it builds the foundation for all other boro patterns.
Can beginners use old jeans for boro practice?
Yes, denim is one of the best beginner fabrics because it is strong and easy to handle.
Is boro stitching the same as sashiko?
No. Boro focuses on repair while Sashiko focuses more on structured decorative stitching.
Do beginner boro stitches need to be perfect?
No. Imperfection is part of traditional boro aesthetics.
What thread is best for beginner boro stitching?
Sashiko thread or embroidery cotton works best for visible, durable stitches.
How long does it take to learn boro stitching?
Most beginners can build basic stitch confidence within a few days of practice.