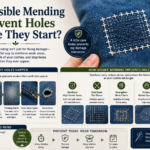
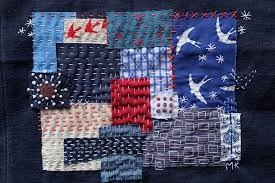
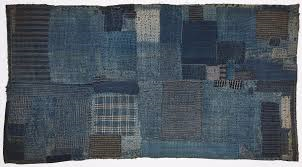
Boro stitching is a traditional Japanese textile repair method built on the idea of reusing, layering, and repairing fabric instead of throwing it away. The word “Boro” translates to “ragged” or “tattered,” but in textile culture, it represents resilience, sustainability, and practical beauty.

Boro started during Japan’s Edo period when fabric was expensive, especially for farming families in northern regions. Clothes were patched repeatedly, layered with scraps, and strengthened using visible stitching. Over time, these garments became visual records of life, work, and repair. Want learn about the history of Japanese Boro Stitching, discover our superior history guide regarding the matter.
Today, Boro has become popular worldwide because of slow fashion and sustainable clothing movements. People use it for repairing denim, jackets, bags, and decorative textile art.
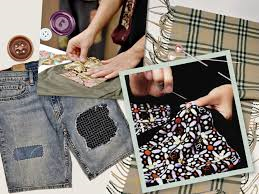
What makes Boro unique is its visible repair style.
Instead of hiding damage, Boro highlights it.
This creates character.
Why people love Boro:
- It extends fabric life
- It reduces waste
- It creates handmade texture
- It makes clothing unique
- It preserves textile history
Unlike machine repair, Boro feels personal.
Each stitch tells a story.
Each patch reflects use.
Learning Boro is not just sewing.
It is learning a repair philosophy.
That philosophy values imperfection, function, and preservation.
Understanding this foundation makes the practical steps easier.
Tools and Materials You Need for Boro Stitching
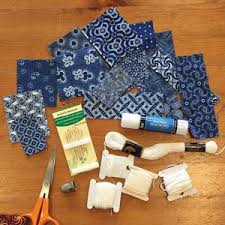
Before starting Boro stitching, gathering the right tools makes the process smoother. Boro is simple compared to many sewing methods, but having the proper materials improves stitching quality and durability.
The good thing is you probably already have most of the materials at home.
The essential Boro toolkit starts with fabric.
Natural fibers work best because they are durable and easy to stitch.
Best fabrics include cotton, denim, linen, and canvas.
Avoid slippery synthetic fabrics.
They can shift while sewing.
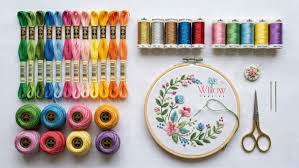
Essential Boro tools:
- Fabric scraps
- Long sewing needles
- Sashiko thread or cotton thread
- Fabric scissors
- Pins or clips
- Fabric chalk
- Thimble
- Iron
Needles matter more than beginners think.
Long needles help create smooth running stitches.
Short needles slow athe process.
Thread thickness affects appearance.
Thicker thread creates stronger visible texture.
Thin thread creates subtle repair.
Fabric scissors should be sharp.
Clean cuts improve patch fitting.
Pins help stabilize layers.
This reduces fabric movement.
A thimble helps when stitching through multiple layers.
Especially denim.
Preparation matters.
Better tools make better Boro.
And better Boro repairs last longer.
How to Choose the Best Fabric for Your Specific Boro Project
Choosing fabric for Boro is not just about using old scraps. Different projects need different fabric strengths, flexibility levels, and wear resistance. A denim knee repair needs much stronger fabric than a decorative wall piece. Using the wrong fabric can shorten the life of the repair or make stitching harder.
A useful decision rule is matching the patch fabric to the purpose of the item. Clothing repairs usually need movement and durability, while art panels can focus more on appearance.
Best fabric choices by project:
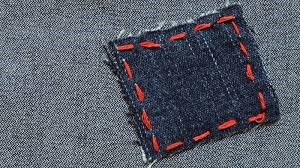
- Jeans repair → denim or canvas
- Jacket elbow repair → medium-weight cotton
- Bags → heavy canvas or denim
- Shirts → lightweight cotton or linen
- Decorative textile art → layered indigo cotton
Fabric weight matters because heavier fabrics resist wear longer. But if the patch is too heavy compared to the base fabric, it can pull awkwardly and create stress.
The best Boro repairs feel balanced.
Strong enough to protect.
Flexible enough to wear.
That balance starts with fabric choice.
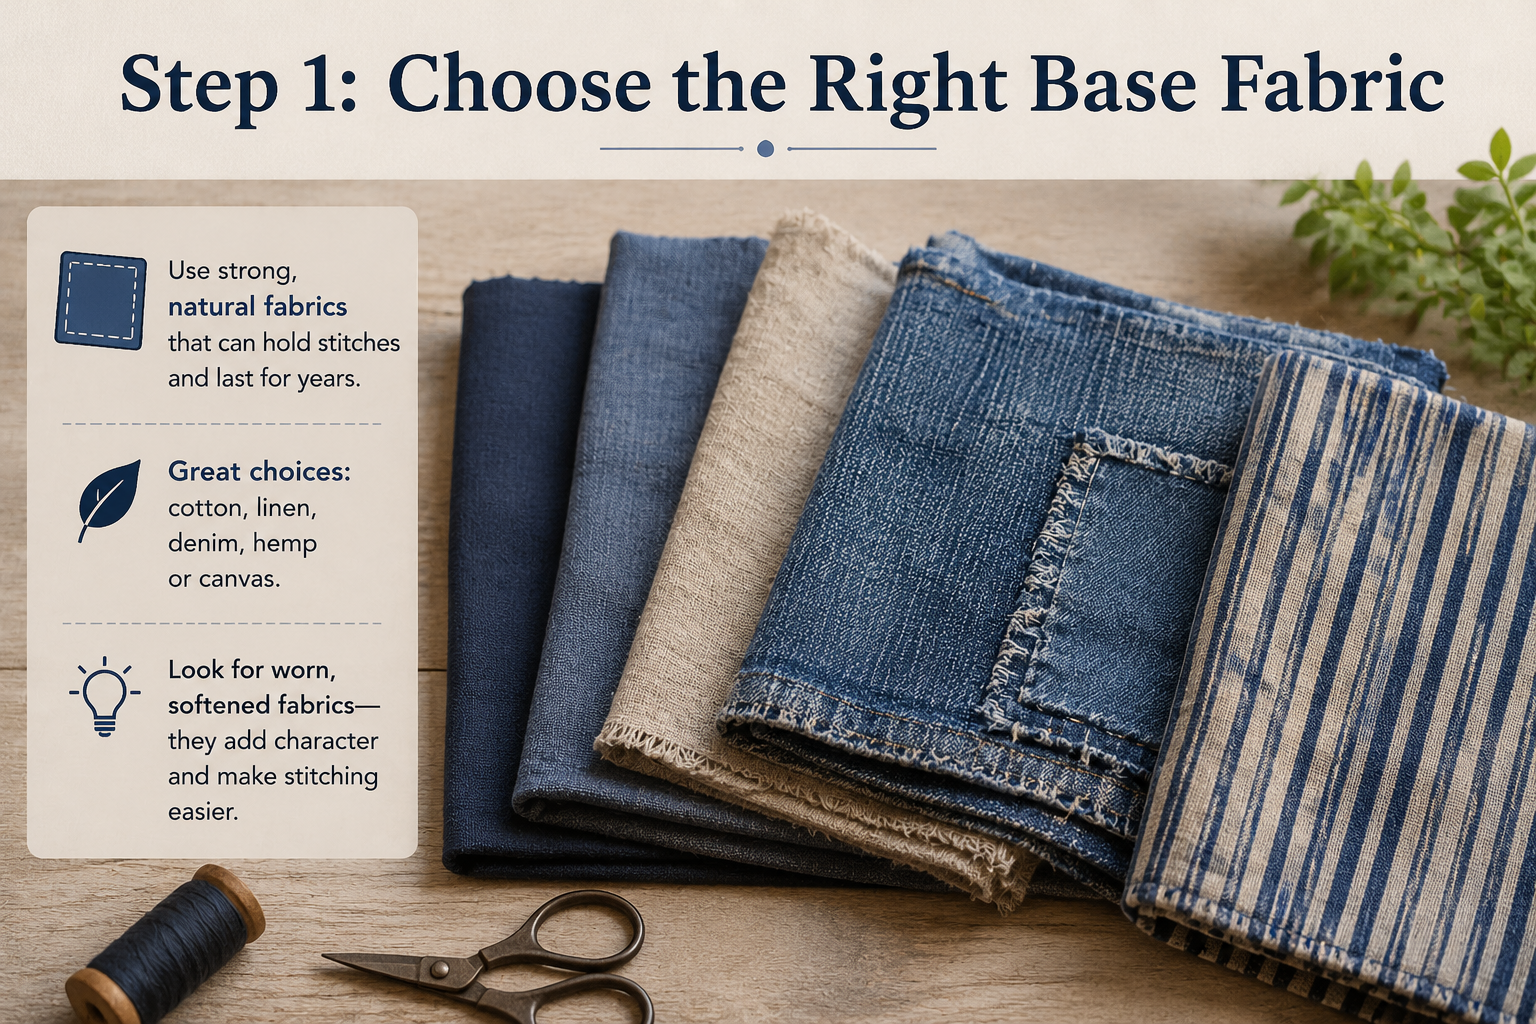
Step 1: Choose the Right Base Fabric
The base fabric is the main item you want to repair or decorate.
This could be old jeans, jackets, bags, shirts, aprons, or quilts.
Choosing the right base is critical because weak fabric affects repair quality.
Look for garments with structural strength.
Even if there is damage.
The surrounding fabric must still hold stitches.
Denim is the best beginner option because it is thick and forgiving.
Cotton jackets are also excellent.
Before choosing, inspect the fabric carefully.
Check:
- Thin spots
- Tears
- Fraying edges
- Weak seams
- Stretch damage
Wash the garment first.
Clean fabric is easier to stitch.
Dirt weakens thread over time.
Ironing helps flatten repair zones.
This improves patch alignment.
Think about wear zones.
Common repair areas:
- Knees
- Elbows
- Pocket corners
- Seat area
- Hemline
The stronger the foundation, the longer the Boro lasts.
Beginners should avoid very thin fabric.
Thin material bunches easily.
It also tears faster.
Decision rule:
If the surrounding fabric feels strong enough to support new stitches, it is a good Boro base.
Starting with strong fabric builds confidence.
Step 2: Select the Best Patch Fabric
Patch fabric determines both repair strength and final appearance.
Choosing the wrong patch weakens the entire repair.
Good Boro patch fabric should complement the base fabric.
Not overpower it.
Patch fabric should be slightly stronger than the damaged section.
Natural fabrics work best.
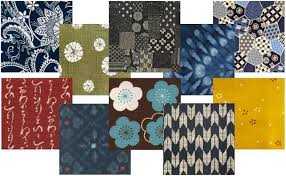
Traditional Boro often uses indigo-dyed cotton.
Modern makers use denim, linen, and canvas.
Good patch choices:
- Old jeans
- Indigo cotton
- Linen scraps
- Canvas pieces
- Vintage shirts
Avoid stretchy patches.
They distort stitching lines.
Patch size matters.
Never patch only the damaged hole.
Always extend beyond it.
At least one inch around the damage is ideal.
This spreads stress.
Patch design also matters.
Some people use matching colors.
Others prefer contrast.
Layering multiple patch tones creates authentic Boro texture.
Patch strategy:
- Large structural patch first
- Medium reinforcement patch second
- Small decorative patch last
This layered method increases durability.
It also creates the classic Boro look.
Good patching is strategic.
Not random.
Strong patches create long-lasting repairs.
Best Thread Types for Boro Stitching (And When to Use Them)
Thread selection changes both the appearance and durability of Boro stitching. Many beginners use random sewing thread, but thread thickness and fiber strength affect long-term repair quality.
Traditional Boro often uses thick cotton thread because it creates visible texture and strong reinforcement. Modern makers sometimes use embroidery thread for decorative contrast.
Use thread based on fabric thickness:
- Thin cotton fabric → standard cotton thread
- Medium fabric → embroidery thread
- Heavy denim → Sashiko thread
- Decorative Boro → colored embroidery thread
Thicker thread creates stronger visual impact.
Thinner thread blends more.
Thread should support the repair, not dominate it.
Another important factor is softness.
Stiff thread can distort fabric.
Good Boro thread moves naturally with the textile.
A strong repair depends on strong thread.
Never underestimate this decision.
Step 3: Position the Patch Correctly
Patch placement affects both comfort and strength.
A poorly positioned patch can wrinkle, pull, or feel uncomfortable.
There are two main patching methods.
Underpatching and overpatching.
Underpatching means placing fabric underneath.
This gives a cleaner surface.
Overpatching means placing fabric on top.
This creates visible layered texture.
Both methods work.
Choose based on your goal.
Use underpatching for:
- Hidden support
- Internal reinforcement
- Cleaner outer appearance
Use overpatching for:
- Decorative effect
- Stronger visible repair
- Layered texture
Secure the patch using pins or clips.
Do not rely on holding it by hand.
Fabric shifts.
Smooth the patch before pinning.
Remove wrinkles.
Check flexibility.
Move the fabric naturally.
If it folds well, your patch is positioned correctly.
Poor positioning creates stress points.
Those stress points become future tears.
Good Boro starts with proper patch placement.
Take your time here. It improves everything later.
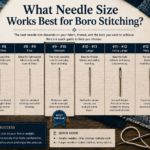
How to Choose the Right Needle for Boro Stitching
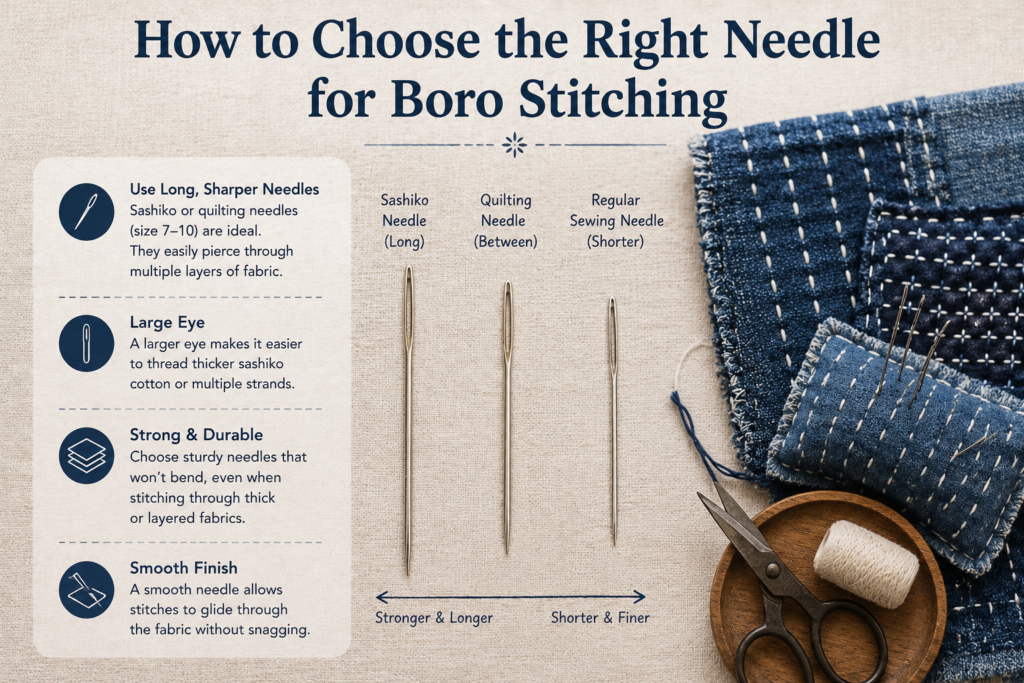
Needle choice affects speed, comfort, and stitch quality. Many beginners struggle not because of technique, but because they are using the wrong needle.
Long needles are usually better for Boro because they allow multiple running stitches in one motion. This creates smoother stitching and better rhythm.
Needle selection guide:
- Denim → thick long needle
- Cotton → medium needle
- Linen → sharp fine needle
- Heavy layers → reinforced Sashiko needle
Needle thickness matters.
A thick needle makes larger holes.
A thin needle bends easier.
The goal is balance.
Strong enough to push through layers.
Thin enough for control.
Using the correct needle reduces hand fatigue and improves stitch consistency.
Better tools improve better habits.
That matters in Boro.
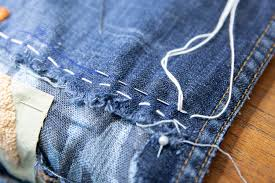
Step 4: Start the Running Stitch Properly
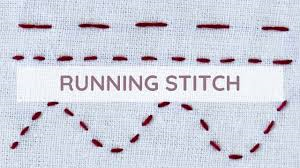
The running stitch is the heart of Boro stitching.
It is simple but powerful.
This stitch holds layers together and creates texture.
A running stitch moves in and out of the fabric repeatedly.
It creates visible lines.
Traditional Boro uses this because it is strong and efficient.
Start by threading your needle.
Use about 20 inches of thread.
Longer thread tangles.
Too short wastes time.
How to do a running stitch:
- Bring needle up
- Push needle down
- Repeat evenly
- Keep spacing consistent
Ideal spacing:
- Stitch length: 3–5 mm
- Gap length: 3–5 mm
Consistency matters.
Perfect straightness does not.
Boro embraces imperfection.
Focus on rhythm.
Not perfection.
Do not pull thread too tightly.
This creates puckering.
Loose thread causes weak repair.
Balanced tension creates better results.
Work in one direction.
Do not jump randomly.
This creates stronger stitch structure.
The running stitch may seem simple.
But mastering it builds the entire Boro foundation.
Everything depends on this skill.
Best Boro Stitch Patterns for Different Repairs
Not all Boro stitching uses the same stitch layout. Stitch pattern selection changes durability, flexibility, and appearance.
Running stitch is the foundation, but there are many variations.
Best Boro stitch patterns:
- Straight parallel lines
- Grid stitching
- Box reinforcement stitching
- Wave stitching
- Random organic stitching
Parallel lines work best for long tears.
Grid stitching works better for large patches.
Box stitching is ideal for corner reinforcement.
Wave stitching creates decorative movement.
Random stitching creates artistic texture.
The best pattern depends on the repair.
Function first.
Style second.
Strong stitch strategy improves durability significantly.
Choosing the right pattern is part of advanced Boro.
Step 5: Reinforce the Fabric with Multiple Rows
One row of stitching is rarely enough.
Boro gains strength through repetition.
Multiple stitch lines spread tension across the patch.
This prevents future tearing.
Think of stitches like structural beams.
More beams create more support.
Use parallel lines across the patch.
Keep spacing even.
Popular reinforcement styles:
- Parallel lines
- Crosshatch grids
- Box stitching
- Directional stitching
Parallel rows are easiest for beginners.
Crosshatch creates stronger hold.
Box stitching works for corners.
High-stress zones need extra reinforcement.
Examples:
- Knees
- Elbows
- Pockets
Do not overcrowd stitches.
Too many stitches reduce flexibility.
Fabric should still move naturally.
Good reinforcement balances strength and softness.
Check the patch while stitching.
If it shifts, reposition.
Stability matters.
The goal is long-term wear.
Not short-term repair.
Multiple stitch rows transform weak fabric into durable wearable fabric.
This is where Boro becomes functional art.
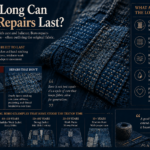
How to Make Boro Repairs Last for Years
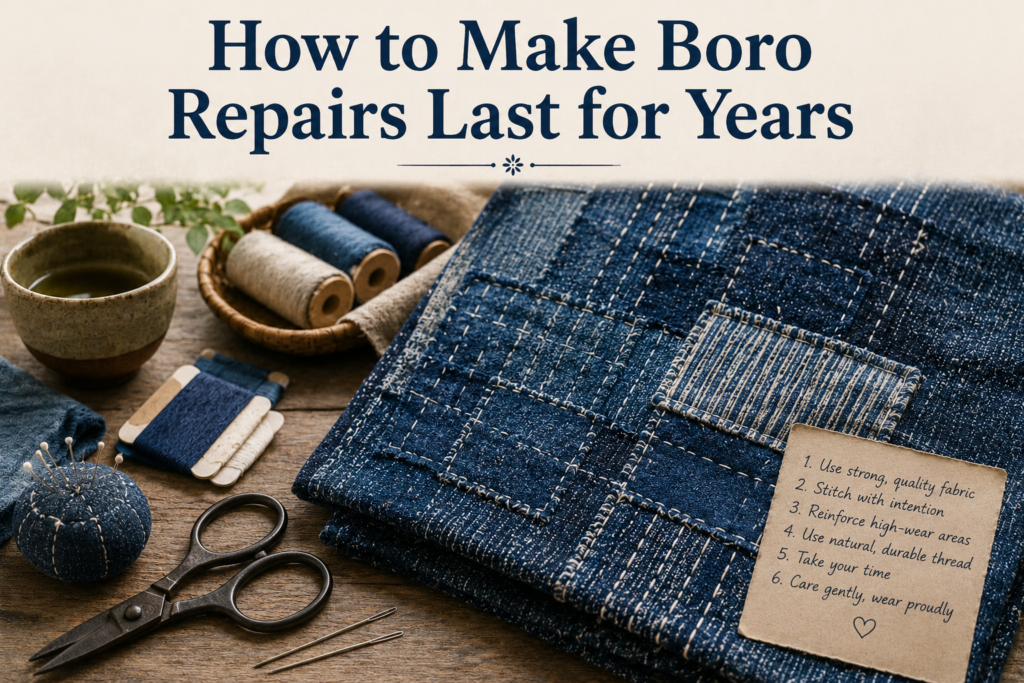
A good Boro repair should survive years of wear, not weeks. Durability depends on more than stitching. It depends on how stress moves through the fabric.
High-stress zones need extra planning.
These areas include:
- Knees
- Elbows
- Pockets
- Seat areas
To increase repair life:
- Use wider patches
- Stitch beyond the damage zone
- Reinforce corners
- Layer weak spots
Small repairs fail faster because stress concentrates in one area.
Larger repairs spread stress.
That improves longevity.
Always think beyond the hole.
Repair the surrounding weakness too.
That is the difference between cosmetic repair and structural repair.
Strong Boro is strategic.
Not reactive.
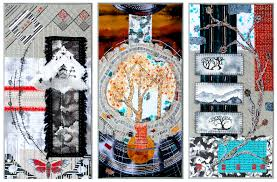
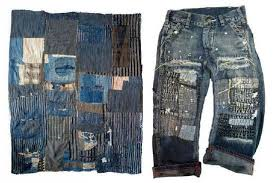
Step 6: Add Layers for Authentic Boro Texture
Layering is what makes Boro visually rich.
Traditional Boro garments often contain many layers built over years.
Each repair becomes part of the textile’s history.
Modern Boro can recreate this.
Layering improves durability.
It also creates depth.
Think of layers as repair history.
Even if new.
Good layering sequence:
- Base fabric
- Main patch
- Reinforcement patch
- Decorative patch
Each layer serves a purpose:
Structural first.
Decorative later.
Benefits of layering:
- Stronger repair
- Better wear resistance
- Richer texture
- More visual depth
Avoid random stacking:
Each patch should support the structure.
Layer edges can overlap.
This creates beautiful complexity.
Use contrasting tones for texture.
Traditional indigo shades work best.
Layering turns repair into textile art.
This is where Boro becomes expressive.? Not just practical.
How Many Fabric Layers Should You Use in Boro?
Layering creates the signature Boro texture, but too many layers can make clothing stiff and uncomfortable.
The ideal number of layers depends on fabric purpose.
General layering guide:
- Light shirts → 2 layers
- Jackets → 2–3 layers
- Jeans → 3–4 layers
- Bags → 4+ layers
Too many layers create bulk.
Too few layers reduce durability.
Balance matters.
Ask yourself:
Will this bend naturally?
Can I wear it comfortably?
Does it feel too heavy?
Traditional Boro often developed layers over time.
Modern Boro creates them intentionally.
Intentional layering creates better control.
Better control creates better repair.
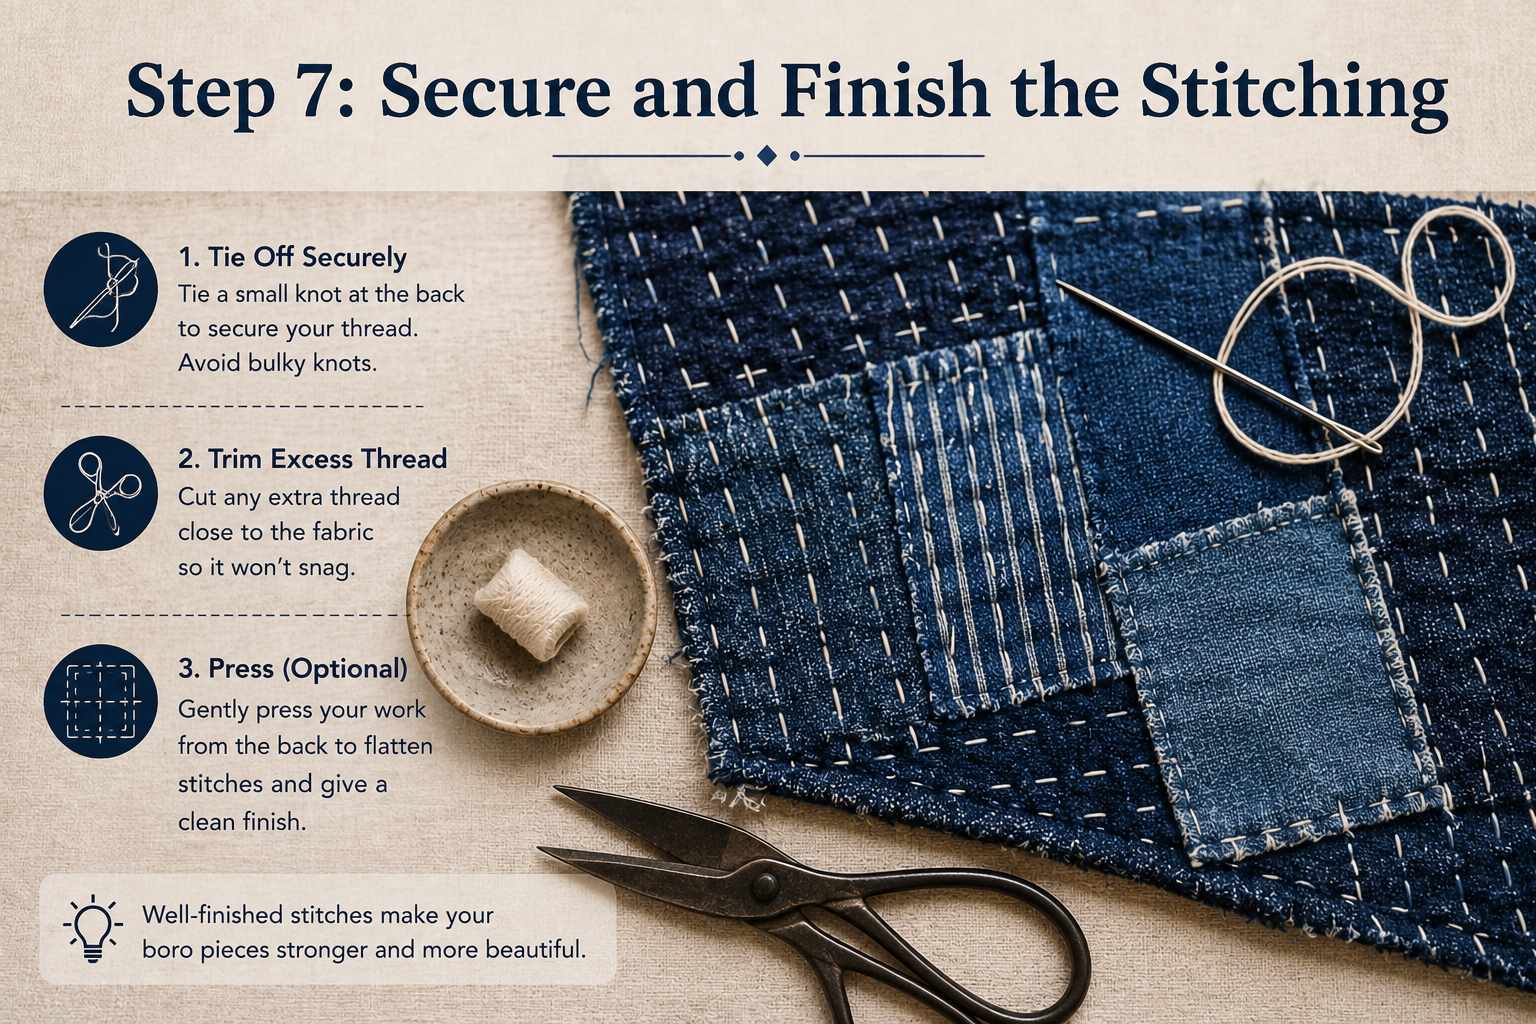
Step 7: Secure and Finish the Stitching
Finishing properly prevents your repair from unraveling.
Many beginners rush the final step.
That shortens repair life.
Finishing properly prevents your repair from unraveling.
Once stitching is complete, secure thread ends.
Traditional methods often hide knots inside layers.
Modern methods use simple locking stitches.
Ways to finish:
- Hidden knot
- Backstitch lock
- Thread burying
Trim excess thread.
Do not cut too close.
Leave slight allowance.
Check every edge.
Look for lifting corners.
Weak corners fail first.
Test the repair.
Gently stretch fabric.
Move it naturally.
Things to inspect:
- Patch stability
- Stitch tension
- Edge security
- Flexibility
Good finishing creates long-lasting repair.
Bad finishing wastes effort.
Strong finishing is the difference between temporary repair and durable Boro.
Take extra time.
It matters.
Common Mistakes Beginners Make in Boro Stitching
Most Boro mistakes are fixable.
That is part of learning.
But knowing them early helps.
Biggest beginner mistakes:
- Pulling thread too tight
- Using weak patch fabric
- Choosing tiny patches
- Uneven stitch spacing
- Ignoring fabric grain
Tight stitches create puckering.
Loose stitches create weak repairs.
Patch size is often underestimated.
Always patch beyond damage.
Weak patch fabric fails quickly.
Another mistake is rushing.
Boro is slow.
Slow stitching creates stronger work.
Poor thread choice also matters.
Thin thread may break faster.
Use durable cotton thread.
Fabric grain matters too.
Ignoring grain causes twisting.
Boro improves through repetition.
Mistakes teach structure.
Do not chase perfection.
Chase durability.
That creates better Boro.
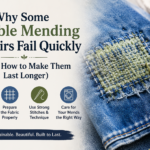
Why Some Boro Repairs Fall Apart After Washing
Many Boro repairs fail after washing because the structural repair was incomplete. Washing tests the flexibility and strength of every stitch.
Common causes of failure:
- Weak thread
- Loose knots
- Small patches
- Poor edge stitching
- Weak base fabric
Water adds movement.
Movement tests repair strength.
If patch edges are weak, they lift.
If thread tension is inconsistent, stitches loosen.
To prevent washing damage:
- Reinforce edges well
- Use strong cotton thread
- Avoid tiny patches
- Air dry instead of machine dry
Good Boro should survive normal washing.
If it cannot, the structure needs improvement.
Washing reveals repair quality.
Best Beginner Projects for Practicing Boro Stitching
Starting with simple projects helps build skill.
Not every project should be complex.
Good beginner projects are small and manageable.
Best beginner Boro projects:
- Jeans knee repair
- Tote bag patching
- Jacket elbow reinforcement
- Pocket repair
- Small fabric art panels
Jeans are ideal.
They are durable.
Mistakes are less noticeable.
Tote bags are excellent for practice.
Flat surfaces are easier to stitch.
Jackets introduce curved stitching.
This builds skill.
Start with practical repairs.
Wear them.
Observe how stitches age.
That teaches more than theory.
Good beginner project goals:
- Learn stitch consistency
- Understand patch strength
- Practice tension control
- Build confidence
Boro is learned by doing.
Not reading.
Start simple.
Improve gradually.
That is the authentic path.
Beginner to Advanced: Best Boro Projects by Skill Level
Not every Boro project has the same difficulty. Starting at the right level helps build skill faster.
Beginner Boro projects:
- Jeans patch repair
- Tote bag repair
- Pocket reinforcement
Intermediate projects:
- Jacket elbow patching
- Layered denim repair
- Decorative patchwork panels
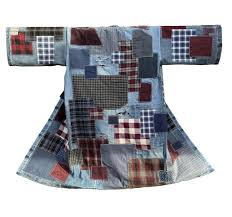
Advanced projects:
- Full jacket restoration
- Quilt-style Boro layering
- Multi-layer textile reconstruction
Progressing slowly builds stronger technique.
Each level teaches something new.
Beginners learn stitch rhythm.
Intermediate makers learn structural layering.
Advanced makers learn design and repair strategy.
Good Boro skill develops in stages.
Do not skip stages.
That creates better long-term craftsmanship.
Boro stitching vs Visible mending: What’s the Real Difference?
Many people confuse Boro with Visible mending, but they are not identical.
Visible mending is a broad repair category.
Boro is a specific Japanese repair tradition.
Visible mending can include:
- embroidery
- patching
- darning
- artistic repair
Boro specifically focuses on:
- layered patching
- running stitches
- repeated reinforcement
- textile preservation
All Boro is visible mending.
Not all visible mending is Boro.
Understanding this difference improves technique and authenticity.
It also helps users choose the right repair style for their project.
Boro is more structural.
Visible mending can be more decorative.
That distinction matters.
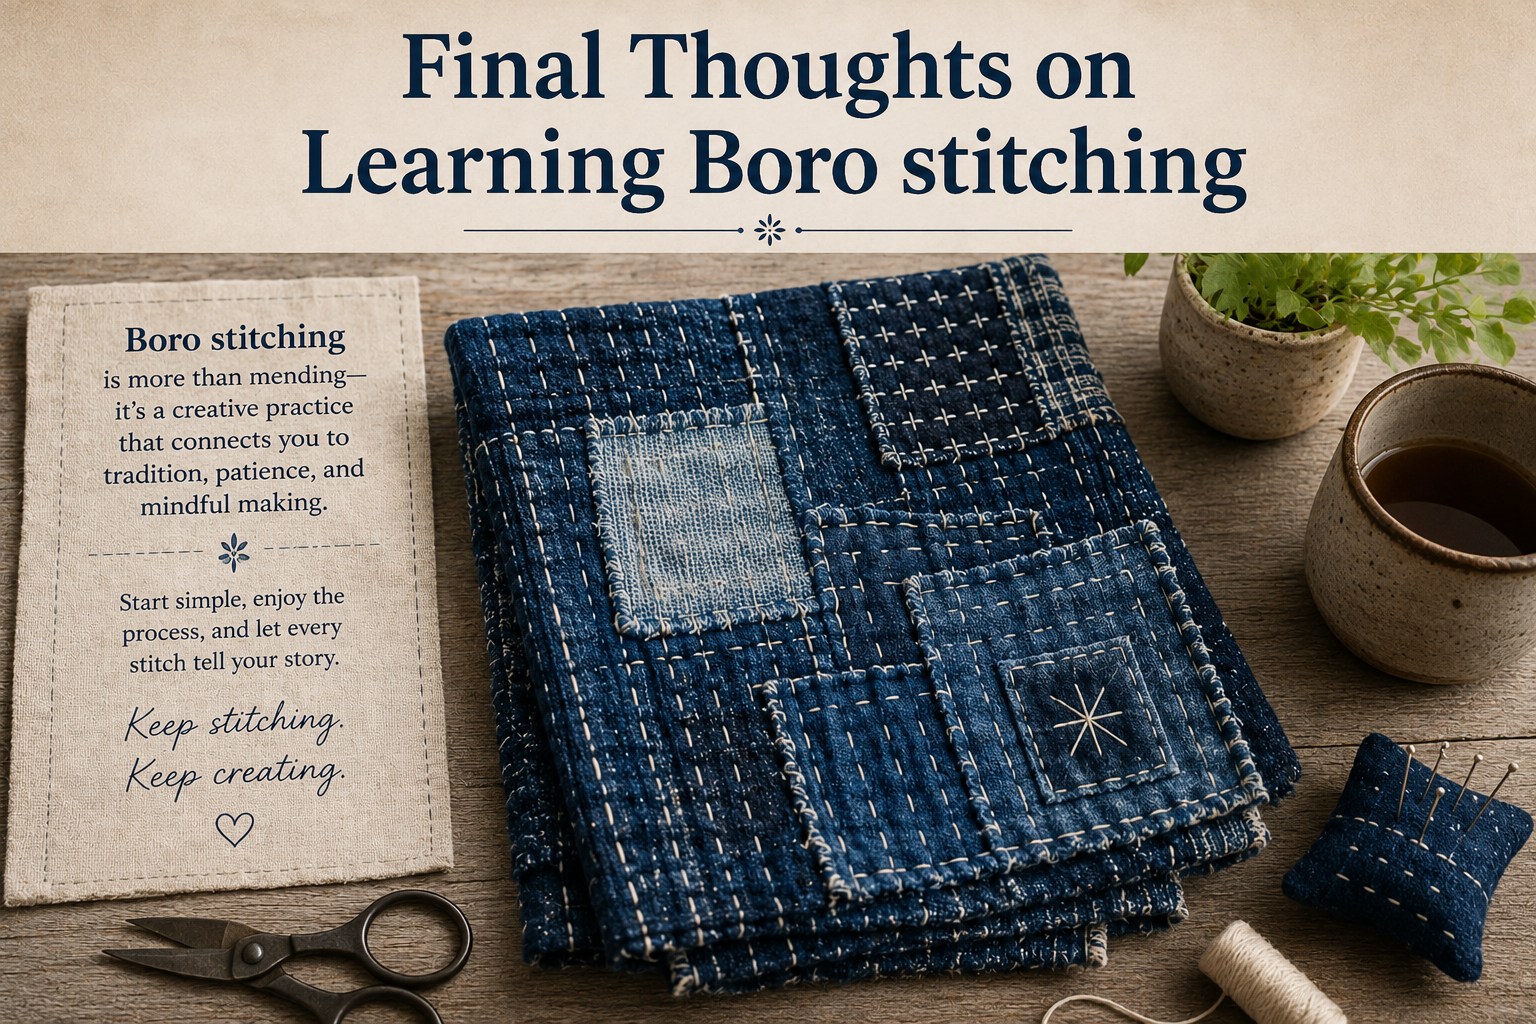
Final Thoughts on Learning Boro stitching
Learning Boro stitching is learning how to respect fabric.
It teaches patience.
It teaches repair.
It teaches sustainability.
The process is simple:
Choose fabric.
Choose patches.
Position carefully.
Stitch consistently.
Reinforce intelligently.
Finish properly.
But the real skill develops through repetition.
Every project improves your understanding.
Every repair teaches something.
Boro is not about flawless stitching.
It is about useful stitching.
Visible repair gives clothing history.
That history makes it unique.
In a world of fast fashion, Boro brings value back to old fabric.
It slows things down.
It preserves.
It transforms.
That is why Boro matters.
And why learning it is worth your time.
FAQs
Is Boro stitching beginner-friendly?
Yes, because it mainly uses simple running stitches.
What is the best fabric for Boro?
Denim and cotton are the best beginner choices.
Is Boro the same as Sashiko?
No. Boro is the repair philosophy, while Sashiko is the stitching method.
Can I repair jeans with Boro?
Yes, jeans are one of the best Boro practice projects.
How long does Boro repair last?
A strong Boro repair can last for years with proper care.
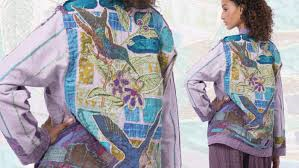
Can Boro be decorative?
Yes, many people use Boro as wearable textile art.