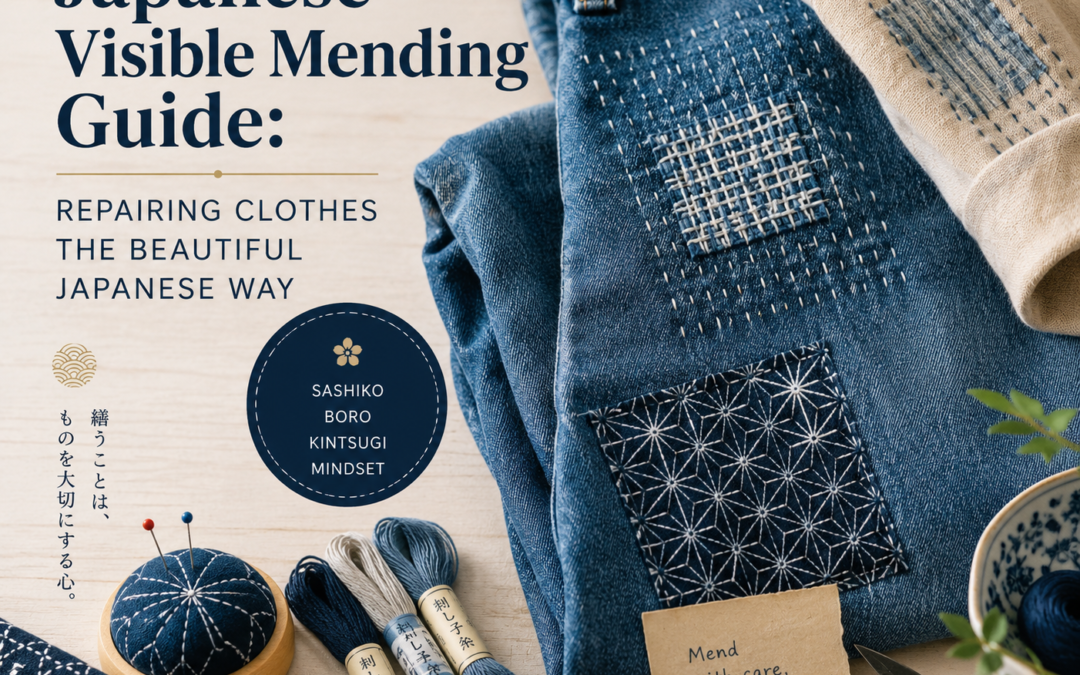
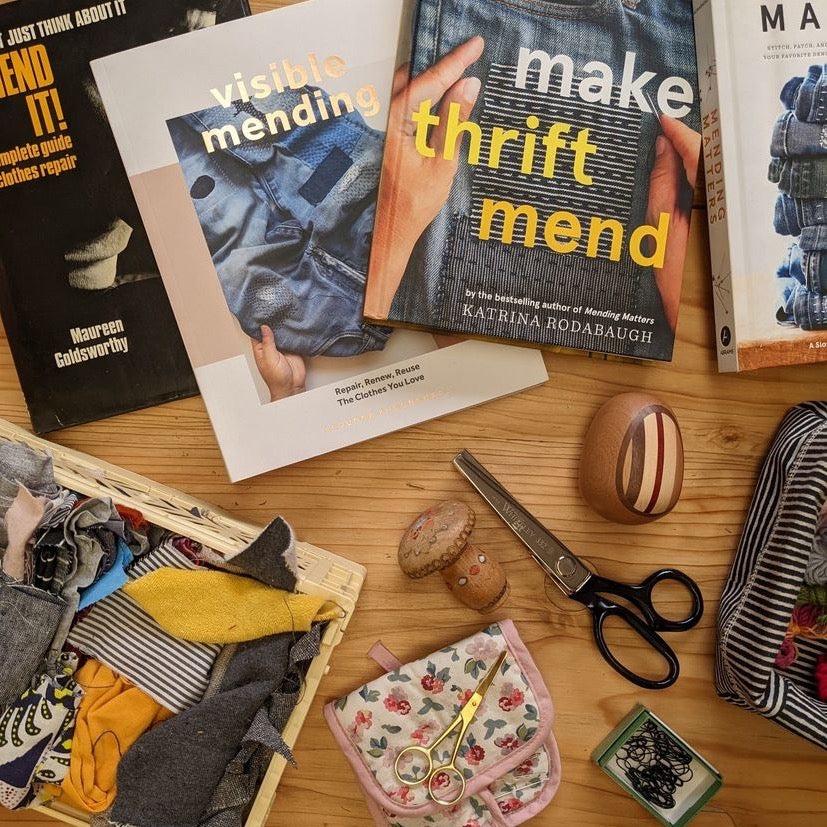
Japanese visible mending is more than repairing damaged clothes. It is a philosophy of preservation, creativity, and sustainability. Unlike modern repair methods that aim to hide damage, Japanese visible mending embraces it. The repaired area becomes part of the garment’s story rather than something to conceal.
This method is deeply connected to Boro Stitching and Sashiko, two traditional Japanese textile practices that evolved out of necessity. In old Japan, fabric was expensive, and families repaired clothing repeatedly to extend its life. Over time, those practical repairs became an art form.
Today, visible mending is growing because people want sustainable alternatives to fast fashion. Instead of throwing away torn jeans, ripped jackets, or worn shirts, people repair them beautifully.
Japanese visible mending offers both function and style.
It strengthens weak fabric.
It extends garment life.
It adds handmade personality.
It supports sustainability.
It teaches patience and craftsmanship.
In this guide, you will learn the history, tools, techniques, and beginner-friendly methods to start visible mending using authentic Japanese principles.
What you’ll learn:
- Difference between Boro and Sashiko
- Tools for visible mending
- Step-by-step repair process
- Best fabrics and threads
- Common mistakes to avoid
What Is Japanese Visible Mending?
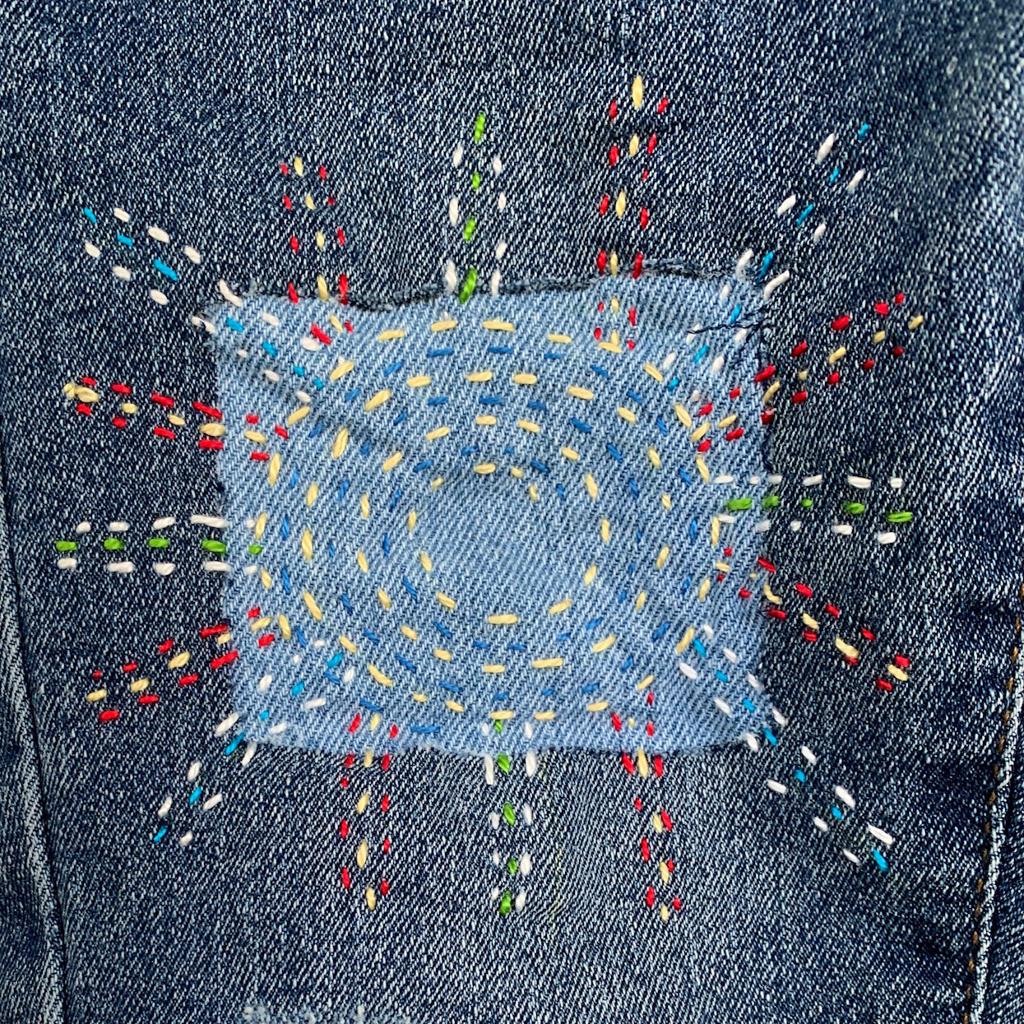
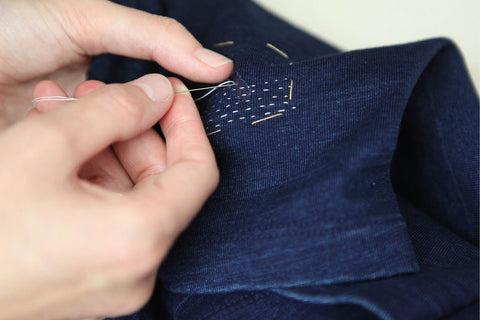
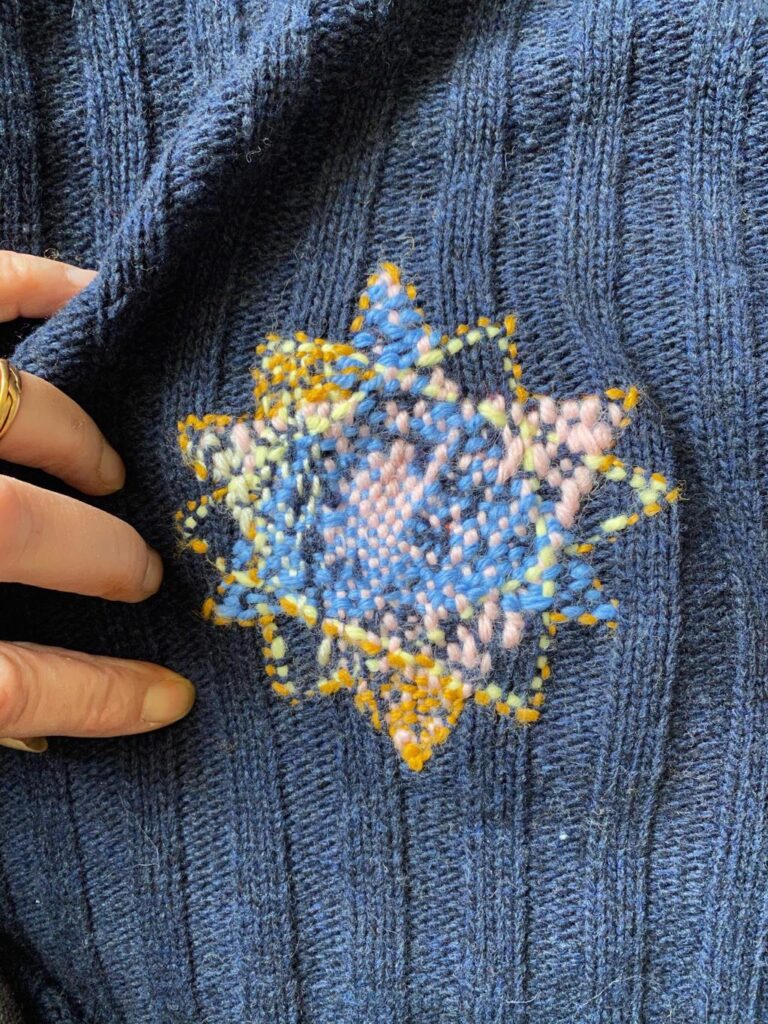
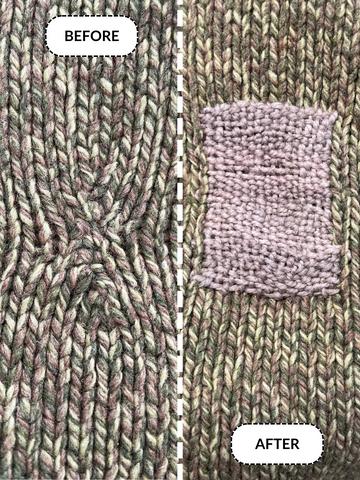
Visible Mending is the practice of repairing fabric in a way that remains intentionally visible. Instead of blending the repair into the original fabric, the repair is highlighted through contrasting thread, decorative stitching, or layered patches.
Japanese visible mending focuses on both durability and beauty. It treats damage as part of the object’s life story. This approach reflects the Japanese philosophy of Kintsugi, where broken things become more valuable after repair.
The core idea is simple: damage does not reduce value.
It creates character.
A ripped knee in jeans becomes an opportunity for artistic stitching. A torn elbow can become a layered fabric patch with geometric patterns.
Traditional visible mending usually includes:
- Reinforcement stitching
- Fabric patching
- Decorative stitching patterns
- Layered repairs
- Structural strengthening
Unlike regular sewing repairs, visible mending often makes the repaired area stronger than before.
This makes it useful for:
- Jeans
- Jackets
- Shirts
- Bags
- Workwear
For beginners, visible mending is one of the easiest ways to enter Japanese textile arts because it combines practical sewing with artistic freedom.
Key idea:
Repair is not hiding.
Repair is honoring.

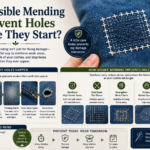
How to Tell If a Garment Is Worth Mending
Not every damaged garment should be repaired. One of the smartest skills in Visible Mending is knowing whether the fabric still has enough strength to support a repair. Many beginners patch holes only to see the surrounding fabric tear again weeks later. The reason is simple: they repaired the hole but ignored the fabric around it.
Start by checking the strength of the surrounding cloth. Gently stretch the damaged area. If the fabric feels thin, brittle, or overly soft, the structural integrity may already be compromised. Look at the weave. If threads are separating across a wider area than the visible hole, you need a larger reinforcement zone.
A garment is usually worth mending if:
- the surrounding fabric is strong
- seams are still stable
- the damage is localized
- the material has sentimental or functional value
It may not be worth repairing if:
- fabric tears easily by hand
- multiple weak areas exist
- seams are failing everywhere
- the textile has become fragile from age
Think beyond the hole.
Repair the strength.
Not just the damage.
Good Japanese mending starts with honest fabric assessment.
The History of Japanese Visible Mending
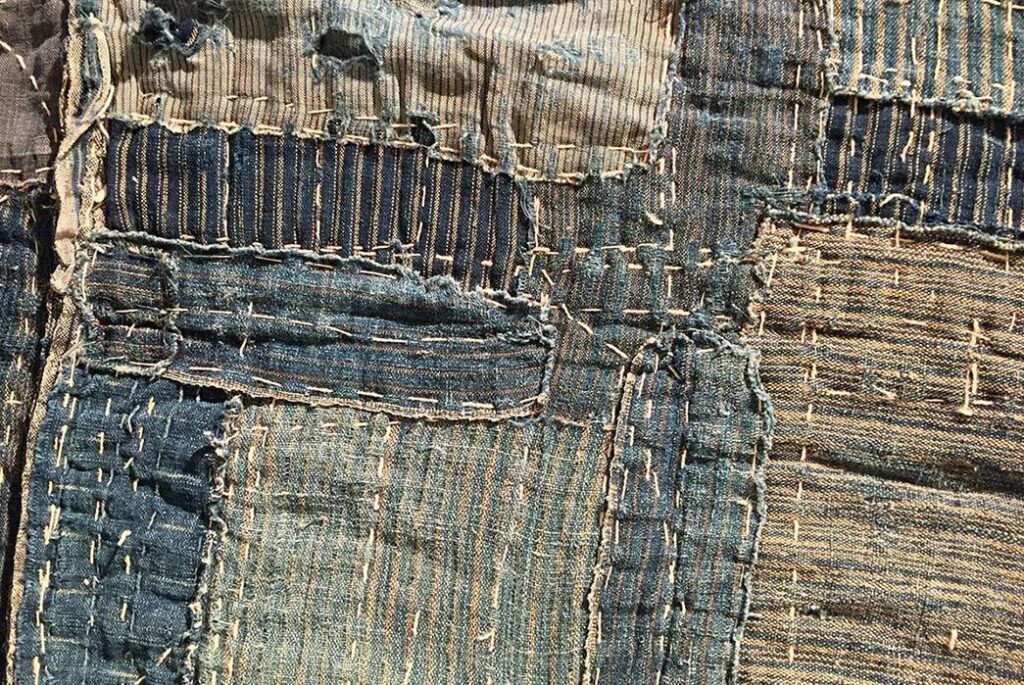
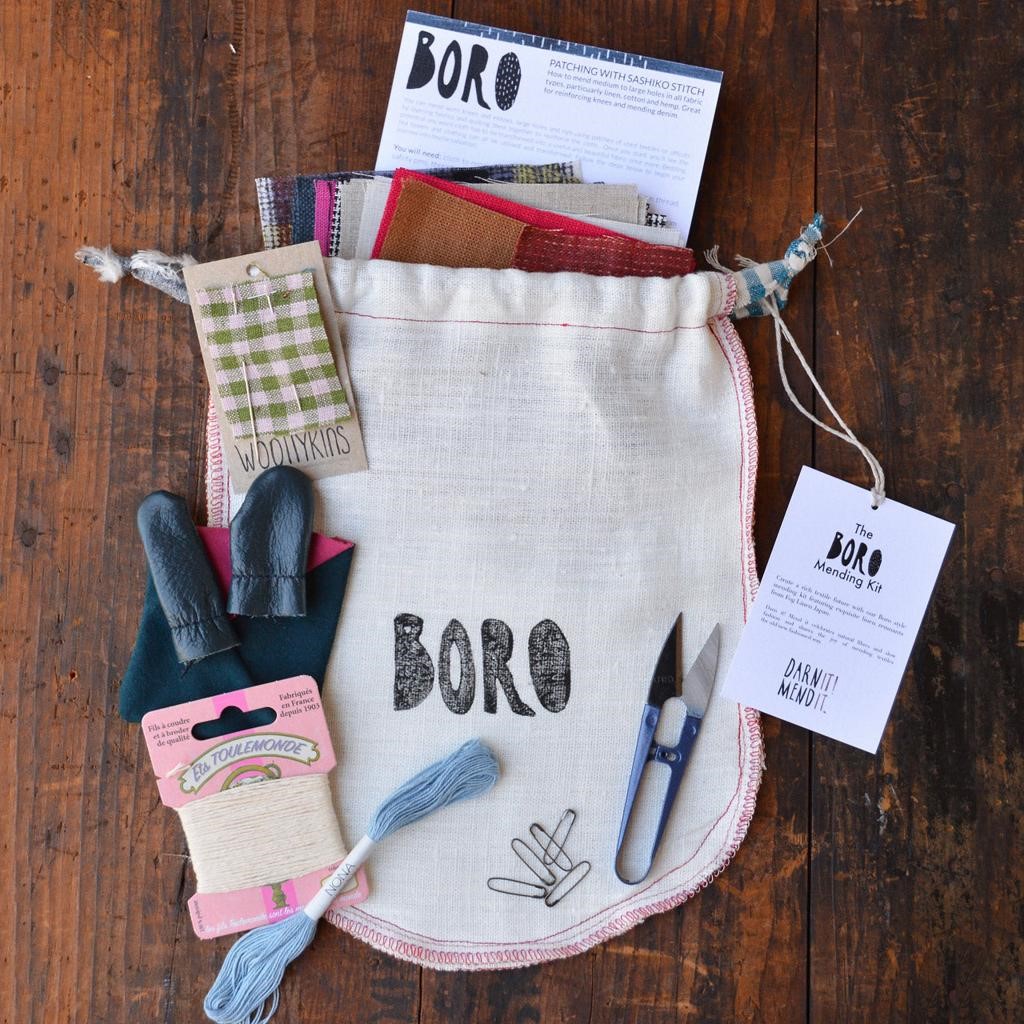
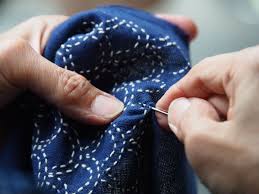
Japanese visible mending has roots in poor rural communities during the Japan Edo period. Cotton was precious, and people could not afford waste. Clothes were patched repeatedly using scraps of old fabric.
This created Boro Stitching.
Boro means “ragged” or “tattered,” but today it represents resilience and beauty.
Farmers layered textiles together to create stronger garments for harsh winters and labor-intensive work. These layers were held together using Sashiko stitching.
Over generations, these techniques evolved.
What started as survival became tradition.
What started as necessity became art.
Key historical reasons visible mending developed:
- Fabric scarcity
- Cold climates
- Manual labor demands
- Family textile preservation
- Limited material access
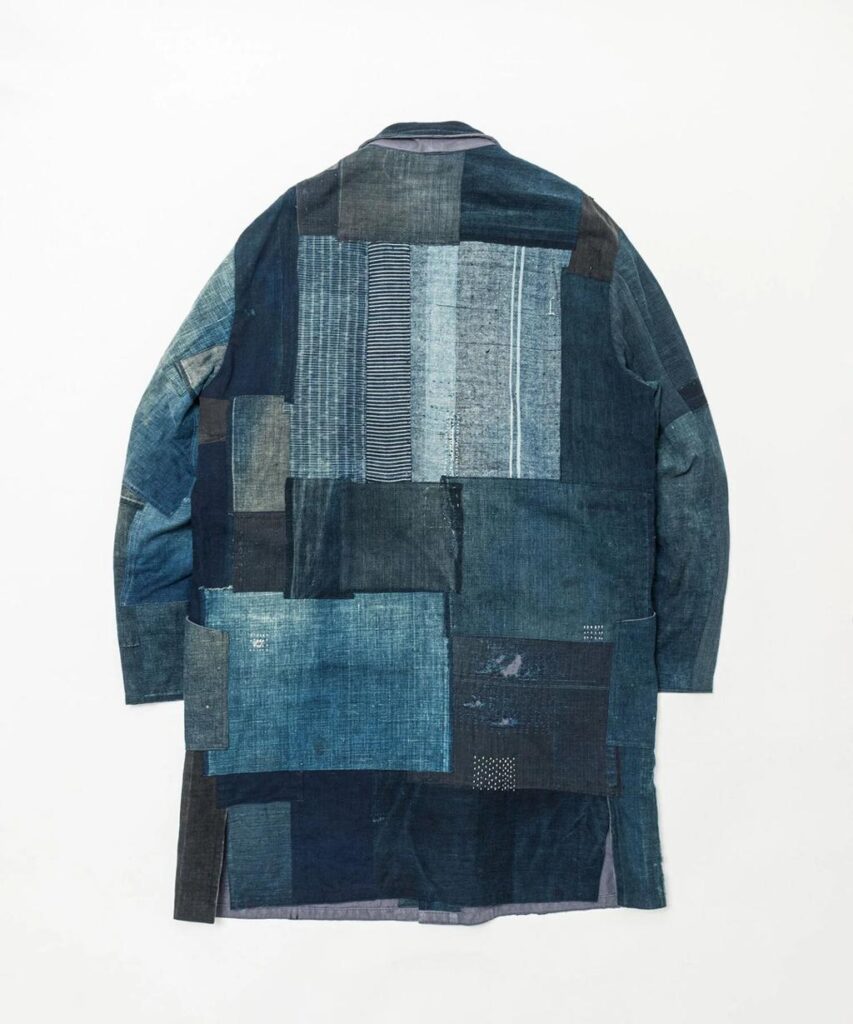
Traditional Boro garments often used indigo-dyed cotton because indigo was common and durable.
Today, vintage Boro textiles are highly collectible because they represent history, labor, and craftsmanship.
Visible mending is now respected worldwide for sustainability and design.
Its roots remain deeply Japanese.
Historical takeaways:
- Waste reduction
- Material respect
- Textile longevity
- Functional beauty
To learn more about Japanese Boro Stitching, refer to our Expert Guide which explains its historical and modern significance in full detail.
Boro vs Sashiko vs Visible Mending
Many beginners confuse these three concepts.
They are connected, but they are not identical.
Boro Stitching refers to the patching and layering of fabric.
Sashiko refers to the stitching technique.
Visible Mending is the broader modern repair concept.
Think of it like this:
Boro is the structure.
Sashiko is the stitch.
Visible mending is the category.
Boro usually includes:
- Multiple fabric layers
- Patchwork
- Reinforcement
Sashiko usually includes:
- Running stitch patterns
- Geometric designs
- Reinforcement stitching
Visible mending includes:
- Boro
- Sashiko
- Embroidery repair
- Patch repair
If your jeans have a patch held by sashiko stitches, that is both Boro and visible mending.
Understanding these differences helps you choose the right repair style.
Use Boro when fabric is weak.
Use Sashiko when stitching reinforcement matters.
Use visible mending when aesthetics matter.
The best repairs often combine all three.
Quick comparison:
- Boro = patching
- Sashiko = stitching
- Visible mending = full repair philosophy
Follow on through to our Boro vs Sashiko, in-depth analysis for further clarification.
Why Japanese Visible Mending Is Popular Again
Modern fashion creates waste.
Fast fashion encourages replacement instead of repair.
Japanese visible mending challenges this mindset.
It supports the Slow Fashion movement by extending garment life. Instead of buying new jeans, repairing old ones saves money and reduces waste.
People also love the handmade aesthetic.
No two repairs look the same.
Every stitch is unique.
Visible mending is growing because it offers:
- Sustainability
- Creativity
- Cost savings
- Emotional value
- Customization
A repaired jacket becomes personal.
A patched pair of jeans becomes one of a kind.
Social media has also helped spread visible mending. Makers share before-and-after transformations that inspire beginners.
Repair culture is returning.
And Japanese techniques are leading it.
The modern appeal includes:
- eco-conscious fashion
- textile art
- anti-consumerism
- personalization
Visible mending turns clothing maintenance into creative expression.
That makes it practical and meaningful.
Tools You Need for Japanese Visible Mending
Starting Japanese visible mending does not require expensive equipment. One reason beginners love it is because the tools are simple, practical, and reusable. Traditional Japanese mending focused on utility. People used what they had. That same principle still works today.
The quality of your tools affects both the stitching experience and the final durability of your repair. Good tools make stitching smoother, cleaner, and more consistent.
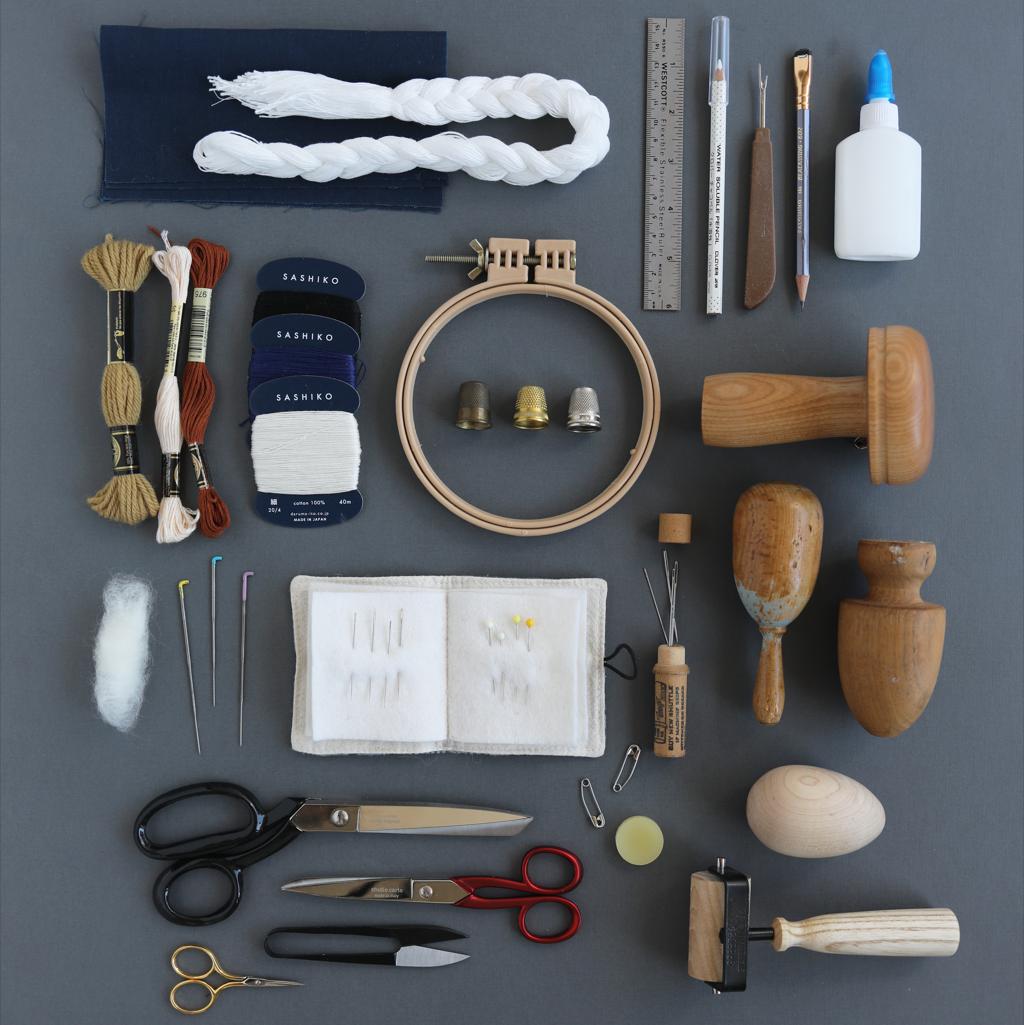
Essential tools include:
- Sashiko needle (longer than standard sewing needles)
- Strong thread
- Patch fabric
- Fabric scissors
- Thimble
- Fabric chalk or washable marker
- Pins or clips
- Small embroidery hoop (optional)
A proper Sashiko Needle matters because it allows multiple stitches to be loaded at once, making the process faster and more controlled.
A thimble helps when pushing through thick denim or layered patches.
Fabric chalk is useful for planning stitch lines. This improves spacing and keeps patterns balanced.
Beginners often make the mistake of using random sewing tools from home. That can work, but proper mending tools improve precision.
Start simple.
Upgrade later.
Focus on control before speed.
Good tools make visible mending easier, but consistency matters more than expensive supplies.
Basic beginner tool kit:
- 1 needle
- 1 thread spool
- Scrap fabric
- Small scissors
- Chalk
That is enough to start.
Best Fabrics for Japanese Visible Mending
Fabric choice changes the strength and appearance of your repair. Traditional Boro Stitching often used cotton because it was accessible, durable, and easy to layer.
Today, many fabrics work well.
The best patch fabric should match or slightly exceed the strength of the original garment.
Top fabrics for visible mending:
- Denim
- Cotton
- Linen
- Canvas
- Heavy twill
Denim is the most popular because it is strong and ages beautifully.
Cotton works well for lighter shirts and casual clothing.
Linen is breathable and excellent for decorative patching.
Canvas is ideal for heavy-duty reinforcement.
Try to avoid stretchy fabrics at first.
Stretch fabrics create tension problems.
They distort stitches.
They shift while sewing.
Fabric matching tips:
- Similar weight = better balance
- Similar weave = cleaner repair
- Stronger patch = longer-lasting repair
Vintage fabric scraps are often great for visible mending because they add texture and character.
Traditional Japanese repairs often used old indigo fabrics.
This created layered history in one garment.
Good visible mending starts with good patch material.
Weak patches fail early.
Strong patches improve longevity.
Best beginner fabric choice:
Old denim.
It is forgiving.
It is durable.
It is easy to learn on
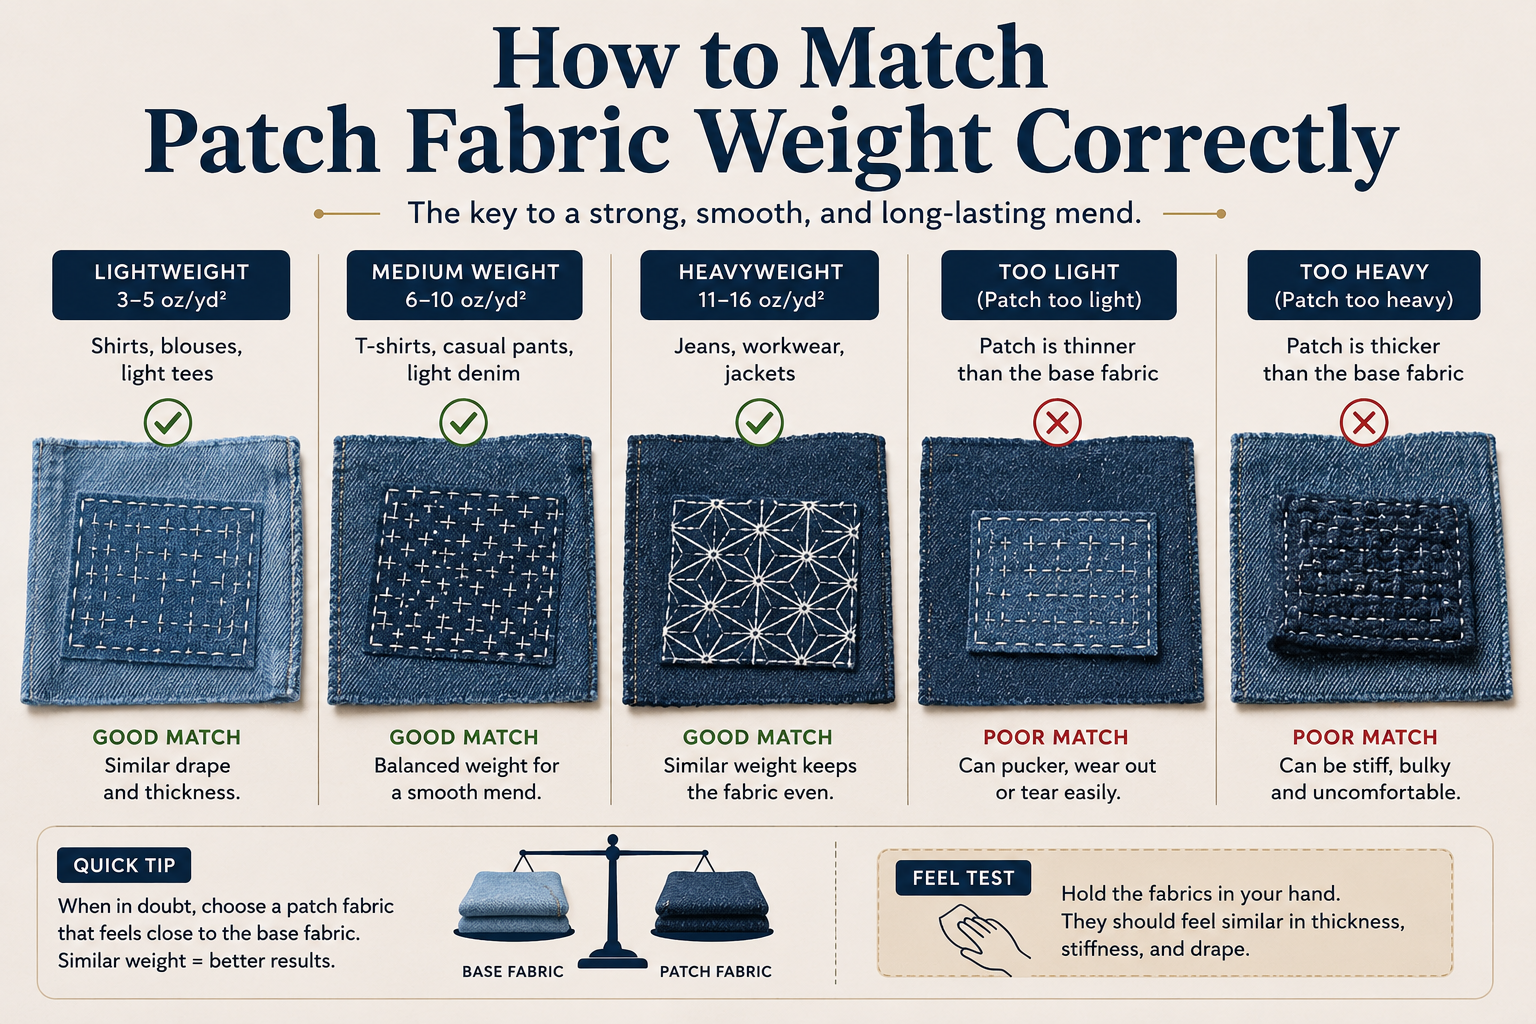
How to Match Patch Fabric Weight Correctly
Patch fabric should not only match visually—it should match structurally. Fabric weight affects how the garment moves, stretches, and wears over time. If the patch is too heavy, it creates tension imbalance. If it is too light, it fails quickly.
A lightweight cotton shirt patched with heavy denim will pull awkwardly during movement. A denim hole patched with thin cotton may tear again because the patch cannot absorb stress.
Good patch matching follows simple logic:
Lightweight garments need:
- lightweight cotton
- linen
- thin woven fabric
Medium-weight garments need:
- medium cotton
- denim scraps
- canvas blends
Heavy garments need:
- denim
- canvas
- layered cotton
Always test flexibility before sewing.
Fold both fabrics together.
Feel the balance.
The closer they behave, the better the repair will age.
Traditional Japanese mending often reused similar fabrics because matching behavior mattered more than matching color.
Function first.
Appearance second.
Strong repairs come from balanced materials.
Best Thread for Japanese Visible Mending
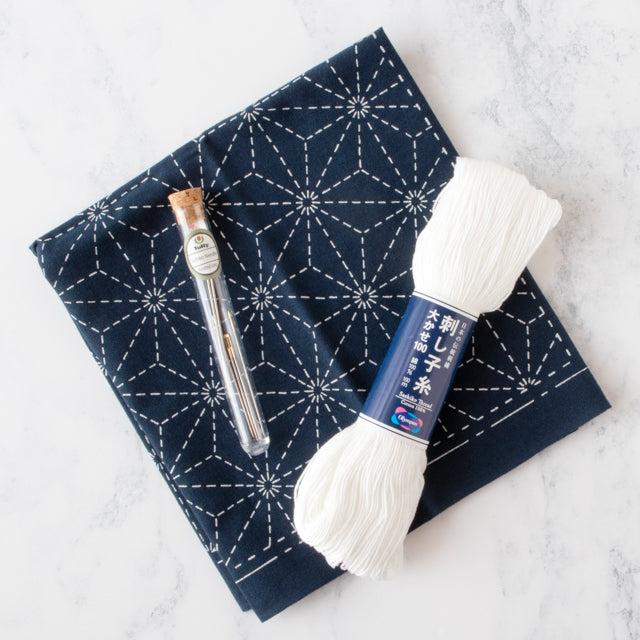
Thread determines both strength and style. In Japanese visible mending, thread is not just structural. It is visual.
Traditional Sashiko Thread is designed specifically for this kind of stitching. It is thicker than regular sewing thread and creates clear visible lines.
Best thread options:
- Sashiko thread
- Embroidery floss
- Pearl cotton
- Linen thread
- Heavy-duty cotton thread
Sashiko thread is best for authenticity and durability.
Embroidery floss works for decorative mending but may fray faster.
Linen thread is strong but less forgiving for beginners.
Color choice matters.
White on indigo is traditional.
Contrast creates visibility.
Matching colors create subtle repair.
Thread tips:
- Use thicker thread for denim
- Use softer thread for cotton
- Avoid weak polyester blends
- Wax thread if needed for smoother sewing
Many beginners use regular sewing thread.
That works for tiny repairs.
But for strong visible mending, thicker thread is better.
Thread tension also matters.
Too tight creates puckering.
Too loose creates weak stitches.
Good thread improves:
- strength
- appearance
- longevity
- texture
Choose durability first.
Style second.
A beautiful repair must still function.
How Thread Color Changes the Look of Visible Mending
Thread color is one of the most overlooked design choices in visible mending. It changes how bold, subtle, or artistic the repair feels. In traditional Sashiko, white thread on indigo fabric became iconic because the contrast made the stitching visible and elegant.
High contrast creates stronger visual impact.
Low contrast creates softer repairs.
Color decisions affect style.
Use high contrast when:
- you want the repair visible
- the stitching is decorative
- the patch is part of the design
Use low contrast when:
- you want subtle repair
- the garment is formal
- the patch should blend more naturally
Popular combinations:
- white on indigo
- cream on black
- navy on blue
- red on denim
Thread color can guide attention.
It can frame the patch.
Or soften it.
Think of thread as the outline of your repair.
It shapes how people see it.
Good mending is not only strong.
It is visually intentional.
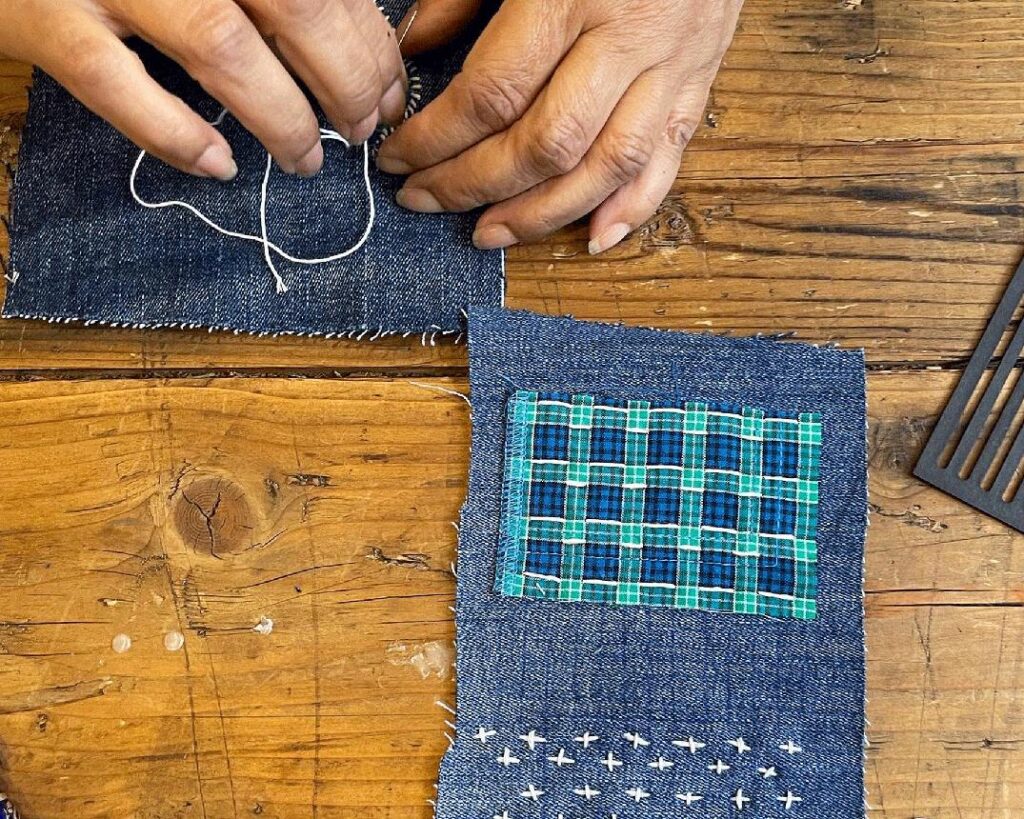
Inside Patch vs Outside Patch in Japanese Visible Mending
Patch placement changes both strength and style. In Japanese visible mending, deciding whether a patch goes inside or outside the garment affects durability, comfort, and aesthetics. There is no single right answer. It depends on the garment and the repair goal.
Inside patches are the most common because they keep the outer surface smoother while still allowing visible stitching. This method works especially well for jeans and shirts because the patch reinforces the damaged area without creating bulk on the outside.
Outside patches create stronger visible contrast and often make the repair look more intentional. This is common in Boro Stitching because layered exterior patches become part of the visual identity.
Choose inside patches when:
- comfort matters
- the fabric is thin
- you want subtle repair
Choose outside patches when:
- style matters
- extra reinforcement is needed
- layered design is desired
Some advanced repairs use both.
Inside for strength.
Outside for reinforcement.
Patch placement is strategy.
Not decoration.
Choose based on use
How to Do Japanese Visible Mending Step by Step
Japanese visible mending follows a practical process. The goal is simple: strengthen damaged fabric while making the repair part of the design.
Step 1: Assess damage
Look for:
- holes
- thinning fabric
- tearing
- weak seams
Step 2: Clean the garment
Dirty fabric traps tension and weakens stitching.
Clean fabric works better.
Step 3: Prepare your patch
Cut patch larger than damage.
This spreads stress.
Step 4: Position patch
Place inside or outside depending on design.
Inside patches look cleaner.
Outside patches look stronger visually.
Step 5: Pin patch securely
Movement causes uneven stitches.
Secure fabric first.
Step 6: Stitch using Running Stitch
Use even spacing.
Work slowly.
Maintain tension.
Step 7: Finish edges
Tie securely.
Trim thread.
Check strength.
Core stitching principles:
- Even spacing
- Balanced tension
- Strong anchoring
- Full patch coverage
Beginners should start with small repairs.
A pocket hole.
A knee tear.
A cuff edge.
These teach control.
Japanese visible mending improves with repetition.
Perfection is not required.
Consistency matters more.
Repair teaches rhythm.
Rhythm builds skill.
Skill builds confidence.
Step-by-step basics:
- Assess
- Patch
- Pin
- Stitch
- Secure
Simple process.
Powerful result.
How Dense Should Sashiko Stitches Be?
Stitch density affects repair strength. This is one of the most important technical details in visible mending. Loose stitching may look fine at first, but it can fail under stress. Dense stitching distributes tension better.
The amount of density depends on the damage location.
High-friction areas need tighter stitching.
Low-stress areas can stay lighter.
High-density stitching works best for:
- knees
- inner thighs
- elbows
- pocket corners
Medium density works best for:
- shirt sleeves
- light tears
- patch edges
Low density works best for:
- decorative reinforcement
- low-friction zones
A simple test:
Press the patched area.
If the patch shifts, increase stitch density.
If the fabric puckers, reduce tension.
Dense does not mean crowded.
Balanced spacing matters.
Traditional Japanese repairs often used repeated running lines because they spread pressure evenly.
Stitching is structural engineering.
Not just decoration.
The right density makes the repair last.
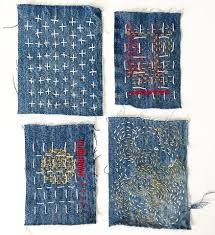
Japanese Visible Mending Patterns for Beginners
Patterns make visible mending beautiful. Even simple stitching can transform a plain patch into something artistic.
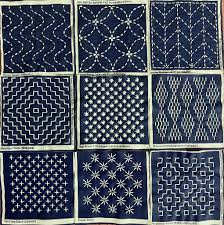
Traditional Sashiko patterns are repetitive and structured. This makes them beginner-friendly.
Best beginner patterns:
- Straight running lines
- Grid stitching
- Cross stitch pattern
- Wave pattern
- Diamond pattern
Straight lines are easiest.
They teach spacing.
They teach rhythm.
Grid patterns strengthen fabric well because they distribute pressure evenly.
Wave patterns add softness and movement.
Diamond patterns create decorative structure.
Pattern tips:
- Mark guides first
- Keep spacing consistent
- Start large
- Practice on scrap fabric
Beginners often overcomplicate patterns.
Do not.
Simple patterns look stronger.
They also sew faster.
Pattern choice depends on fabric damage.
Heavy wear areas need denser stitching.
Light damage needs lighter stitching.
Visible mending is both art and engineering.
The pattern is not just decoration.
It affects durability.
Choose based on function.
Then add beauty.
Start simple.
Master basics.
Then explore advanced Japanese patterns.
Best beginner pattern:
Grid stitch.
Easy.
Strong.
Clean.
Traditional.
Where Clothes Usually Tear First (And How to Reinforce Early)
Clothes usually fail in predictable places. Learning these wear patterns helps you repair early before full holes appear. Preventive visible mending is one of the smartest Japanese repair strategies.
Common wear zones in jeans:
- inner thighs
- knees
- hems
- pocket edges
Common wear zones in shirts:
- elbows
- collars
- cuffs
Common wear zones in jackets:
- shoulders
- pocket corners
- sleeve ends
Early reinforcement prevents larger damage.
A thinning area is easier to strengthen than a full tear.
Watch for:
- faded fabric
- loose fibers
- thinning weave
- soft spots
Japanese repair culture often reinforced weak zones before failure.
That extended clothing life dramatically.
Do not wait for holes.
Repair weakness early.
Preventive mending saves more time than emergency mending.
That is one of the strongest habits in textile longevity.
How to Repair Jeans with Japanese Visible Mending
Jeans are the most common starting point for Japanese visible mending because Denim Repair is practical, forgiving, and highly durable. Denim naturally develops wear in predictable areas, making it ideal for learning.
The most common repair areas are:
- Knee holes
- Inner thigh wear
- Pocket corners
- Back pocket edges
- Hem tears
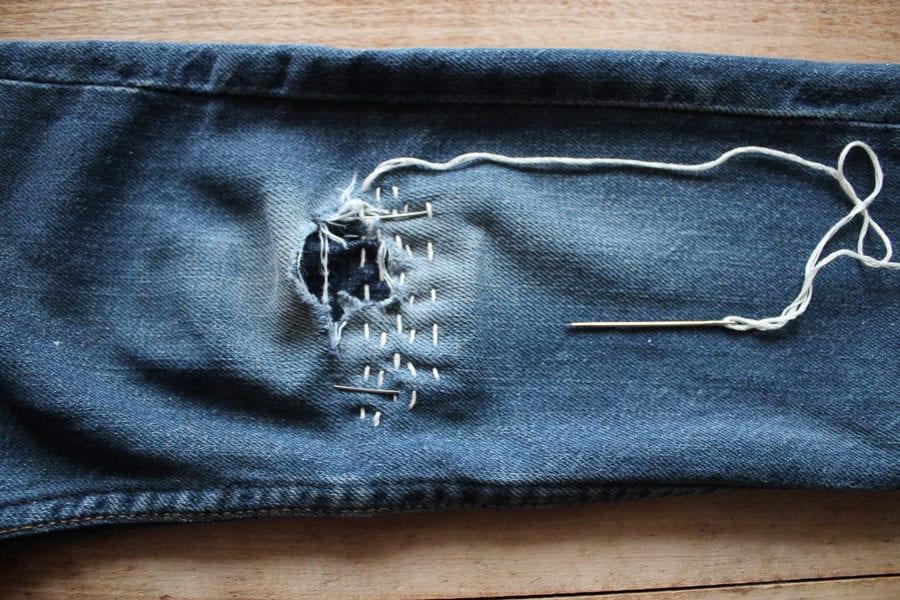
Knee holes are the easiest for beginners. The damaged area is visible and easy to access. A strong denim patch placed behind the hole creates reinforcement while allowing decorative Sashiko stitching on the surface.
Inner thigh wear needs stronger reinforcement because friction causes repeated stress.
Pocket corners often tear because of pulling force.
Repair strategy for jeans:
- Clean the area
- Trim loose threads
- Add a patch behind the hole
- Pin securely
- Stitch evenly
Contrast stitching works beautifully on jeans because denim shows thread clearly.
Traditional white thread on indigo denim is classic.
But modern repairs often use colored thread for personality.
Jeans repair is ideal because the fabric handles multiple stitches without distortion.
The repaired section often becomes stronger than the original.
That is the beauty of Japanese mending.
Damage becomes reinforcement.
Wear becomes design.
For beginners, jeans offer the best balance of durability and learning value.
Start with denim.
It teaches everything.
Best jeans repair zones for beginners:
- knees
- hems
- pockets
How to Repair Shirts with Japanese Visible Mending
Shirts require lighter handling because the fabric is thinner than denim. That means stitch tension becomes more important.
Common shirt damage includes:
- Elbow tears
- Collar wear
- Sleeve holes
- Pocket edge tears
Cotton shirts work especially well for visible mending because they are stable and easy to stitch.
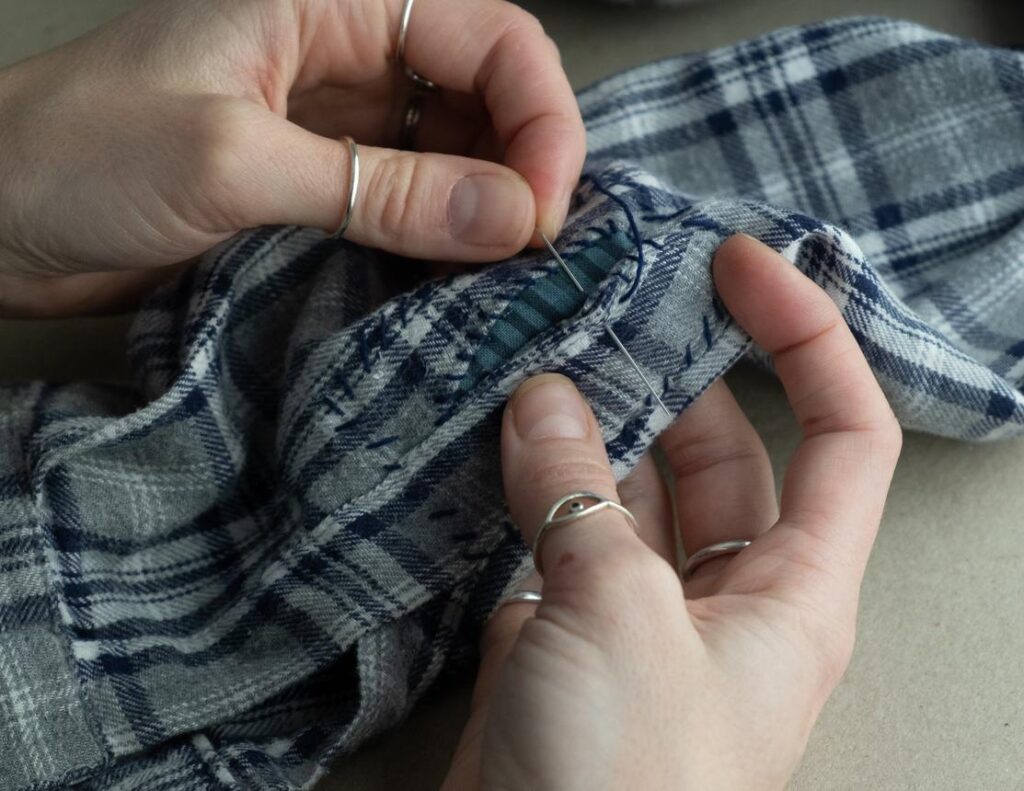
Elbow patches are one of the most popular visible mending projects. They combine function and style.
A visible patch on the elbow can reinforce weak fabric while adding personality.
Collars are harder because they experience constant friction.
Shirt repair tips:
- Use lighter patch fabric
- Choose thinner thread
- Keep stitch tension gentle
- Avoid bulky layering
With shirts, subtle contrast often looks better than heavy contrast.
Neutral tones blend while still remaining visible.
Pattern choice matters.
Simple running lines work best.
Heavy geometric stitching may stiffen lightweight shirts.
Repairing shirts is excellent for beginners who want to practice precision.
Unlike denim, mistakes are more visible.
That makes shirts a great skill builder.
Good shirt mending extends clothing life significantly.
A damaged sleeve does not mean the shirt is finished.
It means the shirt gets another story.
Visible repair turns ordinary clothing into handmade art.
That creates emotional value.
And emotional value increases garment care.
Best shirt repair areas:
- elbows
- collars
- cuffs
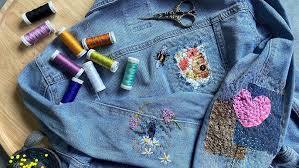
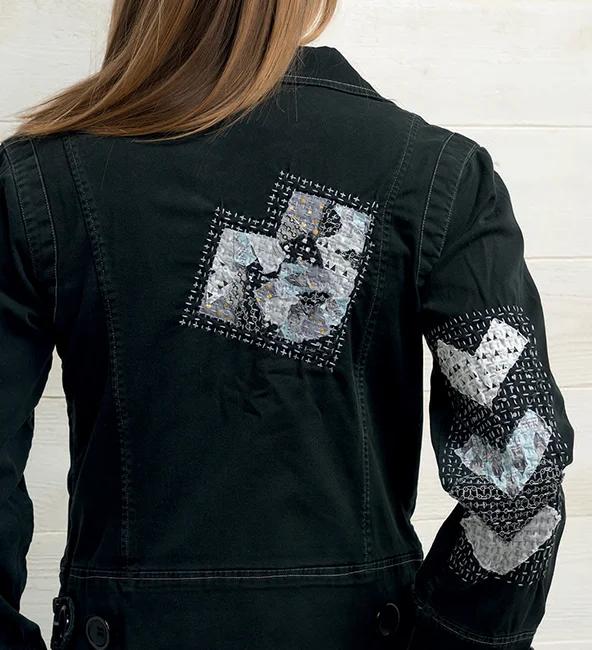
How to Repair Jackets with Boro Mending
Jackets are perfect for Boro Stitching because they naturally support layering. Heavy fabric, larger surfaces, and stronger construction make jackets excellent for structural patchwork.
Common jacket damage:
- Shoulder wear
- Pocket tears
- Sleeve friction
- Lining damage
Boro-style jacket repair often uses multiple patches rather than one.
This creates layered visual depth.
It also increases durability.
Unlike simple visible mending, Boro repair can spread beyond the damaged area into surrounding fabric for structural support.
This is traditional.
Japanese workers repaired beyond the tear.
They strengthened the future weak points.
That is smart mending.
Best jacket repair methods:
- Layered patching
- Cross-direction stitching
- Reinforcement lines
- Structural grid stitching
Jackets allow creativity because larger surfaces support larger patterns.
This makes them ideal for advanced beginners.
Outerwear mending is especially rewarding because jackets experience frequent wear.
A repaired jacket often becomes more unique than when new.
Boro jackets are now fashion pieces.
But originally, they were survival tools.
That heritage still shapes the style.
Repairing jackets teaches layering strategy.
And layering strategy is central to authentic Boro.
Think beyond the hole.
Repair the structure.
Strengthen the garment.
Best jackets for Boro repair:
- denim jackets
- work jackets
- canvas jackets
Common Mistakes in Japanese Visible Mending
Beginners often focus too much on appearance and not enough on structure. But strong visible mending starts with strong repair principles.
The biggest mistakes:
- Using weak patch fabric
- Pulling thread too tight
- Uneven stitch spacing
- Poor patch placement
- Ignoring fabric grain
Weak patches fail quickly.
Always choose durable patch material.
Tight thread creates puckering.
Puckering weakens fabric tension.
Uneven stitches reduce strength.
Consistency matters more than beauty.
Patch placement matters.
Too small a patch concentrates stress.
A larger patch spreads it.
Fabric grain matters because stretch direction affects wear.
Ignoring it can distort the repair.
Other mistakes include:
- using thread too thin
- skipping fabric cleaning
- rushing stitches
- poor knot security
Japanese mending values patience.
Rushing creates weak work.
Repair slowly.
Build rhythm.
Trust repetition.
Mistakes are part of learning.
Traditional Boro was never perfect.
It was practical.
That practical mindset helps beginners improve faster.
Aim for strength first.
Beauty follows structure.
The strongest visible repairs often become the most beautiful over time.
Wear reveals quality.
Not perfection.
Avoid these first:
- weak patches
- tight stitching
- uneven spacing
Fixing these improves everything.
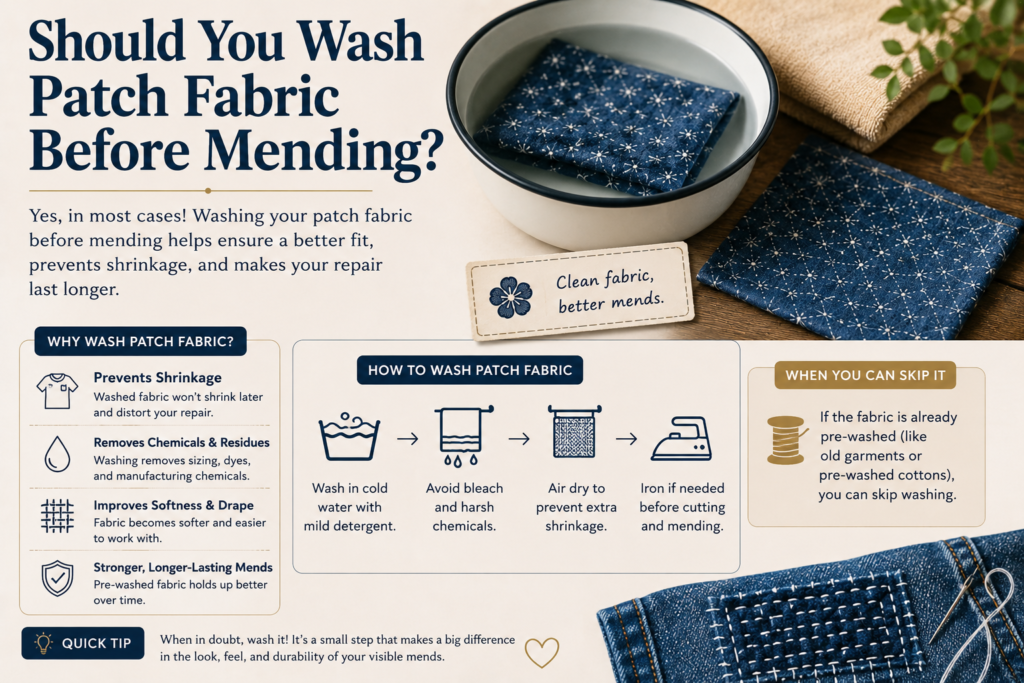
Should You Wash Patch Fabric Before Mending?
Yes. Prewashing patch fabric is one of the simplest ways to prevent repair failure. Different fabrics shrink differently after washing. If your patch shrinks more than the garment—or less—it can distort the repaired area.
This creates:
- pulling
- puckering
- tension imbalance
- seam distortion
Prewashing removes shrink risk.
It also removes dust and stiffness.
This helps stitching settle more naturally.
Always prewash when:
- using denim patches
- mixing fabric types
- using dyed fabric
Especially with Indigo Dyeing fabrics, washing helps prevent color transfer.
Wash the patch the same way you wash the garment.
That creates matching behavior.
This small step dramatically improves repair longevity.
Many beginners skip it.
That creates avoidable problems.
Wash first.
Repair second.
This is one of the easiest upgrades to improve visible mending quality
How to Care for Clothes After Visible Mending
Good repair deserves good care. Mended garments can last years if maintained properly.
Washing matters.
Harsh washing damages thread and stresses patched areas.
Best washing practices:
- Cold water
- Gentle cycle
- Mild detergent
- Turn inside out
- Wash less often
Air drying is better than machine drying.
Heat weakens fibers over time.
Especially repaired areas.
Inspection matters too.
Check high-stress zones regularly.
Small wear signs are easier to fix early.
Maintenance habits:
- Trim loose threads
- Reinforce weak spots early
- Avoid aggressive stretching
- Store carefully
Textile Preservation is part of Japanese mending philosophy.
Repair is not one event.
It is an ongoing relationship.
That mindset changes how people treat clothing.
Instead of disposable fashion, clothing becomes long-term.
That saves money.
It reduces waste.
It builds appreciation.
Mended clothes often outlast modern replacements because repaired areas are stronger.
Visible mending creates resilience.
But care protects that resilience.
Wash thoughtfully.
Wear intentionally.
Repair early.
Maintain regularly.
That is the Japanese approach.
Long-term clothing care is part of the art.
Not separate from it.
Care checklist:
- wash gently
- inspect regularly
- repair early
- air dry
Good care extends good repair.
Is Japanese Visible Mending Worth It? Cost vs Replacement
Repairing clothes takes time, but replacing clothes costs money. Japanese visible mending helps balance that decision. A strong repair can add years to a garment’s life, especially with denim and workwear.
Repairing jeans may cost:
- patch fabric
- thread
- time
Replacing jeans may cost far more.
And often lower-quality replacements wear out faster.
Visible mending is worth it when:
- the garment fits perfectly
- the fabric is still strong
- the damage is localized
- the garment has sentimental value
Replacement may be better when:
- damage is widespread
- seams are failing everywhere
- fabric has become fragile
Repair also supports Slow Fashion.
Less waste.
Less consumption.
More use.
More value.
Japanese visible mending is not always the fastest option.
But it is often the smartest long-term option.
Good repair protects good clothing.
And good clothing deserves repair.
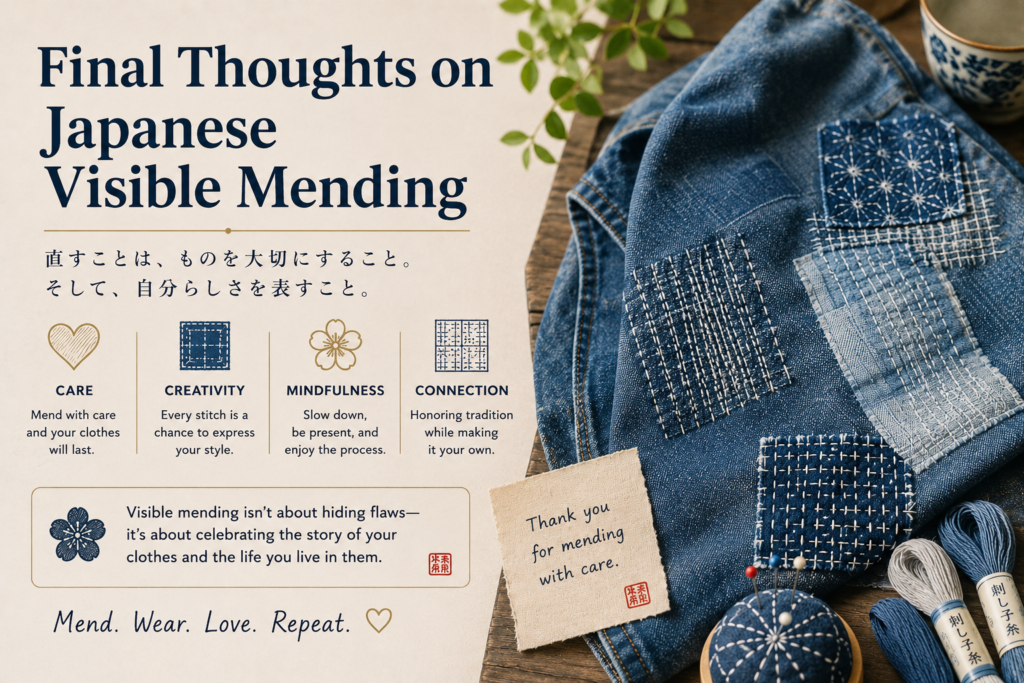
Final Thoughts on Japanese Visible Mending
Japanese visible mending changes how we think about damage. Instead of seeing a tear as the end of a garment, it becomes the beginning of a new stage.
That philosophy comes from Boro Stitching and Sashiko—traditions built on necessity, respect, and craftsmanship.
Visible mending teaches patience.
It teaches sustainability.
It teaches appreciation.
And practically, it saves clothing.
Instead of replacing:
- jeans
- jackets
- shirts
- bags
you restore them.
Each stitch adds history.
Each patch adds strength.
Each repair adds identity.
That is why visible mending feels different from ordinary sewing.
It is practical.
But it is also deeply personal.
For beginners, start small.
Repair one hole.
Patch one tear.
Learn one pattern.
Over time, your skill grows.
And so does your relationship with your clothing.
Japanese visible mending is not just repair.
It is preservation.
It is creativity.
It is slow fashion in its purest form.
Most importantly:
it proves damaged things still have value.
Sometimes even more than before.
That idea alone makes the practice worth learning.
Start with:
- old jeans
- simple patch
- running stitch
Small beginning.
Lifelong skill.
FAQs
Is Boro the same as visible mending?
No. Boro is a Japanese patching tradition, while visible mending is the broader repair category.
Can beginners do Sashiko?
Yes. Running stitch patterns are beginner-friendly and easy to practice.
What fabric is best for visible mending?
Denim and cotton are the easiest starting fabrics.
What thread should I use?
Traditional Sashiko thread is the strongest and most authentic choice.
Does visible mending make clothes stronger?
Yes. A properly patched and stitched area is often stronger than the original fabric.