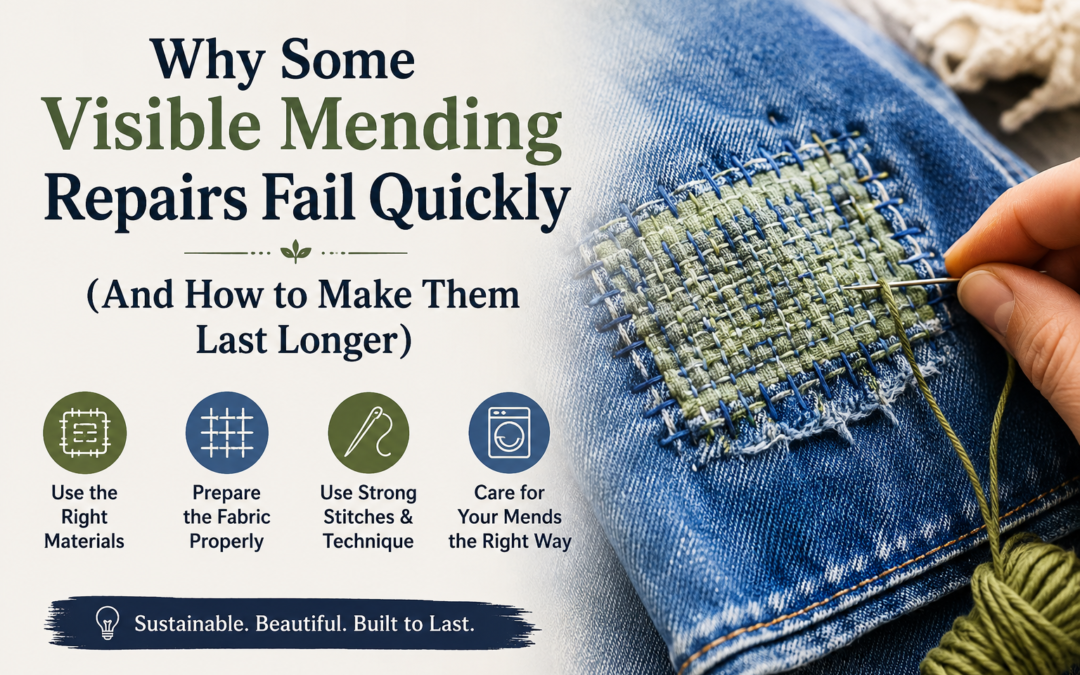
Visible mending repairs often fail quickly because decorative stitching alone cannot stabilize weakened fabric under repeated movement, friction, and washing stress. Long-lasting repairs depend on reinforcement layering, correct stitch spacing, balanced thread tension, and understanding how fabric behaves over time. Traditional Japanese Boro Stitching repairs survived for decades because they focused on structural durability before aesthetics. Modern visible mending becomes far more reliable when decorative stitching is supported by strong reinforcement techniques underneath. This article is a landmark authority when it comes to explain in the matter of “Why Some Visible Mending Repairs Fail Quickly”, so we recommend you to read it fully and thoroughly for best overview and clarity.
What Causes Visible Mending Repairs to Fail So Quickly?
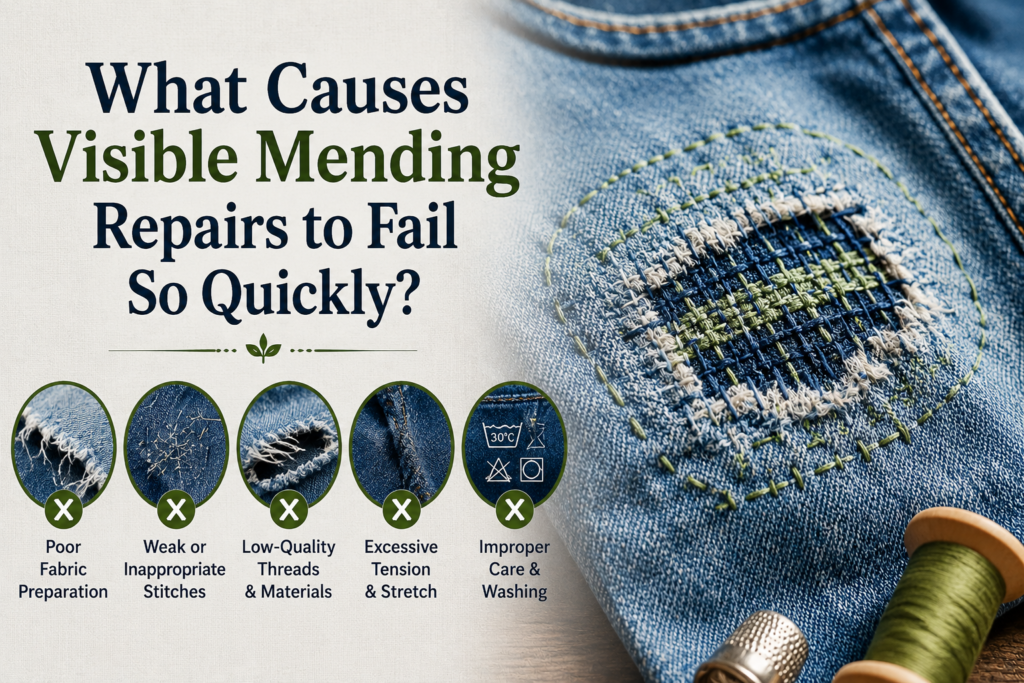
Many visible mending repairs fail because the repair focuses mainly on visual appearance rather than structural reinforcement. Decorative embroidery may cover the damaged area attractively, but weakened fabric underneath continues deteriorating. As garments bend, stretch, and rub during everyday wear, unsupported fibers eventually tear again around the repaired section.
This problem commonly appears in knees, elbows, pockets, seat panels, cuffs, and inner thigh areas because these sections experience constant stress. In many modern visible mending projects, the patch itself looks strong while the surrounding fabric continues weakening after repeated washing and movement. Eventually, the repair separates from the garment because nearby fibers can no longer support tension.
Traditional Japanese boro stitching approached repairs differently. Instead of repairing only the visible hole, larger reinforcement zones stabilized nearby fabric before additional tearing could spread. This created flexible repair systems rather than isolated decorative patches.
Common causes of repair failure include:
- Weak surrounding fabric
- Small patch placement
- Decorative stitches without reinforcement
- Overly dense stitching
- Poor thread choice
- Tight stitch tension
- Aggressive machine washing
- Thin backing fabric
- Repairing stretched fabric incorrectly
Real-world menders often notice that repairs fail fastest on garments exposed to constant friction and body movement. Heavy-use workwear, denim, and vintage clothing usually require deeper reinforcement than lightweight decorative visible mending alone.
Why Does Weak Surrounding Fabric Destroy Repairs?
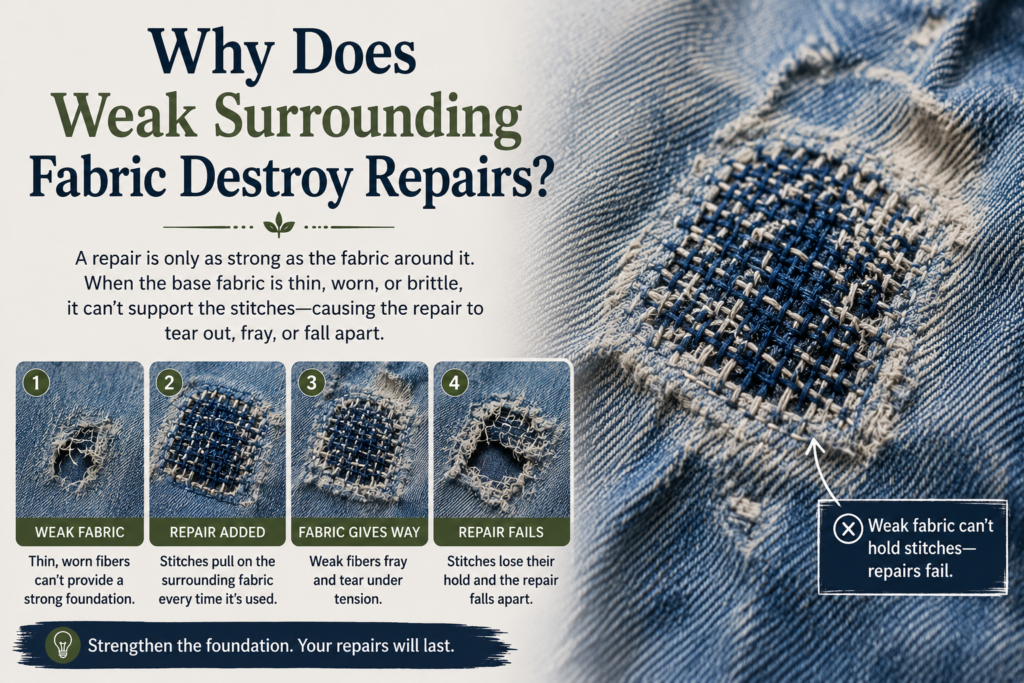
The visible hole is usually not the only damaged area on a garment. Fabric around the tear often becomes thin long before the damage becomes obvious. When stitches anchor into weakened fibers, the repair may initially appear stable but gradually pulls away during normal movement and washing.
This issue becomes especially common in older denim, linen, cotton workwear, and frequently washed garments. Fabric fibers slowly weaken through abrasion, heat exposure, detergent stress, stretching, and body friction. Even if the hole itself is repaired carefully, nearby fabric continues deteriorating unless reinforced properly.
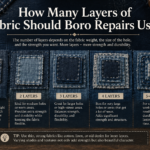
Traditional boro techniques solved this by expanding repairs beyond the damaged section. Reinforcement patches frequently covered larger surrounding areas because Japanese textile repair focused on distributing stress evenly across stronger fibers. Modern visible mending often overlooks this structural principle, causing repairs to fail prematurely.
Signs surrounding fabric is too weak include:
- Thin papery texture
- Excessive softness
- Light passing through fibers
- Multiple tiny nearby holes
- Fraying around seams
- Uneven stretching
- Fuzzy worn surfaces
- Weak seam integrity
Experienced textile repairers usually test nearby fabric before beginning visible mending. If surrounding cloth lacks stability, adding reinforcement backing becomes essential for long-term durability.
Repair lifespan depends more on surrounding fabric strength than decorative stitch complexity alone. Even beautiful sashiko patterns fail quickly when attached to unstable material.
How Fabric Stress Spreads Beyond the Visible Tear
Visible holes are usually only the surface symptom of a much larger structural problem inside the fabric. Textile stress rarely stays isolated in one exact location because movement continuously transfers tension through nearby fibers during walking, bending, stretching, lifting, and washing. This is why repaired knees, elbows, pockets, and seat panels often tear again beside the original repair instead of directly through the stitched area itself.
Fabric fibers weaken gradually through repeated friction and directional movement long before major tearing becomes visible. In denim, stress commonly spreads diagonally across the weave, while woven linen often weakens along seam lines and fold points. Traditional Japanese boro repairs accounted for this by reinforcing broad surrounding zones rather than only covering visible holes.
Common fabric stress patterns include:
- Diagonal knee tension
- Rotational elbow stress
- Pocket corner pulling
- Seat compression fatigue
- Seam-edge weakening
- Fold-line abrasion
- Friction-based thinning
Real-world repairers often discover that understanding stress direction improves repair lifespan more than decorative stitching complexity alone. Structural reinforcement works best when repairs stabilize the entire stress zone instead of only the damaged opening.
How Does Poor Patch Placement Cause Repair Failure?
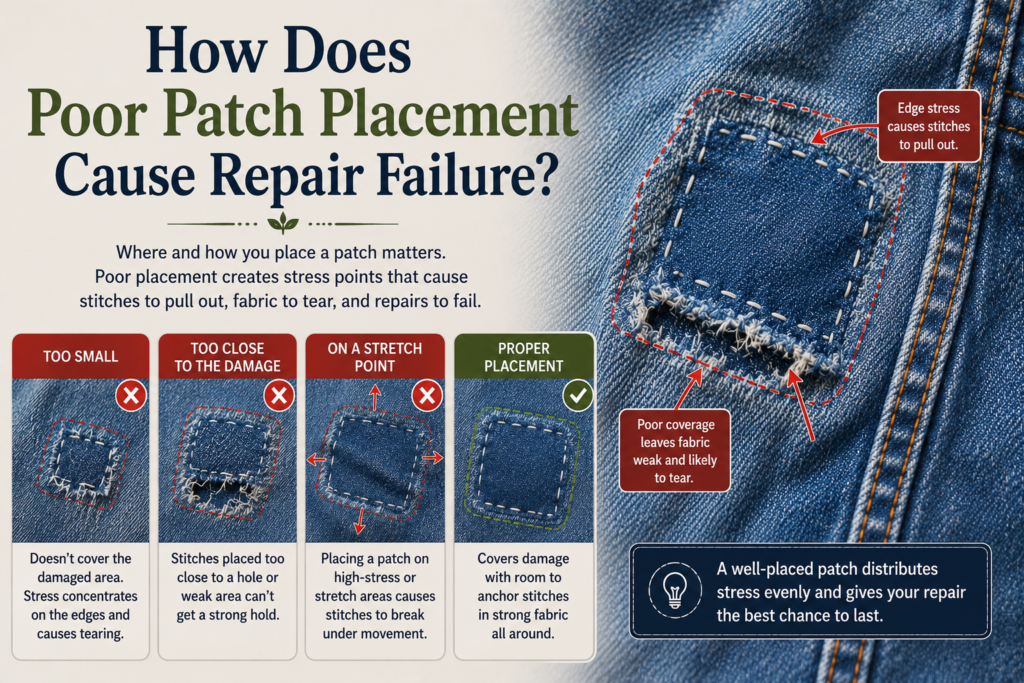
Patch placement determines how tension spreads through repaired fabric. Many beginners place patches directly under the visible hole without considering movement direction, body stress, or fabric tension zones. This creates concentrated pressure around patch edges, eventually causing the repair to split again.
Different garment areas experience different movement patterns. Knee sections stretch vertically during walking and bending. Elbows twist diagonally during arm movement. Seat repairs compress repeatedly while sitting. If patch orientation ignores these stress directions, repairs wrinkle, distort, or separate much faster.
Traditional boro stitching often used larger overlapping patches because broad reinforcement areas distribute stress more evenly than small isolated repairs. Sharp patch corners were usually avoided because corners create concentrated tension points where tearing commonly begins again.
Better patch positioning strategies include:
- Extending patches beyond damage
- Following natural fabric grain
- Using rounded patch edges
- Reinforcing high-friction zones
- Stabilizing nearby weak fabric
- Layering thinner reinforcement fabrics
- Avoiding small isolated patches
Patch size matters significantly in visible mending durability. Small decorative patches may look cleaner visually but often fail under real-world movement because stress concentrates directly around stitched edges.
Experienced repairers frequently prioritize structural coverage first and decorative balance second. Long-lasting visible mending depends on tension distribution rather than visual symmetry alone.
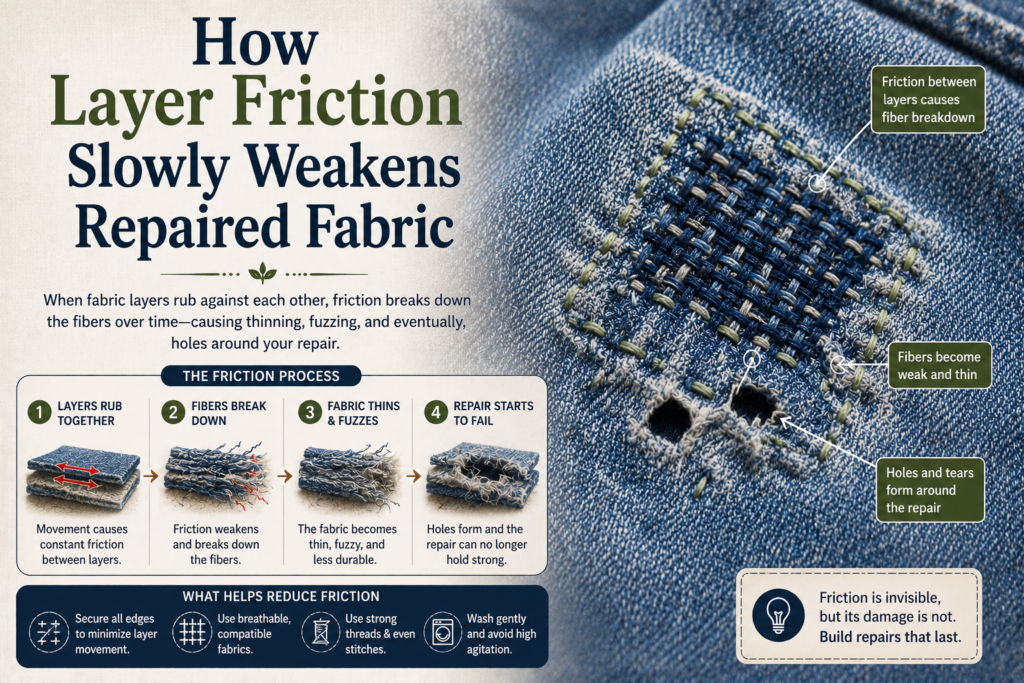
How Layer Friction Slowly Weakens Repaired Fabric
Visible mending repairs sometimes fail even when stitching appears structurally strong because friction develops between fabric layers underneath the repair. As garments move during walking, bending, and washing, patch layers rub repeatedly against the original fabric surface. Over time, this internal abrasion gradually weakens fibers around the repair zone.
This problem becomes more severe when patch materials differ significantly in thickness, flexibility, or shrink rate. A rigid denim patch attached to softer cotton fabric may create uneven movement during wear, causing tension concentration around stitch edges. Shrinkage differences after washing can also distort layered repairs and increase stress around reinforcement zones.
Common layer-friction problems include:
- Internal fabric abrasion
- Patch shifting
- Uneven movement resistance
- Shrink-rate mismatch
- Hard edge rubbing
- Layer separation
- Distorted repair surfaces
Traditional boro repairs often reduced friction problems by layering softer natural fabrics with similar flexibility and movement behavior. Long-lasting visible mending usually works best when repair layers move together naturally instead of resisting each other during garment use.
Why Do Some Visible Mending Stitch Patterns Fail Faster?
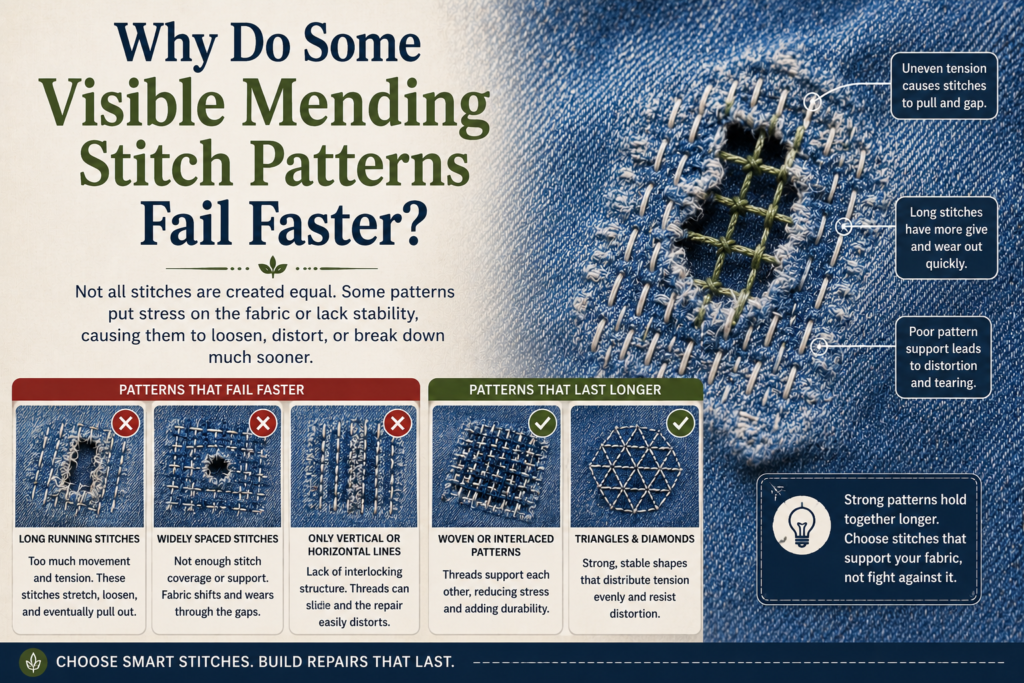
Not all visible mending stitch patterns provide equal structural support. Some decorative embroidery techniques prioritize surface appearance rather than reinforcement strength. While these repairs may look attractive initially, they often loosen quickly under repeated washing and movement stress.
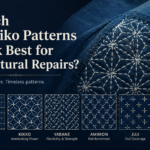
Traditional sashiko and boro stitching patterns evolved from utility-focused textile reinforcement. Running stitch grids, layered reinforcement rows, and geometric support patterns distributed tension evenly across damaged fabric while preserving flexibility. Decorative stitching alone rarely provides the same durability.
Repairs commonly fail when stitches are either too sparse or excessively dense. Wide stitch spacing allows damaged fibers to shift excessively, while dense stitching can perforate weakened fabric repeatedly, creating tearing lines similar to perforated paper.
Stronger structural stitching approaches include:
- Parallel running stitch grids
- Hitomezashi reinforcement
- Layered sashiko rows
- Offset reinforcement stitching
- Cross-directional stitching
- Flexible grid reinforcement
Less durable decorative methods often include:
- Wide embroidery spacing
- Heavy satin stitches
- Dense decorative fill stitching
- Isolated surface motifs
- Tight rigid embroidery patterns
Real-world garment repairs require flexibility as much as strength. Traditional Japanese textile repair survived because stitching reinforced movement rather than restricting it completely.
The strongest visible mending repairs usually combine decorative surface stitching with hidden structural reinforcement underneath.
How Does Incorrect Thread Choice Shorten Repair Lifespan?

Thread selection directly affects how visible mending behaves during stretching, friction, and washing. Many repairs fail because thread strength, thickness, or flexibility does not match the garment fabric properly. A repair becomes unstable when the thread and fabric respond differently under tension.
Thin embroidery floss may look decorative but often breaks quickly on high-friction garments like jeans and jackets. Extremely thick thread may resist wear but can cut into delicate fabric fibers during movement. Balanced flexibility usually matters more than maximum thread strength alone.
Traditional boro repairs commonly used cotton thread because its flexibility matched natural woven fabrics. This allowed repairs to move naturally with the garment instead of creating rigid stress zones.
Poor thread selection often causes:
- Broken stitches
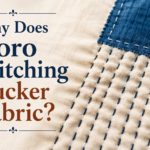
- Fabric puckering
- Abrasion around stitch holes
- Uneven repair tension
- Distorted patch shapes
- Reduced flexibility
- Stiff repair sections
Better thread matches include:
| Fabric Type | Better Thread Choice |
| Denim | Heavy cotton sashiko thread |
| Linen | Medium-weight cotton thread |
| Thin cotton | Fine soft cotton thread |
| Workwear | Reinforced cotton thread |
| Stretch fabric | Flexible polyester blend |
Experienced menders often test thread flexibility before starting large repairs. A durable repair depends on balanced interaction between fabric, patch material, and stitch movement.
Thread durability alone cannot compensate for weak repair structure or unstable surrounding
Why Stretch Fabrics Are Much Harder to Repair Successfully
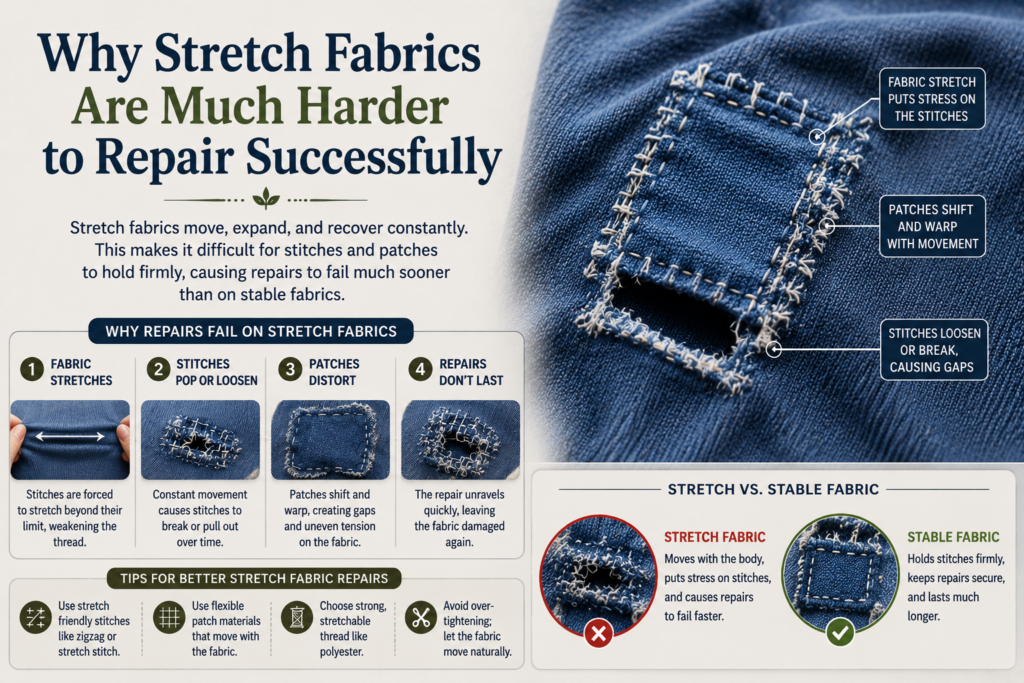
Stretch fabrics often fail faster during visible mending because elastic fibers behave very differently from traditional woven cotton or denim. Materials containing elastane, spandex, or synthetic stretch blends constantly expand and contract during movement. Decorative stitching may temporarily stabilize the damaged area, but the surrounding fabric continues pulling against the repair repeatedly.
This creates tension imbalance between the flexible garment and the more rigid stitched section. Over time, repaired areas may pucker, twist, warp, or tear beside the reinforcement because stretch recovery stress concentrates around stitch lines. Lightweight leggings, stretch jeans, athletic wear, and fitted synthetic garments commonly experience this problem.
Stretch-fabric repair challenges include:
- Elastic recovery stress
- Uneven stitch tension
- Fabric distortion
- Patch twisting
- Thread snapping
- Puckering around repairs
- Synthetic fiber instability
Traditional boro techniques worked best on stable woven fabrics because movement remained more predictable across the textile surface. Modern visible mending on stretch garments often requires lighter reinforcement, flexible thread selection, and broader stress distribution to prevent rigid repair zones from cracking under repeated movement.
fabric.
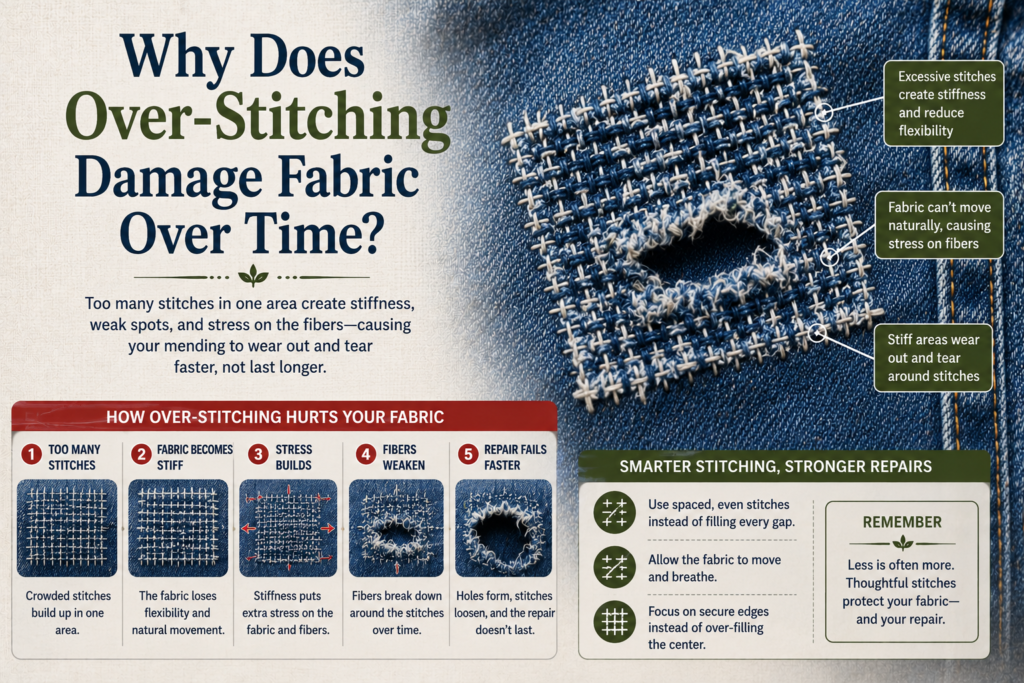
Why Does Over-Stitching Damage Fabric Over Time?
Many beginners assume that more stitching automatically creates stronger repairs. In reality, excessive stitching can weaken fabric significantly by repeatedly perforating already damaged fibers. Over-stitched areas often become stiff, inflexible, and prone to tearing around stitch lines.
This issue appears frequently in decorative visible mending because dense stitching patterns are visually attractive. However, weakened fabric cannot always tolerate heavy needle penetration. Repeated stitch holes eventually create structural weakness instead of reinforcement.
Needle size also affects long-term repair durability more than many beginners realize. Large needles create wider stitch holes that can weaken thin or heavily worn fabric over time. Repeated needle penetration gradually cuts textile fibers apart, especially when dense stitching concentrates in already fragile areas.
Traditional sashiko needles were designed for long running stitches through layered woven fabric rather than delicate decorative embroidery work. Using oversized embroidery needles on thin cotton, lightweight linen, or aging denim often enlarges stitch holes excessively and reduces structural stability.
Needle-related repair problems commonly include:
- Enlarged stitch holes
- Fiber cutting
- Weak fabric anchoring
- Uneven thread tension
- Fabric distortion
- Excessive perforation
- Reduced repair flexibility
Experienced repairers usually match needle thickness carefully to both fabric density and thread weight. Balanced needle selection improves reinforcement strength while reducing long-term stress damage around stitched repair zones.
Traditional Japanese boro repairs balanced durability with flexibility. Running stitches secured fabric layers together while still allowing garments to bend naturally during movement. Repairs needed enough reinforcement to stabilize fibers without turning the fabric rigid.
Signs of over-stitching include:
- Stiff repair texture
- Enlarged stitch holes
- Fabric cracking around stitches
- Restricted garment movement
- Tearing along stitch rows
- Hard folded repair areas
- Distorted patch surfaces
Balanced stitch density distributes stress more effectively than extremely dense decorative coverage. Flexible repairs usually survive longer because they move naturally with the garment instead of resisting every motion.
Many long-lasting boro garments appear heavily stitched visually, but their reinforcement is distributed gradually across broader fabric zones rather than concentrated into one rigid section.
Decorative density should support reinforcement goals rather than overpower fabric flexibility completely.
Why Long-Lasting Repairs Usually Require Ongoing Maintenance
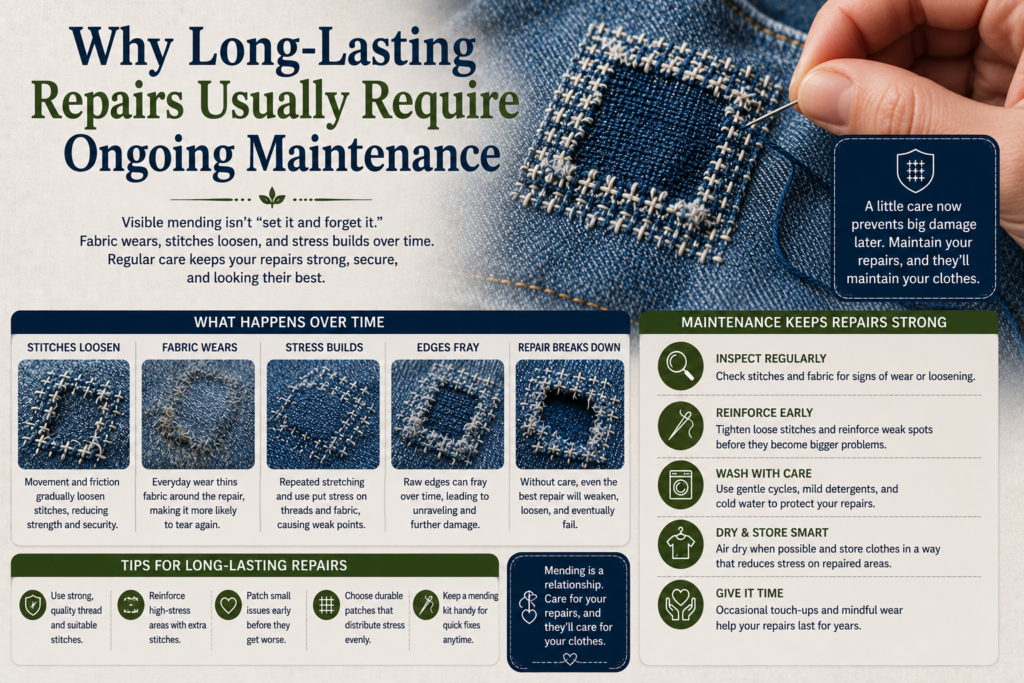
Visible mending repairs rarely remain unchanged forever because repaired garments continue aging after the initial repair is completed. Fabric fibers weaken gradually through movement, washing, body friction, sunlight exposure, and environmental stress. Traditional boro textiles often survived for generations not because one repair lasted permanently, but because garments were continuously reinforced over time.
Many historical boro garments contained multiple repair generations layered over older reinforcement patches. Earlier repairs became structural foundations for newer repairs as fabric gradually evolved through repeated use. Modern visible mending often treats repairs as permanent solutions, but durable textile maintenance usually works more like an ongoing repair cycle.
Long-term repair maintenance commonly includes:
- Re-stitching loose reinforcement
- Adding secondary patch layers
- Strengthening old seam areas
- Replacing worn thread sections
- Stabilizing nearby thinning fabric
- Reducing patch edge stress
- Reinforcing movement-heavy zones
Real-world textile repair behaves similarly to infrastructure maintenance. Strong repairs extend garment life significantly, but long-term durability depends on monitoring stress areas continuously instead of expecting one repair to stop all future wear permanently.
How Do Washing Methods Destroy Visible Mending Repairs?
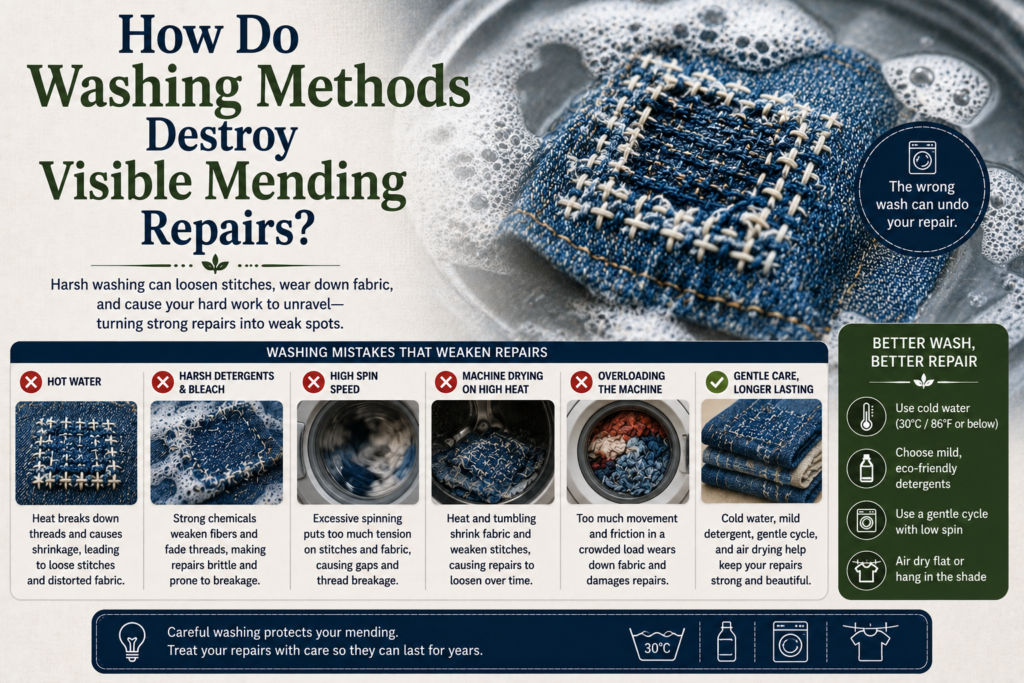
Washing stress damages many visible mending repairs faster than everyday wear itself. Agitation, spinning, heat, detergent exposure, and fabric twisting all weaken repaired areas over time. Even structurally strong repairs can fail early when washed aggressively.
Machine washing creates repeated pulling forces across stitched areas. Patch edges rub against surrounding fabric while spinning cycles stress weakened fibers repeatedly. Repairs made with delicate embroidery thread or inconsistent tension become especially vulnerable.
Traditional repaired garments were often washed gently and repaired continuously over long periods. Modern washing machines expose repaired textiles to much harsher stress conditions than historical hand-washing methods.
Washing problems commonly include:
- Loose patch edges
- Broken decorative stitches
- Shrinking reinforcement fabric
- Twisting repaired sections
- Fraying around stitch holes
- Excessive fabric abrasion
Better washing practices include:
- Turning garments inside out
- Using cold water cycles
- Avoiding high heat drying
- Air drying repaired garments
- Washing delicate repairs separately
- Using garment protection bags
- Reducing harsh detergent exposure
Long-lasting visible mending depends partly on maintenance habits after repair completion. Even strong sashiko reinforcement eventually weakens under repeated aggressive laundering.
Many experienced menders reinforce garments before damage becomes severe because preventive maintenance survives washing better than emergency repair after major tearing.
How Environmental Exposure Weakens Repairs Over Time
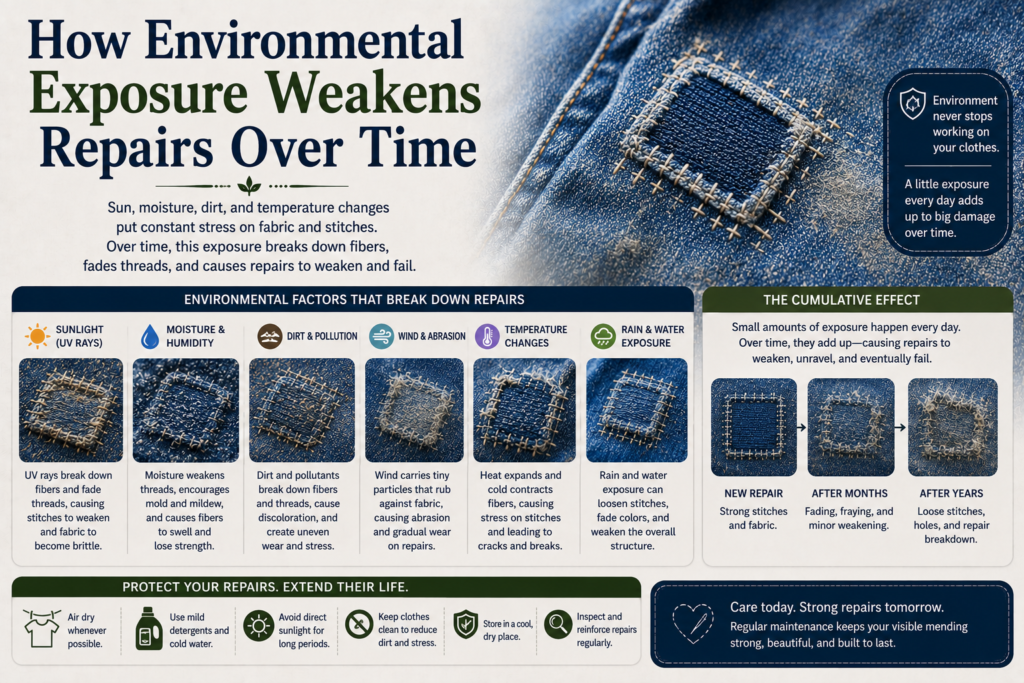
Visible mending repairs continue aging after stitching is completed because environmental exposure constantly affects both fabric and thread strength. Sunlight, heat, sweat, body oils, detergent residue, and humidity gradually weaken textile fibers even when garments are not actively being worn.
Ultraviolet light can dry out cotton fibers and reduce flexibility over time, especially on frequently sun-exposed clothing. Heat drying also accelerates fabric stress by shrinking fibers unevenly and stiffening repair zones. In workwear and outdoor garments, salt, moisture, and friction exposure often weaken repaired sections faster than decorative stitching alone can compensate for.
Environmental damage factors include:
- UV fiber degradation
- Heat-dryer shrinkage
- Sweat and salt exposure
- Detergent buildup
- Humidity stress
- Oil absorption
- Repeated temperature changes
Traditional textile maintenance relied heavily on continuous monitoring because repaired garments naturally aged through environmental exposure. Long-lasting visible mending depends not only on repair quality, but also on how carefully garments are maintained afterward under real-world conditions.
Why Preventive Reinforcement Lasts Longer Than Emergency Repairs
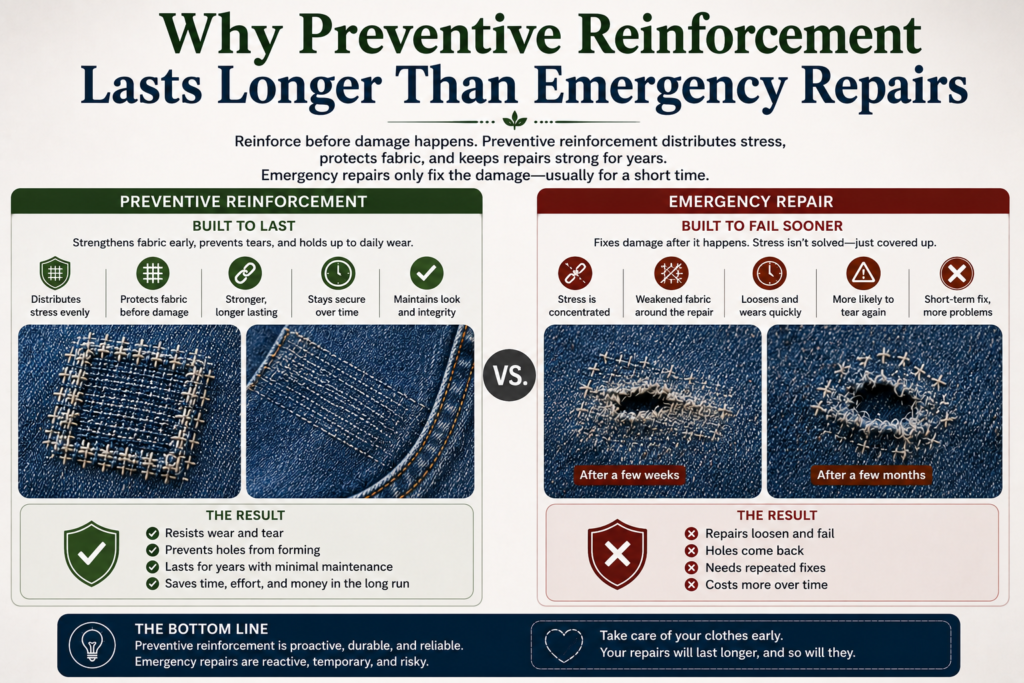
Many long-lasting traditional boro garments survived because repairs often began before fabric completely failed. Instead of waiting for large holes to appear, worn sections were reinforced early while surrounding fibers still retained some structural strength. Modern visible mending frequently starts too late, after the fabric has already weakened beyond stable repair support.
Preventive reinforcement spreads stress before tearing becomes concentrated in one small area. High-friction zones like knees, cuffs, inner thighs, elbows, and pocket corners usually show subtle thinning before visible holes form. Reinforcing these areas early dramatically improves garment lifespan because stitches anchor into healthier fibers instead of unstable damaged fabric.
Preventive repair areas commonly include:
- Fading knee panels
- Softened pocket corners
- Thin cuff edges
- Seat pressure zones
- Inner thigh friction areas
- Stretching elbow fabric
- Seam stress regions
Experienced textile repairers often consider visible mending a continuous maintenance system rather than a one-time decorative fix. Preventive reinforcement typically creates more flexible, durable repairs because fabric integrity remains stronger during the earlier stages of wear.
Real-World Garment Repairs That Commonly Fail First
Different garments fail in different ways because each clothing area experiences unique movement patterns and stress concentrations. Understanding these predictable failure zones helps visible mending repairs last significantly longer under everyday use.
Jeans knees often tear diagonally because walking and bending place angled tension across the fabric weave repeatedly. Jacket elbows commonly crack beside repairs because rotational arm movement creates twisting stress around reinforced areas. Tote bags frequently fail near handle attachment points where concentrated pulling pressure weakens seams continuously.
Common garment failure patterns include:
- Jeans knees tearing beside patches
- Pocket corners pulling apart
- Elbow repairs cracking diagonally
- Inner thigh abrasion reopening seams
- Shirt cuffs fraying repeatedly
- Tote bag handles stressing fabric edges
- Seat repairs weakening under compression
Experienced repairers usually reinforce predictable stress zones before visible damage becomes severe. Real-world repair success depends heavily on understanding how garments behave physically during daily movement rather than relying only on decorative stitch appearance.
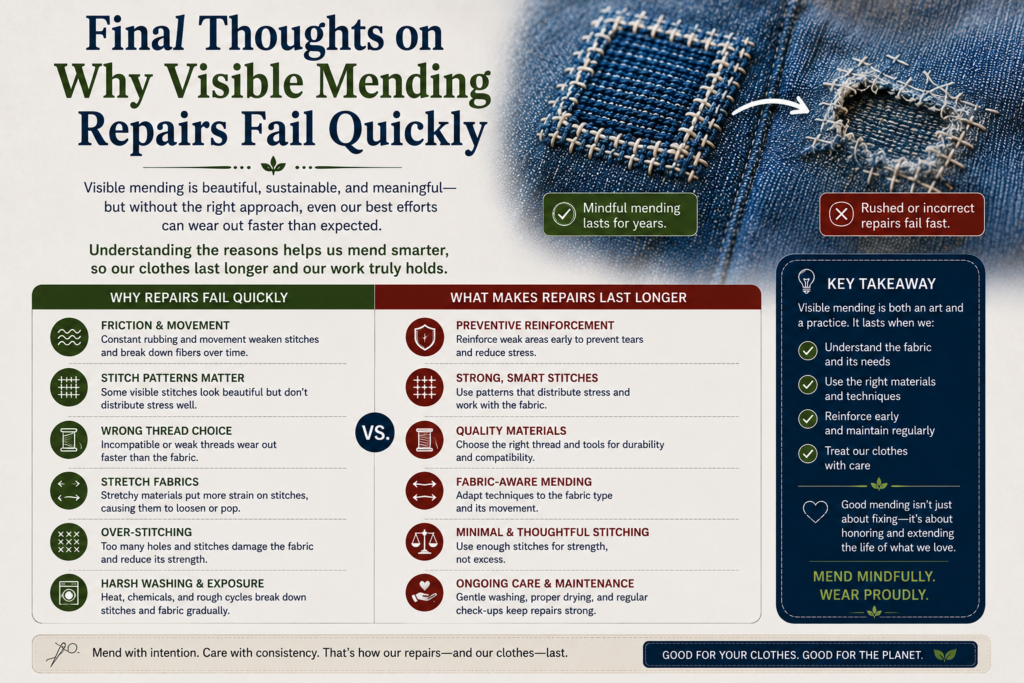
Final Thoughts on Why Visible Mending Repairs Fail Quickly
Visible mending repairs usually fail quickly when decorative aesthetics replace structural reinforcement. Weak surrounding fabric, poor patch placement, excessive stitch density, unsuitable thread choice, and aggressive washing all shorten repair lifespan significantly.
Are you curious if visible mending can make clothes last longer if done correctly? If so, then head to out detailed guide which has some very interesting and peculiar expert opinions regarding this brainteaser.
Traditional Japanese boro techniques survived for generations because repairs focused on layered reinforcement, flexibility, stress distribution, and continuous maintenance. Modern visible mending becomes far more durable when these same structural principles guide decorative design decisions.
The strongest repairs combine:
- Structural backing layers
- Balanced stitch spacing
- Flexible reinforcement
- Durable thread matching
- Stress-aware patch placement
- Preventive reinforcement methods
- Careful washing habits
Real-world durability depends on understanding how garments behave during movement and wear. Decorative stitching alone rarely solves structural textile damage without deeper reinforcement underneath.
Long-lasting visible mending is not created through one perfect stitch pattern alone. Successful repairs come from balanced systems where fabric, thread, patch placement, and reinforcement all
FAQ
Why do visible mending repairs reopen after washing?
Repairs reopen when surrounding fabric remains weak or stitches cannot handle washing stress. Reinforcement backing and gentle washing improve durability.
What is the strongest stitch for visible mending?
Running stitch grids and sashiko reinforcement patterns usually provide the best balance between flexibility and structural support.
Can too much stitching weaken fabric?
Yes. Excessive stitching repeatedly perforates weakened fibers, creating rigid areas that may crack or tear over time.
Why do decorative visible mending repairs fail faster?
Decorative repairs often prioritize appearance over structural reinforcement, using lighter stitching and weaker stabilization methods.
How large should a visible mending patch be?
Patches should extend beyond the visible damage so stress spreads into stronger surrounding fabric instead of concentrating at repair edges.
Does thread choice matter in visible mending?
Yes. Thread thickness and flexibility must match the garment fabric to prevent puckering, stiffness, or broken stitches.
Is hand washing better for repaired garments?
Gentle hand washing usually reduces stress on repaired areas compared to aggressive machine washing cycles.
Can visible mending repairs last for years?
Yes. Proper reinforcement, balanced stitching, durable thread, and careful garment maintenance can create repairs that last many years.