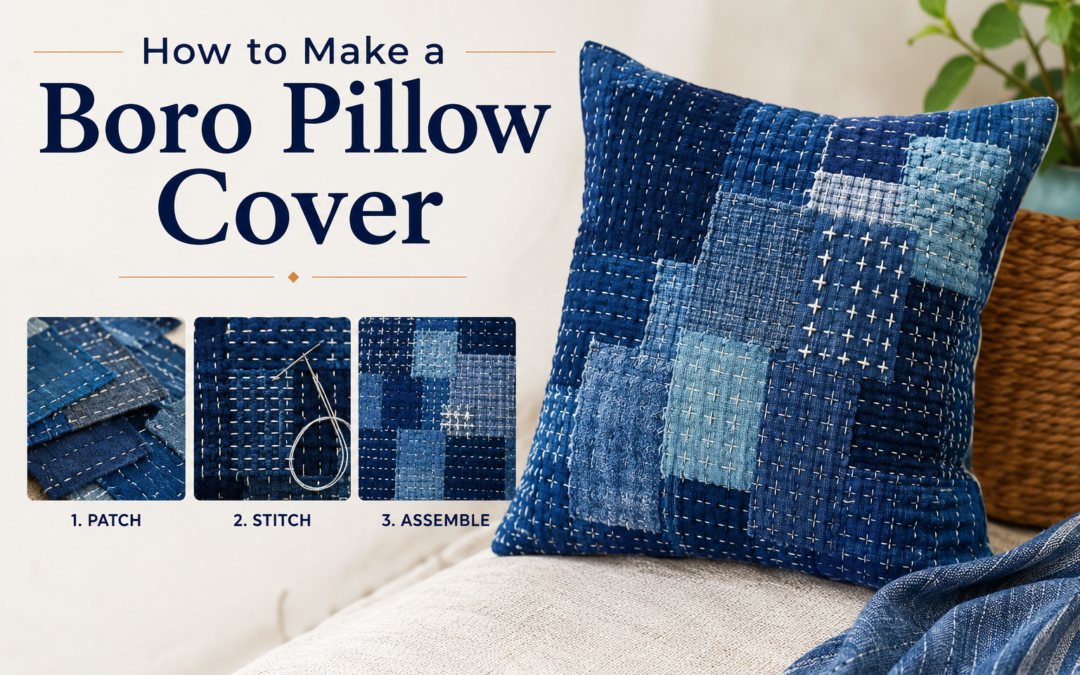
A boro pillow cover is a handmade cushion cover created using layered fabric scraps, visible sashiko-style stitching, and traditional Japanese-inspired repair techniques. Unlike standard patchwork cushions, boro pillow covers focus on reinforcement, texture, and visible mending aesthetics rather than perfect symmetry. Most modern boro pillows use indigo fabrics, recycled denim, cotton textiles, and organic hand stitching to create textured home décor with strong handcrafted character. This guide covers all major hurdles, checkpoints and decision making involved in the whole matter of “How to Make a Boro Pillow Cover”.
Boro pillow covers have become increasingly popular because they combine sustainability, slow stitching, and Japandi-inspired interior design into one project. The layered fabric texture adds warmth and visual depth to minimalist spaces without overwhelming the room with heavy patterns or bright colors. Many people also enjoy making boro cushions because the process feels meditative and creative rather than highly technical.
Common characteristics of authentic-looking boro pillow covers include:
- Layered indigo fabrics
- Visible reinforcement stitching
- Recycled textile patches
- Uneven handmade texture
- Organic patch placement
- Running stitch patterns
- Worn fabric character
Traditional Japanese boro originally developed as a repair practice in rural communities where textiles were repeatedly reinforced instead of discarded. Modern boro décor continues using this repair-first philosophy by transforming old fabric into functional textile art.
Even beginners can create attractive results because slight irregularity usually improves the final appearance. In boro stitching, perfection is less important than texture, balance, and visible craftsmanship.
What Is a Boro Pillow Cover?
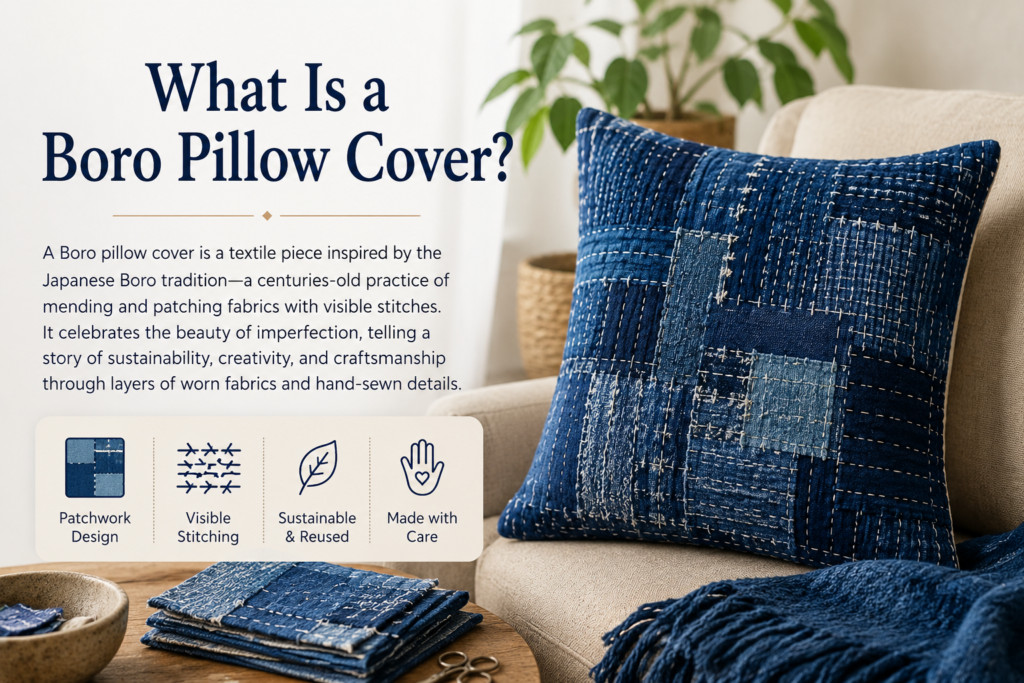
A boro pillow cover is a decorative textile cushion inspired by traditional Japanese boro fabrics that were repeatedly repaired through visible patching and reinforcement stitching. Historically, boro textiles evolved from necessity because rural Japanese families repaired clothing and household fabrics over many years instead of replacing them. The repeated layering process created richly textured surfaces filled with visible stitching and overlapping fabric patches.
Have a read on the History of Japanese Boro Stitching for a full overview of its many characteristic traits that were born out of survival rather than a fashion trend in Japan in its most desperate periods for families living there in the Edo Period.
Modern boro pillow covers recreate this layered repair aesthetic as decorative home décor. Instead of hiding seams or damage, visible stitching becomes part of the visual identity of the finished textile. This creates a softer and more personal appearance compared to factory-made cushions.
Most authentic-looking boro pillow covers include:
- Indigo-dyed cotton fabrics
- Recycled denim or workwear
- Sashiko-inspired running stitches
- Organic asymmetrical layouts
- Layered fabric intersections
- Slightly faded textile textures
- Visible hand-sewn reinforcement
The philosophy behind boro also connects closely to modern visible mending and slow living movements. Many homeowners now prefer handmade décor pieces because they introduce warmth, texture, and individuality into minimalist interiors.
Boro cushions work especially well in:
- Japandi interiors
- Wabi-sabi homes
- Rustic living rooms
- Neutral-toned bedrooms
- Handmade décor collections
- Sustainable interior styling
Unlike ordinary patchwork, boro emphasizes repair-inspired texture rather than decorative geometric precision. The final textile surface usually appears naturally evolved instead of perfectly planned.
This relaxed handcrafted appearance is one reason boro pillow covers continue growing in popularity across modern interior design and slow-fashion craft communities worldwide.
What Materials Do You Need for a Boro Pillow Cover?
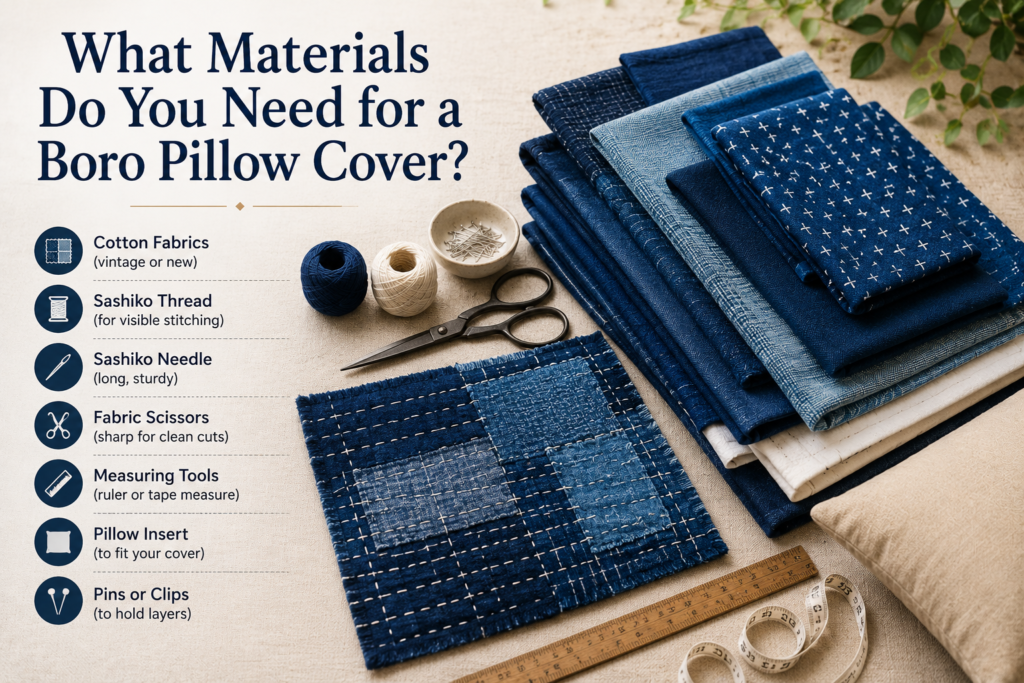
The materials required for a boro pillow cover are simple and beginner-friendly, which makes this project accessible even for people with limited sewing experience. Most boro cushions are made using recycled fabric scraps combined with visible hand stitching to create layered texture and reinforcement. Traditional-looking projects often work best with reused materials because faded fabrics create stronger visual depth and more authentic textile character.
A strong cotton or linen base fabric usually provides the best structure because it supports multiple stitched layers without becoming unstable. Denim, indigo cotton, and canvas fabrics are especially popular because they soften attractively over time while remaining durable.
Guide yourself to our 1-in-a-1000 article stating all the necessary boro supplies needed to start any project of boro stitching.
Basic materials typically include:
- Cotton or linen base fabric
- Indigo fabric scraps
- Old denim patches
- Sashiko thread or embroidery thread
- Long hand-sewing needle
- Pillow insert
- Fabric scissors
- Straight pins or clips
- Backing fabric
- Chalk or washable marker
Many experienced makers prefer recycled textiles because they already contain:
- Natural fading
- Fabric softness
- Slight fraying
- Vintage texture
- Color inconsistency
- Organic fabric movement
Long sashiko needles are especially useful because they hold multiple stitches before pulling the thread through layered fabrics. This helps create smoother stitch rhythm and more consistent running stitches.
Choosing the correct fabric weight also matters. Extremely thin fabric may wrinkle excessively, while heavy upholstery fabric can become difficult to stitch by hand. Medium-weight cotton and denim usually create the best balance between durability and flexibility.
Most beginners can start with inexpensive materials found at home. Old jeans, cotton shirts, and leftover textile scraps often create more authentic boro texture than expensive brand-new fabric.
The goal is not luxury perfection. The beauty of boro usually comes from visible repair, fabric history, and layered handmade texture.
Which Fabric Combinations Work Best for Boro Pillow Covers?
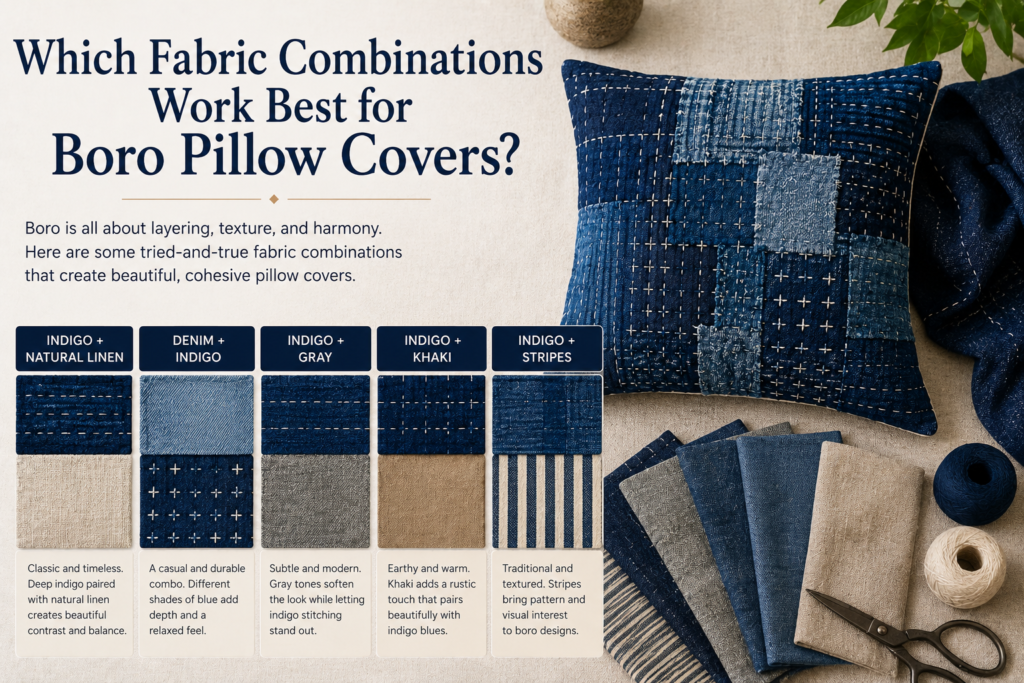
The best boro pillow covers usually combine fabrics with slightly different texture, weight, and fading characteristics to create layered visual depth. Using only one fabric type can sometimes make the finished surface appear flat or overly uniform.
Denim and indigo cotton remain the most popular combination because they provide strong contrast while still aging naturally together over time.
Popular fabric combinations include:
- Raw denim + faded denim
- Indigo cotton + linen
- Chambray + canvas
- Vintage shirts + quilting cotton
- Soft cotton + textured hemp fabric
- Medium-weight denim + lightweight indigo cotton
Good fabric combinations usually balance:
- Texture variation
- Flexible movement
- Stitching ease
- Fabric durability
- Aging consistency
Combining extremely heavy fabric with delicate lightweight fabric may create uneven tension after washing. Medium-weight materials generally produce the best long-term balance for beginners.
Many experienced makers also combine multiple shades of indigo because subtle fading differences create richer handmade texture without requiring complicated patchwork patterns.
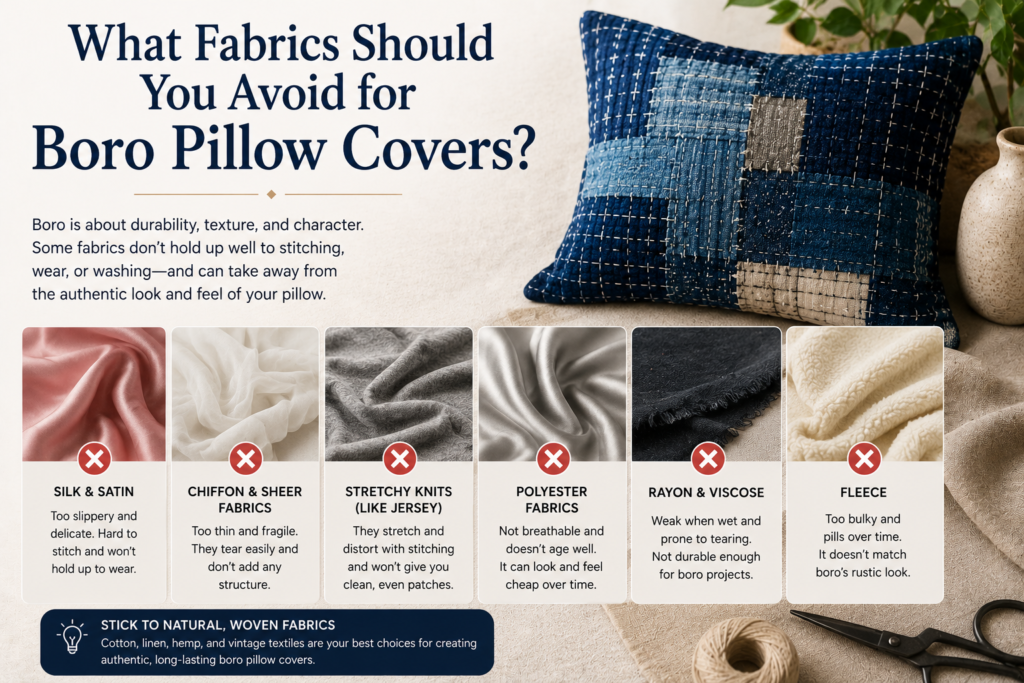
What Fabrics Should You Avoid for Boro Pillow Covers?
Some fabrics make boro stitching unnecessarily difficult and may reduce the durability or appearance of the finished pillow cover. Traditional boro techniques usually work best with tightly woven natural fibers that soften attractively through repeated stitching and use.
Stretchy, slippery, or fragile fabrics often create tension problems and unstable patchwork layers.
Fabrics commonly avoided in boro projects include:
- Stretch knit fabric
- Slippery polyester
- Thick upholstery fabric
- Fragile silk
- Loose-weave burlap
- Thin synthetic blends
These materials may cause:
- Uneven stitch tension
- Fabric warping
- Excessive fraying
- Poor stitch visibility
- Reduced durability
- Difficult hand sewing
Medium-weight cotton, denim, canvas, and linen generally remain the safest choices for beginners because they provide stable stitching surfaces and age more naturally over time.
Many makers also avoid highly shiny modern fabrics because they can reduce the traditional handmade textile appearance associated with authentic boro aesthetics.
How Do You Plan the Layout for a Boro Pillow Cover?
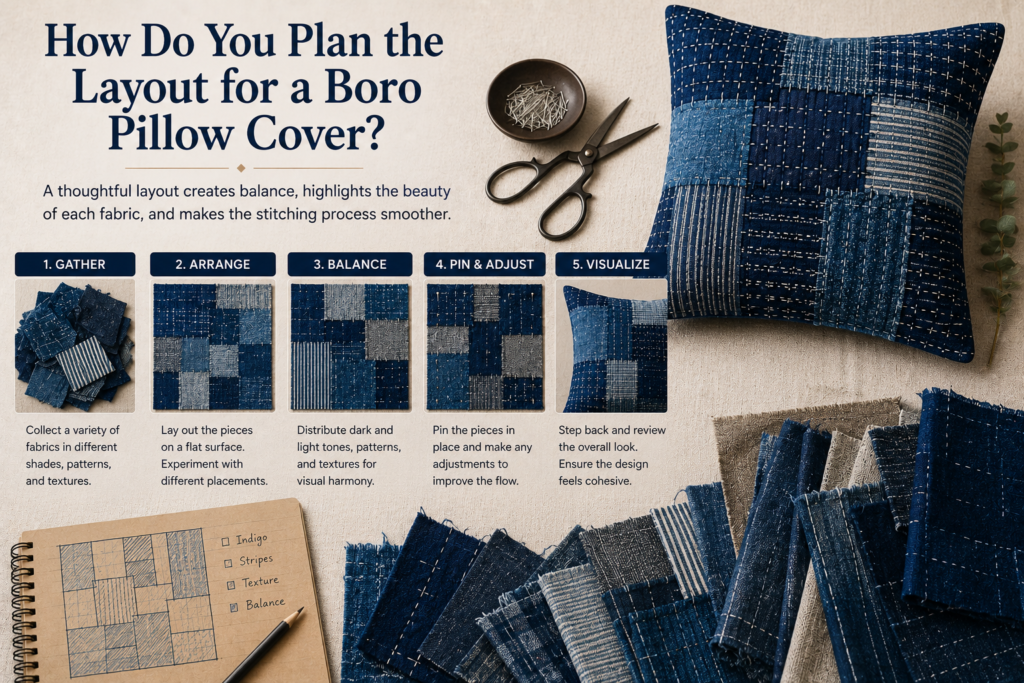
The best boro pillow cover layouts use asymmetrical patch placement, layered fabric intersections, and balanced indigo variation to create natural handmade texture. Planning the composition before stitching helps prevent overcrowded layouts and excessive seam bulk while improving the overall visual flow of the finished cushion.
Traditional boro textiles evolved gradually through repeated repairs over time. Because of this, modern boro projects usually look more authentic when they avoid perfectly symmetrical patch arrangements. Organic layering generally creates stronger visual depth and more believable repair-inspired texture.
Most beginners start with common pillow sizes such as:
| Pillow Type | Common Dimensions |
| Throw pillow | 18×18 inches |
| Accent pillow | 20×20 inches |
| Lumbar pillow | 12×20 inches |
An 18×18 inch pillow is usually the easiest beginner size because it provides enough space for visible stitching without becoming physically tiring to hand sew.
Most makers plan the patch layout using this process:
- Place the base fabric flat
- Add large patches first
- Fill medium-sized gaps gradually
- Add small accent pieces carefully
- Balance faded and dark indigo fabrics
- Leave visual breathing room
Authentic-looking boro usually contains overlapping patch intersections rather than isolated decorative pieces. Layered fabric creates stronger depth and more interesting stitching paths.
Important layout guidelines include:
- Avoid rigid geometric symmetry
- Mix multiple indigo shades
- Balance dense and open areas
- Prevent excessive seam buildup
- Use organic fabric flow
- Keep patch placement irregular
Many experienced makers also lightly pin the entire composition before sewing to evaluate visual balance from a distance. This helps identify overcrowded sections before permanent stitching begins.
Traditional-looking boro often follows visible repair logic rather than decorative quilting rules. This is why handmade boro cushions usually feel softer and more naturally evolved compared to highly structured patchwork pillows.
What Measurements Work Best for a Boro Pillow Cover?

The best boro pillow cover measurements balance comfort, seam allowance, and layered fabric flexibility. Most makers use slightly oversized front panels because multiple stitched layers naturally reduce flexibility and increase seam bulk during construction. Proper measurements help prevent overcrowded stitching and make the finished pillow more comfortable during regular use.
For standard throw pillows, most beginners use:
- 18×18 inch pillow insert
- 19×19 or 20×20 inch fabric panel
- 1/2 inch seam allowance
- Patch sizes between 2–6 inches
- Stitch spacing around 4–6 mm
Patch scale strongly affects the final texture. Medium-sized patches usually create better visual flow than tiny scraps because they reduce excessive seam buildup while still maintaining layered character.
Useful measurement recommendations include:
- Leave extra border room near seams
- Avoid overly large heavy patches
- Balance dense stitching with open space
- Limit thick denim intersections
- Test fabric thickness before sewing
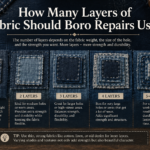
The number of fabric layers also matters. Most comfortable boro pillow covers contain approximately 3–5 overlapping fabric layers in heavily textured sections. Excessive layering may create stiff areas that reduce usability.
Many experienced makers avoid stacking multiple thick denim seams directly in the center of the pillow because this creates uncomfortable pressure points. Spreading layered textures more evenly across the surface usually produces better long-term comfort.
Stitch spacing also influences the appearance. Tight stitch spacing creates stronger reinforcement and denser texture, while slightly wider spacing creates softer movement and a more relaxed handmade appearance.
Important measurement considerations include:
- Pillow insert size
- Seam allowance consistency
- Fabric shrinkage potential
- Stitch density balance
- Layer thickness distribution
The goal is creating enough texture to achieve authentic boro depth while still preserving softness and flexibility in the finished cushion cover.
How Do You Stitch a Boro Pillow Cover?
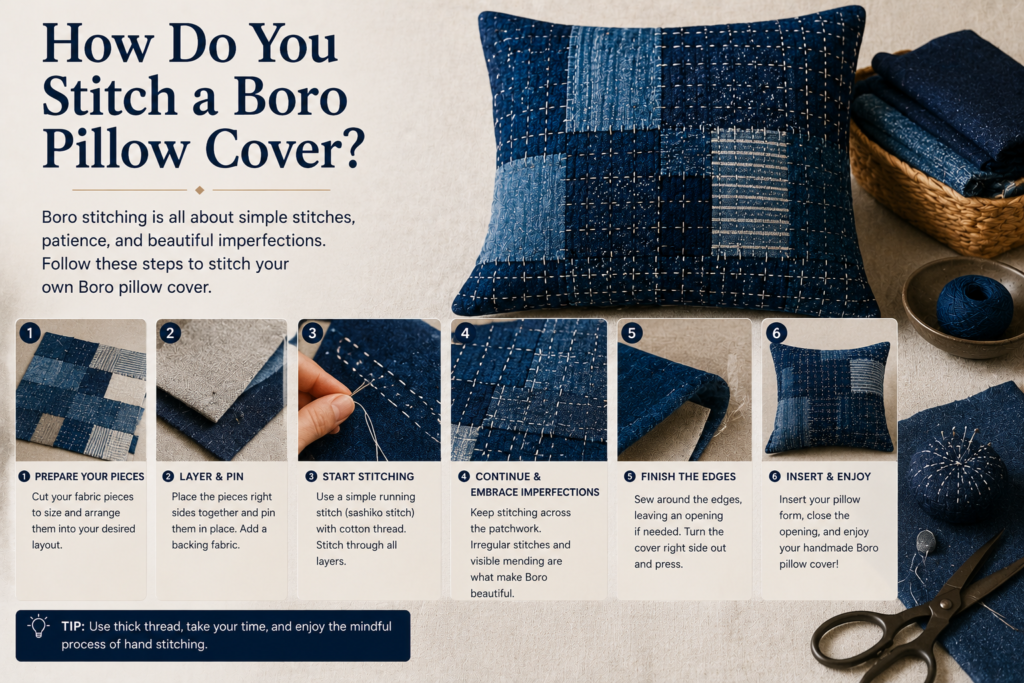
The stitching process defines the visual identity of a boro pillow cover because visible reinforcement stitches create both structure and texture across the layered fabric surface. Traditional Japanese boro textiles relied on repeated running stitches to strengthen worn areas, and modern decorative projects continue using similar visible hand-sewn techniques.
Most beginners use simple running stitches because they are easy to learn and naturally create authentic handmade texture. Sashiko-inspired stitching patterns are especially popular because they combine reinforcement and decoration without looking overly complex.
The basic stitching process usually includes:
- Securing the base fabric
- Pinning large patches first
- Stitching through all fabric layers
- Reinforcing overlapping sections
- Adding smaller patches gradually
- Trimming excess fabric afterward
Good stitching usually contains:
- Balanced stitch spacing
- Visible thread contrast
- Reinforced patch edges
- Relaxed fabric movement
- Consistent stitch rhythm
White sashiko thread is the most traditional choice because it creates strong contrast against indigo fabric. However, cream, gray, and faded indigo thread colors can also produce softer vintage-style texture.
Consider educating yourself in just a 5 min read with our Step-by-Step Beginner Boro Stitching Guide to avoid any unnecessary hassle during your project.
Popular thread choices include:
- White sashiko thread
- Cream cotton thread
- Muted gray thread
- Natural beige thread
- Tonal indigo stitching
Many experienced makers intentionally avoid bright modern thread colors because they can overpower the handmade textile appearance.
Stitch density also matters. Excessively dense stitching may flatten the fabric texture and create stiffness, while insufficient stitching can leave patches unstable. The best boro cushions usually contain balanced reinforcement with some visible breathing space between stitched areas.
Long sashiko needles help improve stitch consistency because they hold several stitches at once before pulling the thread through the fabric. This creates smoother stitching flow and more relaxed hand movement during long sewing sessions Many beginners notice hand fatigue during their first long stitching session, especially when pushing needles repeatedly through thick denim intersections or layered canvas fabric. Taking short breaks every 20–30 minutes usually improves stitch consistency and reduces uneven tension caused by tired hands. Many experienced makers also use a small palm thimble because it helps push long sashiko needles through dense fabric layers more comfortably without straining the fingers.
Real-world stitching comfort tips include:
- Use a palm thimble for denim layers
- Stretch fingers during long sessions
- Avoid pulling thread too aggressively
- Work under strong natural lighting
- Rotate the fabric occasionally for comfort
Hand fatigue is completely normal during early boro projects. Most makers naturally develop smoother stitching rhythm and better tension control after several hours of practice..
The stitching stage is also where the project becomes most meditative for many makers. Repeated running stitches gradually transform separate fabric scraps into a unified textured textile surface.
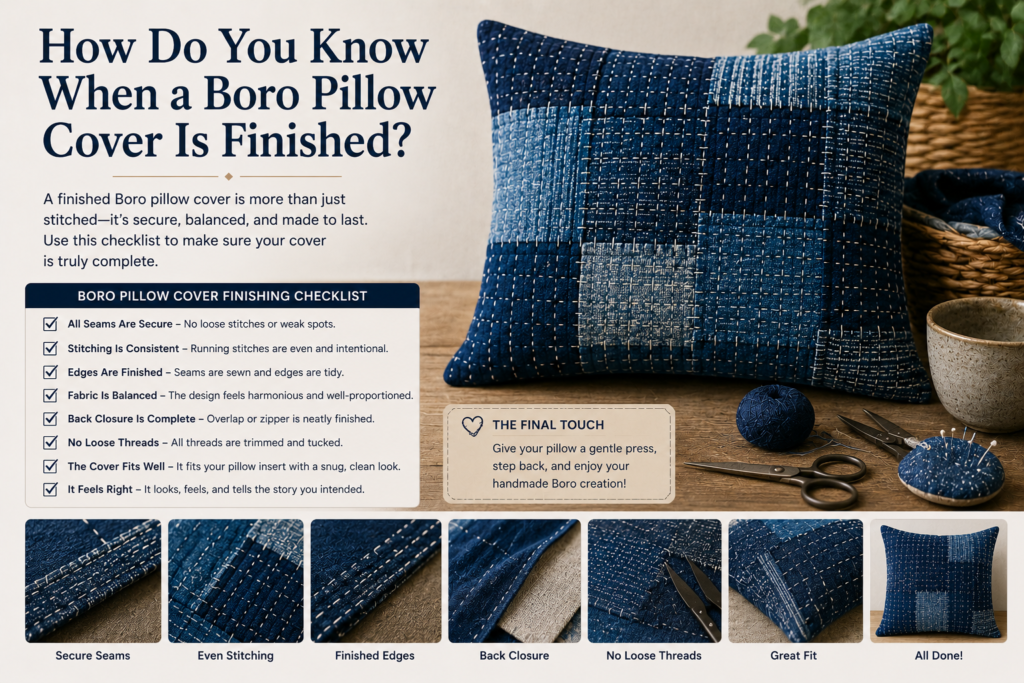
How Do You Know When a Boro Pillow Cover Is Finished?
A boro pillow cover is usually finished when the fabric feels visually balanced, structurally reinforced, and still flexible enough for comfortable use. Many beginners continue adding unnecessary stitching because they worry the surface looks incomplete, but authentic boro often contains both dense textured areas and quieter open sections.
Traditional-looking boro rarely covers every inch of fabric with stitches. Balanced negative space helps the layered patches stand out more naturally and prevents the surface from becoming visually overcrowded.
Signs the pillow cover is finished include:
- The fabric still bends comfortably
- Patch edges feel secure
- Dense and open stitched areas feel balanced
- Indigo tones appear visually distributed
- The pillow still feels soft enough to use
- Stitching looks integrated rather than excessive
One of the easiest ways to evaluate the composition is placing the project several feet away and viewing it from a distance. Over-stitched areas usually become immediately noticeable when the fabric no longer has visual breathing room.
Many experienced makers intentionally stop before the project feels “perfect” because slight incompleteness often creates a more authentic handmade appearance.
What Beginner Mistakes Ruin Boro Pillow Covers?
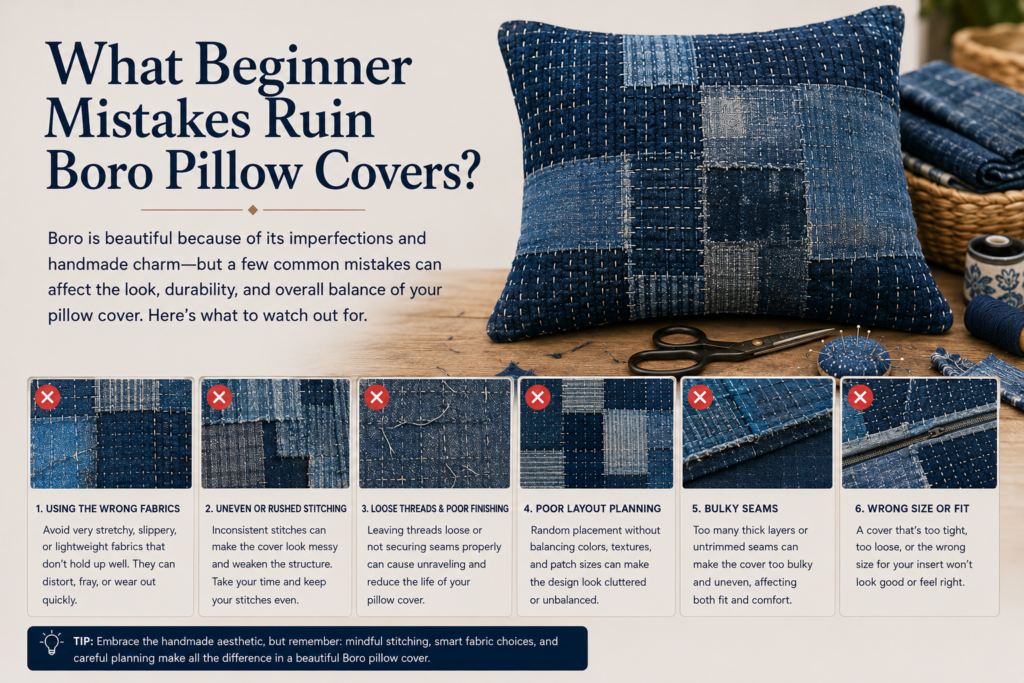
The most common beginner mistakes involve excessive symmetry, overcrowded patchwork, and poor fabric balance. Many first-time makers assume boro requires complicated embroidery or decorative quilting, but authentic boro aesthetics usually depend on restraint, visible repair logic, and balanced layering instead of decorative perfection.
One major mistake is stitching too tightly. Excessive tension causes puckering and prevents the fabric from relaxing naturally over time. Relaxed stitch movement usually creates softer and more authentic-looking texture.
Common beginner mistakes include:
- Overcrowded patch layouts
- Perfect geometric symmetry
- Excessively tight stitching
- Thick fabric intersections
- Weak low-quality thread
- Excessive decorative embroidery
- Flat single-layer surfaces
- Poor indigo color balance
Another common issue is using upholstery-weight fabric that becomes difficult to stitch and creates uncomfortable stiffness. Medium-weight cotton and denim usually produce better flexibility and more natural movement.
Many beginners also stitch every inch of the surface without leaving negative space. Traditional-looking boro typically contains lighter open areas between dense stitched sections, which helps the layered textures stand out more clearly.
If you don’t want to be one of the people that make those silly beginner mistakes, refer to our expert guide on the Common Boro Stitching Mistakes Beginners Make, along with precautions on how to avoid/rectify them.
Helpful beginner recommendations include:
- Start with fewer fabric layers
- Use medium-weight textiles
- Maintain relaxed stitch tension
- Focus on visible reinforcement
- Avoid over-designing the layout
- Leave some open fabric space
Authentic boro rarely looks machine-perfect. Slight irregularity usually improves realism and strengthens the handmade aesthetic.
Another overlooked mistake is poor backing fabric selection. Thin unstable backing may warp under the weight of repeated stitching and layered denim. Strong cotton or linen backing generally provides better long-term structure.
The best beginner approach is keeping the design simple while focusing on texture, layering, and visible hand stitching instead of decorative complexity.
How Do You Prevent Boro Fabric From Fraying Too Much?
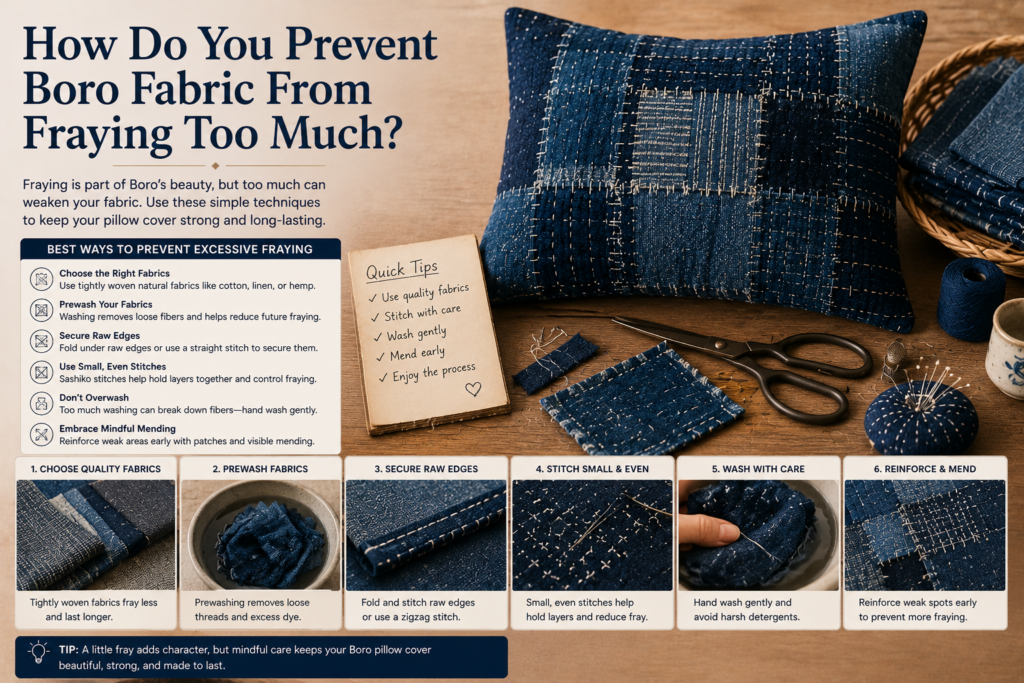
Controlled fraying can improve the texture of a boro pillow cover, but excessive fraying may weaken the fabric and create messy unfinished edges over time. Traditional boro often allowed some natural edge wear, but modern decorative pillows usually require a balance between organic texture and structural stability.
Most makers prevent excessive fraying by reinforcing patch edges with visible running stitches before the fabric begins separating too aggressively.
Helpful fraying control methods include:
- Using medium-weight tightly woven cotton
- Reinforcing edges with running stitches
- Folding under some patch edges
- Avoiding extremely loose-weave fabrics
- Applying lightweight interfacing behind fragile patches
- Leaving only selective raw edges exposed
Denim and tightly woven indigo cotton generally fray more attractively than lightweight synthetic fabric. Loose burlap and stretchy knit fabrics often deteriorate too quickly for durable pillow construction.
Many experienced makers intentionally mix clean folded edges with lightly frayed raw edges because the contrast creates more natural-looking textile variation.
How Is a Boro Pillow Cover Different From Regular Patchwork?
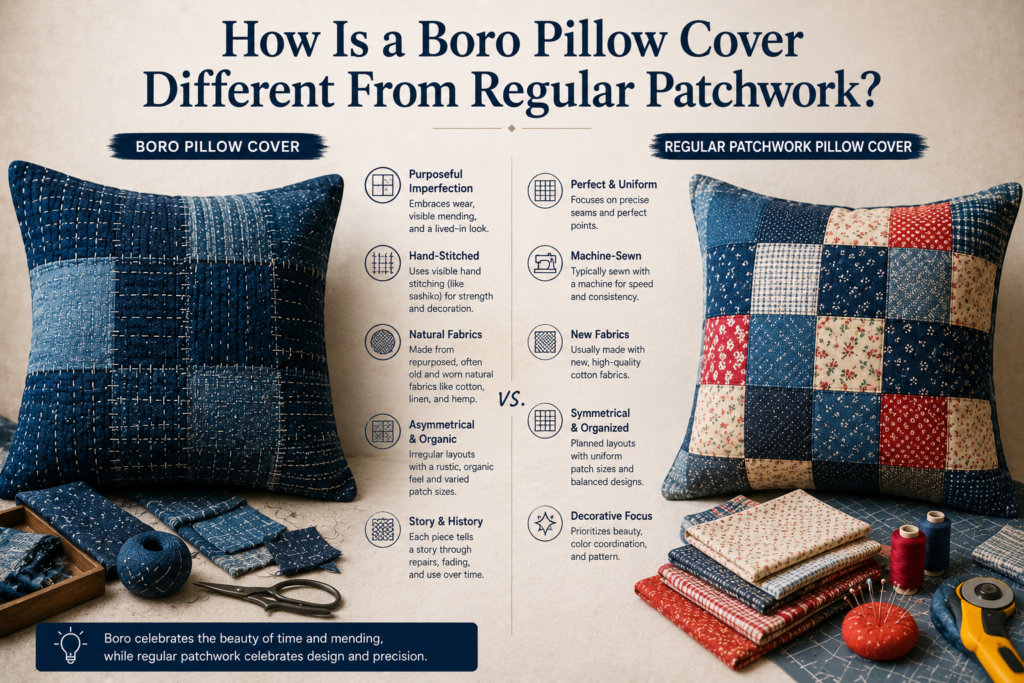
Boro pillow covers differ from regular patchwork because boro focuses on visible repair, layered reinforcement, and textile preservation rather than decorative geometric precision alone. Traditional patchwork usually prioritizes symmetrical assembly and hidden seams, while boro intentionally exposes stitching and overlapping fabric layers as part of the design.
The layered texture of boro creates more depth and tactile movement compared to flat decorative patchwork cushions. Instead of hiding wear or repair marks, boro celebrates visible reinforcement as part of the textile identity.
Key differences include:
| Boro Pillow Cover | Regular Patchwork |
| Repair-inspired layering | Decorative assembly |
| Visible stitching | Hidden seams |
| Organic layouts | Geometric symmetry |
| Uneven handmade texture | Flat polished surface |
| Reinforcement-focused | Pattern-focused |
| Vintage fabric character | Clean decorative appearance |
Traditional Japanese boro also carries a stronger visible mending philosophy where repaired areas become part of the textile story instead of being hidden from view.
Important characteristics unique to boro include:
- Layered repair texture
- Recycled textile use
- Running stitch reinforcement
- Organic asymmetry
- Indigo-dominant color palettes
- Visible fabric history
Many modern interiors prefer boro cushions because they feel warmer and more personal than factory-produced decorative pillows. The handmade stitching creates softer visual texture without overwhelming minimalist spaces.
Boro also evolves differently over time. Repeated use gradually softens the layered fabrics and allows stitching to settle naturally into the textile surface, improving the vintage appearance instead of damaging it.
This repair-first philosophy is one reason boro-inspired home décor continues growing in popularity within slow living, sustainable crafting, and Japandi interior design communities.
How Do You Turn the Fabric Into a Finished Pillow Cover?
Once the stitched front panel is complete, the layered textile must be assembled into a functional pillow cover. This stage is simpler than the stitching process, but careful construction still matters because layered denim and repeated reinforcement stitching can create thick seam areas.
Most beginners prefer envelope-style closures because they are easy to sew and do not require advanced zipper installation.
Common closure methods include:
- Envelope back closure
- Hidden zipper closure
- Button closure
- Tie closure
- Hand-sewn opening
Basic assembly usually follows this process:
- Trim the stitched front panel evenly
- Prepare the backing fabric
- Align front and back panels
- Pin thick seam areas carefully
- Sew around the edges
- Leave an opening for the insert
- Turn fabric right side out
- Insert the pillow form
Heavy denim intersections sometimes require stronger sewing needles or slower machine speed. Hand-sewn finishing often creates softer and more organic-looking seam movement.
Advanced makers also balance dense stitched areas with lighter sections to prevent the pillow from becoming visually heavy or physically stiff. This texture balancing technique creates smoother fabric movement across the finished cushion surface.
Useful construction recommendations include:
- Avoid excessive corner bulk
- Keep seam allowances consistent
- Reinforce heavily layered sections
- Test flexibility before final sewing
- Balance texture across the surface
Many experienced makers lightly press the finished pillow after assembly to relax the layered fabrics without flattening the visible stitching texture completely.
The final pillow should feel textured yet comfortable. The goal is preserving authentic layered character while still maintaining practical everyday usability for interior décor.
How Durable Are Handmade Boro Pillow Covers?
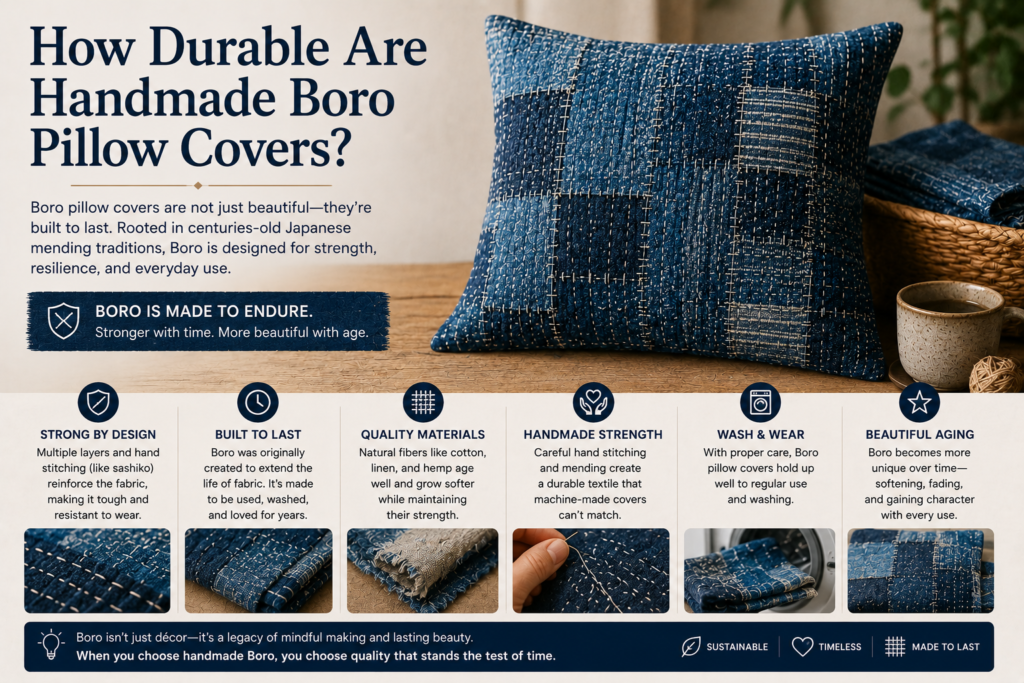
Well-made boro pillow covers are often more durable than ordinary decorative cushions because layered stitching reinforces the textile surface instead of depending on a single fabric layer. Traditional Japanese boro repair techniques originally existed to extend fabric lifespan, and modern boro décor continues using the same reinforcement principles.
The strongest boro pillow covers usually combine durable fabric with balanced stitch density and stable construction methods.
Important durability factors include:
- Strong base fabric
- Reinforced patch edges
- Durable thread quality
- Balanced stitch spacing
- Stable seam construction
- Gentle washing methods
Denim and tightly woven cotton fabrics generally last the longest because they resist tearing while gradually softening through use.
Most handmade boro pillow covers can be cleaned safely using:
- Cold water washing
- Mild detergent
- Gentle machine cycles
- Air drying
- Spot cleaning when possible
Aggressive heat drying may shrink layered fabrics unevenly or distort visible stitching patterns.
One of the most appealing aspects of handmade boro textiles is how they evolve over time. Repeated handling gradually softens the fabric layers and allows the stitching to settle naturally into the textile surface.
Over time, many boro cushions develop:
- Softer texture
- Better stitch integration
- Faded indigo variation
- Relaxed fabric movement
- Natural frayed edges
- Enhanced vintage appearance
Unlike factory-made cushions that often deteriorate unattractively, well-made boro textiles usually gain more visual character through gentle aging.
This evolving appearance reflects the original philosophy behind traditional boro, where repaired textiles became more valuable through continued use rather than replacement.
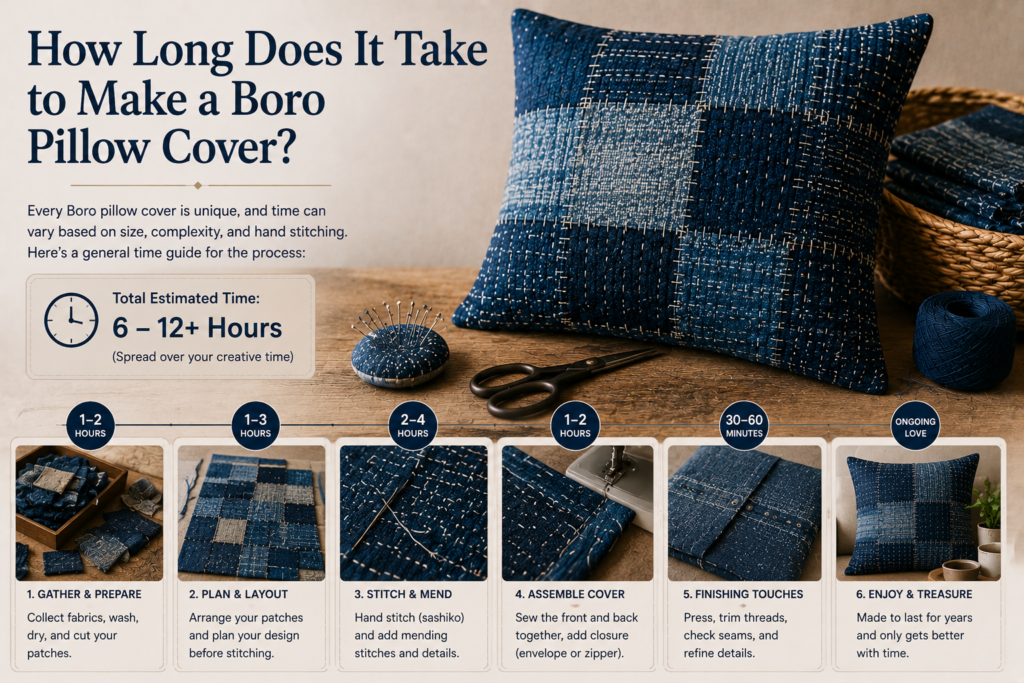
How Long Does It Take to Make a Boro Pillow Cover?
The time required to make a boro pillow cover depends on the complexity of the patchwork, stitch density, and whether the project is sewn entirely by hand. Simple beginner projects can often be completed within a weekend, while heavily layered decorative designs may require multiple days of stitching.
Hand stitching naturally takes longer than machine sewing because each visible reinforcement line is sewn individually.
Estimated project times usually include:
| Skill Level | Estimated Time |
| Beginner | 6–12 hours |
| Intermediate | 4–8 hours |
| Advanced | 3–6 hours |
Several factors influence total sewing time:
- Number of fabric patches
- Stitch density
- Pillow size
- Layer thickness
- Hand-sewing speed
- Decorative complexity
Many experienced makers intentionally spread the project across several shorter stitching sessions because slow stitching improves consistency and reduces hand fatigue.
One reason boro sewing feels relaxing for many people is that the process encourages gradual progress instead of rushed completion. The visible stitching slowly transforms recycled fabric into textured handmade décor over time.
How Do You Style a Boro Pillow Cover in Home Décor?
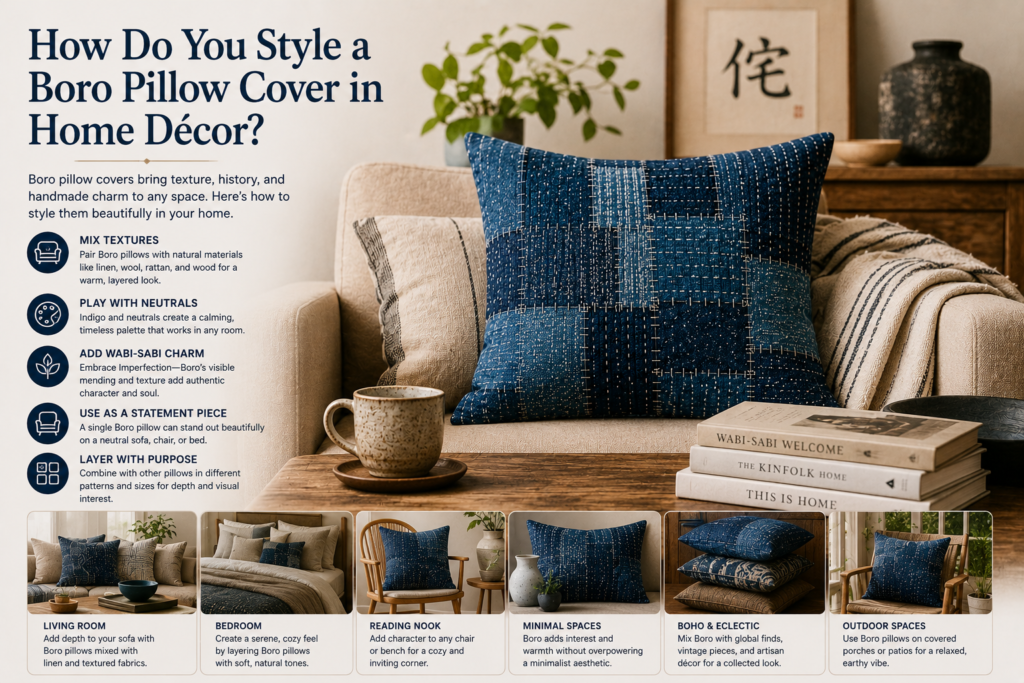
Boro pillow covers work best in interiors that emphasize natural texture, layered materials, and calm neutral color palettes. Because visible stitching already creates strong detail, boro cushions usually pair best with simpler fabrics and understated furniture rather than heavily patterned décor.
Japandi and wabi-sabi interiors especially complement boro textiles because both design styles value craftsmanship, imperfection, and organic material texture.
Popular styling approaches include:
- Pairing with plain linen cushions
- Using neutral-toned sofas
- Combining indigo textiles with wood furniture
- Styling near handmade ceramics
- Layering cushions asymmetrically
- Mixing vintage fabrics with minimalist décor
Soft natural lighting helps reveal the layered stitching texture more effectively than harsh artificial light.
Boro cushions work especially well in:
- Reading corners
- Minimalist living rooms
- Rustic bedrooms
- Floor seating areas
- Handmade textile displays
- Neutral-toned interiors
Many interior stylists also prefer odd-number cushion arrangements because they feel more relaxed and organic than perfectly symmetrical layouts.
The layered indigo fabrics create warmth and visual depth without overwhelming the room with excessive color or decorative complexity. This makes boro cushions especially effective in calm modern interiors focused on texture and material quality.
Because every handmade boro pillow develops slightly differently, the finished décor piece usually feels more personal and artisan-crafted than factory-produced decorative cushions.
The visible stitching also creates subtle tactile texture that encourages closer visual interaction, making boro cushions highly effective statement pieces within minimalist interior styling.
How Advanced Makers Create Balanced Texture in Boro Designs
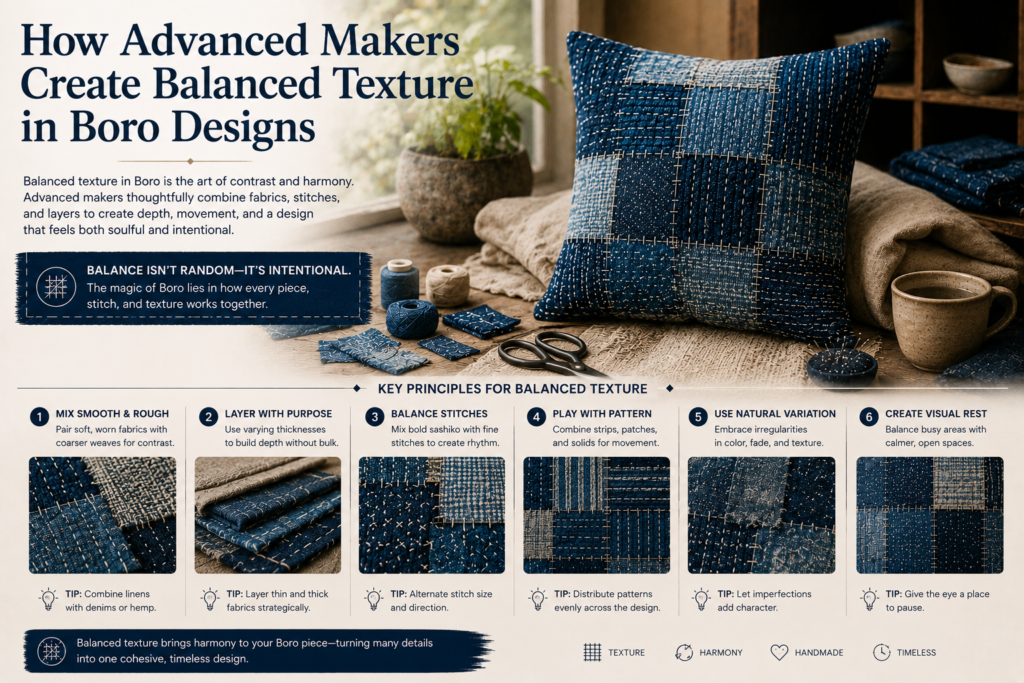
Advanced boro makers usually focus on texture rhythm rather than simply adding more stitching or more fabric layers. Strong handmade boro surfaces often contain a balanced mixture of dense stitched areas, lighter open spaces, and gradual transitions between different fabric textures.
This variation helps guide the eye naturally across the pillow surface without making the design feel visually heavy or overcrowded.
Advanced texture techniques often include:
- Creating focal stitched areas
- Balancing dense and open sections
- Mixing faded and dark indigo fabrics
- Controlling directional stitch movement
- Preventing repetitive patch placement
- Using layered texture gradients
Many experienced makers also avoid distributing texture evenly across the entire pillow because perfectly equal density can make the surface feel flat. Instead, they intentionally concentrate stitching in certain areas while leaving softer sections nearby for contrast.
Subtle asymmetry usually creates more realistic boro aesthetics because traditional textiles evolved gradually through repeated repair rather than through perfectly planned decorative composition.
The goal is creating layered visual movement while still maintaining enough softness and flexibility for practical everyday use.
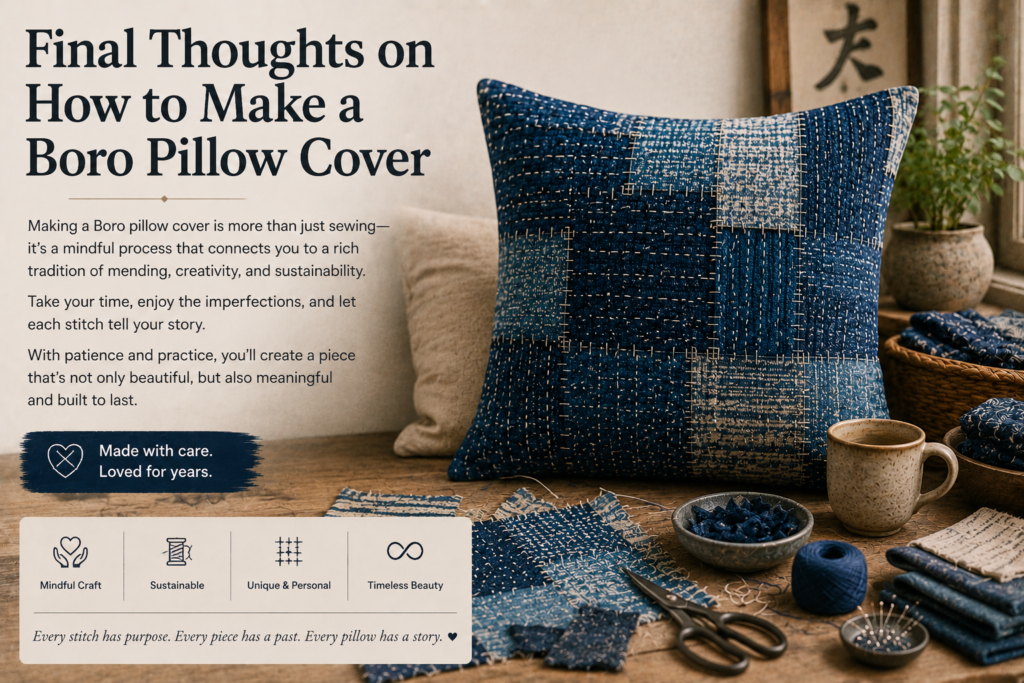
Final Thoughts on How to Make a Boro Pillow Cover
Making a boro pillow cover combines visible mending, recycled textiles, and Japanese-inspired stitching into one highly practical handmade décor project. Unlike ordinary patchwork cushions, boro focuses on layered reinforcement, organic texture, and visible repair aesthetics rather than decorative perfection.
A successful boro pillow cover usually depends on:
- Organic patch placement
- Balanced visible stitching
- Indigo fabric contrast
- Comfortable layer density
- Durable construction
- Handmade texture variation
Even beginners can create attractive results using simple running stitches and recycled fabric scraps. Slight irregularity often improves the authenticity of the finished textile by making it feel naturally handcrafted instead of commercially manufactured.
The stitching process also encourages slower and more mindful creativity. Many makers enjoy boro projects because repeated hand stitching feels calming and meditative rather than rushed or highly technical.
Over time, the layered fabrics soften and develop richer texture through fading, use, and gentle aging. This evolving appearance reflects the original philosophy behind traditional Japanese boro textiles, where repaired fabric gained value through continued use instead of replacement.
The beauty of boro ultimately comes from transformation. Old fabric becomes functional textile art through patient stitching, visible repair, and handcrafted texture.
Frequently Asked Questions
What fabric works best for a boro pillow cover?
Indigo cotton, denim, linen, and recycled workwear fabrics usually work best because they create strong texture and authentic layering.
Can beginners make boro pillow covers?
Yes. Boro pillow covers are beginner-friendly because simple running stitches and imperfect layouts still look attractive.
Do you need sashiko thread for boro stitching?
No. Sashiko thread helps create traditional texture, but embroidery thread or strong cotton thread can also work well.
Can boro pillow covers be machine washed?
Yes, but gentle cold washing and air drying help preserve the stitching and layered fabric texture longer.
What size pillow works best for boro covers?
Most beginners prefer 18×18 inch throw pillows because they provide enough space for visible patchwork design.
How long does a boro pillow cover take to make?
Simple designs may take several hours, while heavily stitched detailed covers can take multiple days depending on complexity.
Can you use a sewing machine for boro projects?
Yes. Many makers combine machine assembly with hand-stitched decorative reinforcement.
Why do boro textiles use indigo fabric?
Traditional Japanese workwear commonly used indigo-dyed cotton because it was durable, affordable, and widely available.